Note: The following operations are applicable only to the project with the scenario set to "Hotel" or "Other".
Click Project, select a non-apartment project, and then click Device Config > Basic to enter the enter the wireless configuration interface. The wireless configuration consists of three parts: "Wireless Settings", "Security Features", and "Advanced Settings".
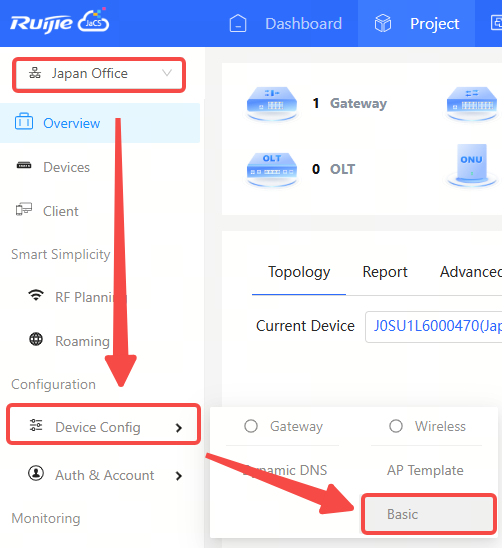
(1) Wireless Configuration: Supports configuring SSIDs and radios.
(2) Security: Supports configuring Web passwords, Telnet passwords, client isolation, and wireless intrusion detection.
(3) Advanced Settings (Optional): Supports configuring scheduled shutdown of RF, adding whitelists, and issuing configurations to APs through the Web CLI.
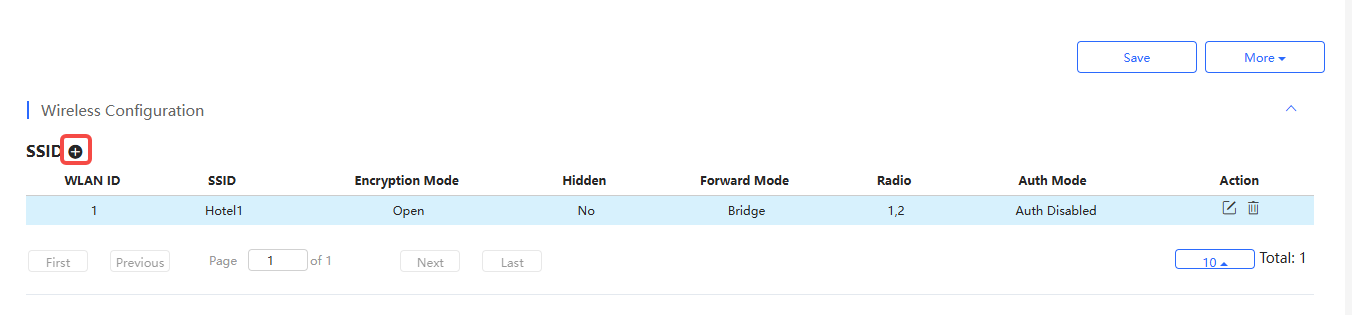
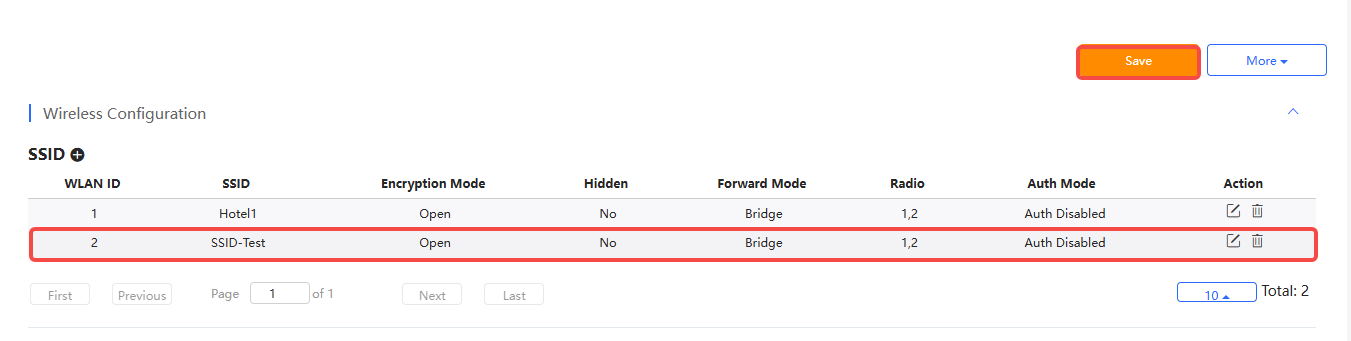
Follow the steps below to add a SSID in a project with the scenario set to hotel or other.
Step 1: Click + icon.
Step 2: Specifying the parameters according to the actual needs, and then click OK. The added SSID will be displayed in the list. If you do not need to modify it, click Save to save the configuration. After the configuration is saved, the configuration will be sent to the APs in the project after they go online.
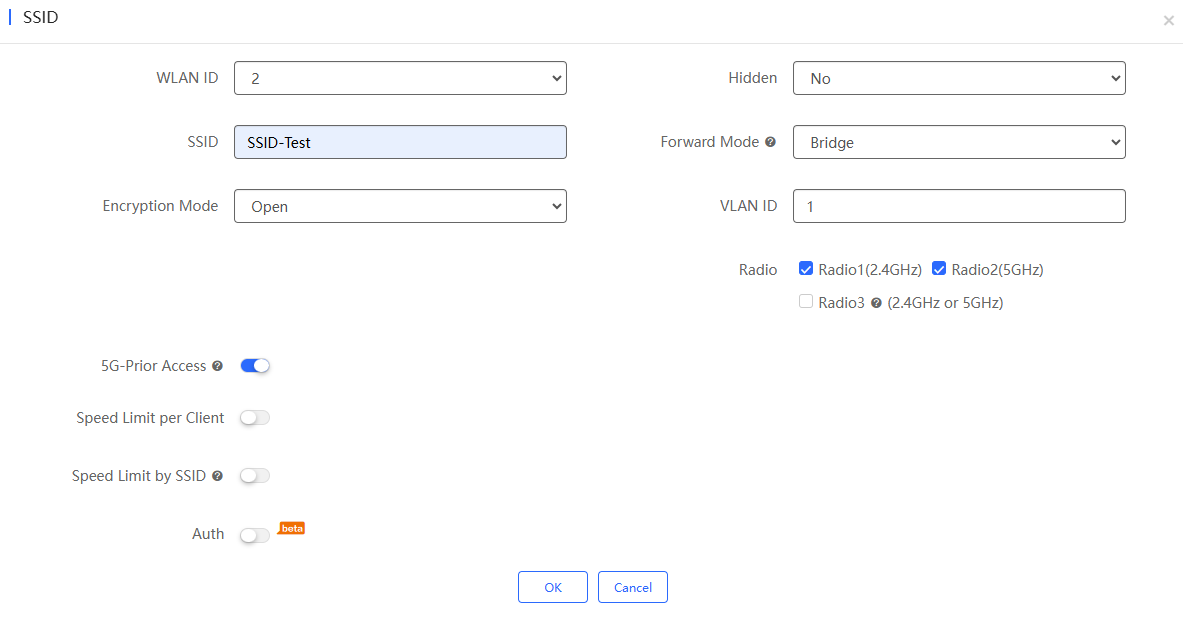
Introduction to the configuration items in SSID setting page:
(1) WLAN ID: Required. Select a WLAN ID. SSID and WLAN ID must correspond one to one. WLAN ID is only specified when adding a SSID. Once it is set, it cannot be changed. WLAN ID range: 1-16.
(2) Hidden: Required. Set whether to hide the SSID. Defaults: No. If you need to hidden the SSID, set it to "Yes".
(3) SSID: Required. Set the SSID name. Up to 32 characters are supported. Letters, numbers, spaces, underscores (_), hyphens (-), periods (.), and @ can be contained. If a SSID name contains spaces, its length cannot exceed 30 characters.
(4) Forward Mode: Required. Configure the forwarding mode of the AP.
Defaults: Bridge.
Options:
Note: RG- MA2810, RG-MA2610-PE, and RG-MA2610-AC only support setting forwarding mode globally. Therefore, if the forwarding mode of one SSID is changed, the forwarding modes of other SSIDs will be changed synchronously.
(5) Encryption Mode: Required. Defaults: Open
Options:
(6) VLAN ID: Configure a VLAN ID. This field is only required when the forwarding mode is configured as "Bridge". The VLAN ID range is 1-4094.
(7) Radio: Required. Defaults: Radio1(2.4GHz) and Radio2(5GHz). Options: Radio1(2.4GHz) , Radio2(5GHz) , Radio 3 (2.4GHz or 5GHz)
(8) 5G-Prior Access: Disabled by default. After it is enabled, when the SSID of a dual-band AP is associated with Radio 1 and Radio 2 , clients that support dual-band will access the 5 GHz band first to reduce the load on the 2.4 GHz band so as to improve user experience.
(9) Speed Limit per Client: Set the speed limit based on client. Disabled by default. If this function is enabled, set the uplink and downlink speed limits.
(10) Speed Limit by SSID: Set the speed limit based on SSIDs. Disabled by default. If this function is enabled, set the uplink and downlink speed limits.
(11) Auth: Disabled by default. After it is enabled, clients will be redirected to the designated portal for authentication when they access the network. Only authenticated clients can access the Internet.
Two authentication methods are supported:
If the encryption mode is configured as " WPA2-Enterprise (802.1x) ", the following interface will appear:
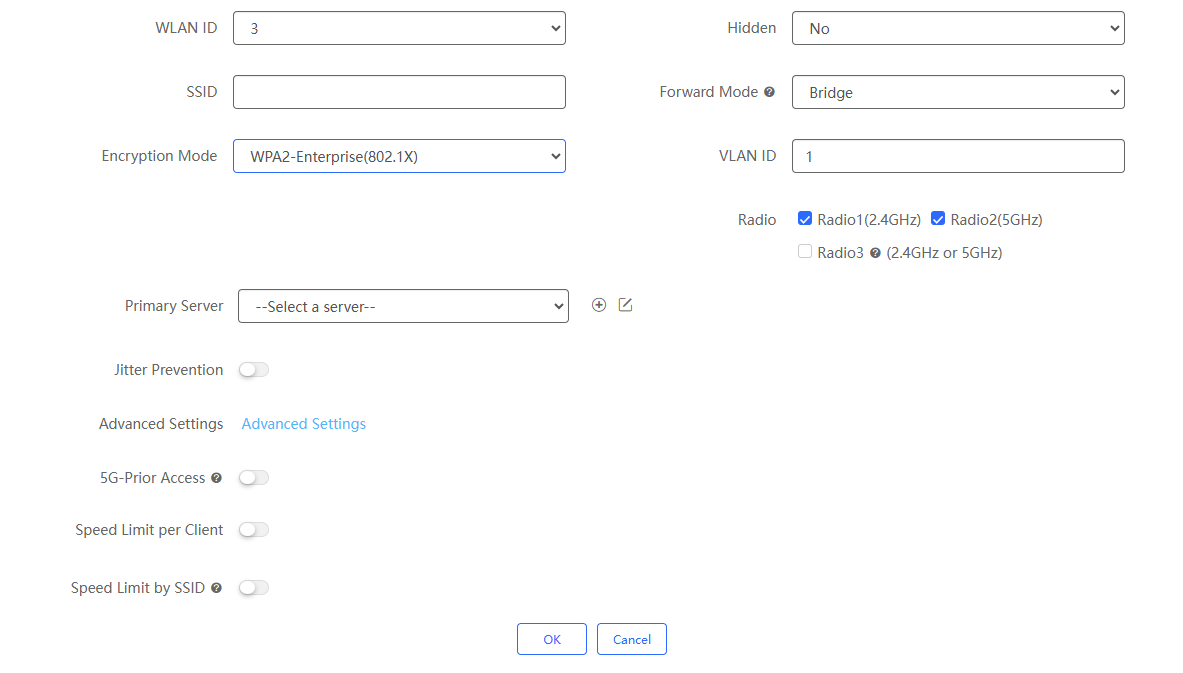
(1) Primary Server: Select the primary server. Click the + icon to set up the Radius server. When the server is set, you need to configure the server name (required), server address (required), authentication port, accounting port and key (required).
Note: If the authentication port and accounting port are left blank, they are set to 1812 and 1813 by default.
(2) Jitter Prevention: Disabled by default. After it is enabled, you need to set the anti-jitter duration (0-600s). During the anti- jitter period, the client will not go offline. The default anti-jitter duration of the AP is 2 seconds. If the AP version is too low, it may not support the anti-jitter function.
(3) Addition Settings: Click Advance Settings to enter the advanced settings page, which supports configuring NAS IP address (available in NAT environment) and accounting update interval (unit: minutes).
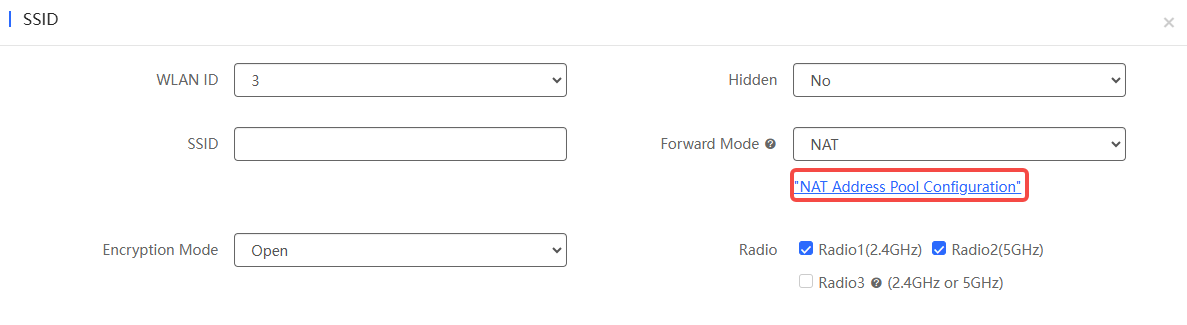
If the forward mode is configured as NAT, you can click the "NAT Address Pool Configuration" link below to configure the address pool. After selecting the address pool configuration type, click the corresponding blue font to configure it. After configuration, click Save.
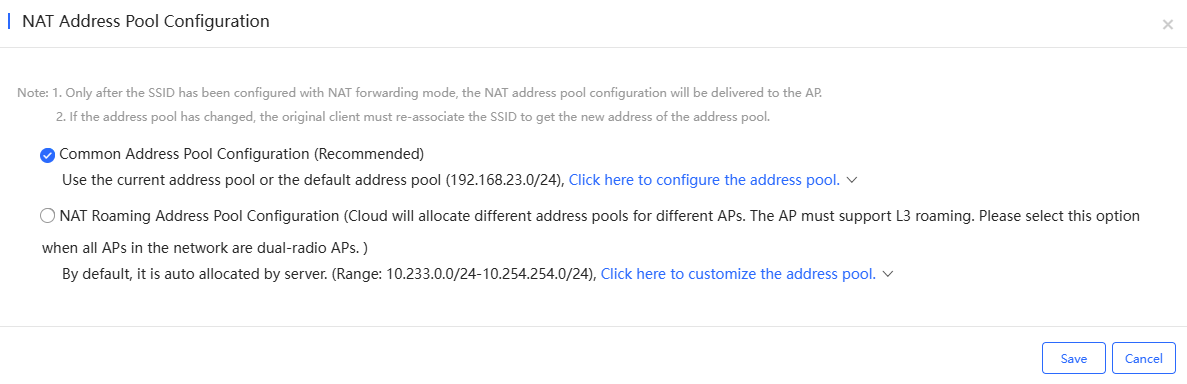
(1) Command Address Pool Configuration (Recommended): After selecting this option, the address pool (192.168.23.0/24) is used by default. If you need to change it, click "Click here to configure the address pool" to configure the IP address and mask.
(2) NAT Roaming Address Pool Configuration: After selecting this option, the default address is assigned by the server (10.233.0.0/24-10.254.254.0/24). If you need to change it, please click "Click here to customize the address pool." and set the start address and end address.
By default, the authentication function of SSID is disabled. After the authentication function is enabled, you can choose to set a captive portal or an external portal.
If you select captive portal, the following configuration items will appear:
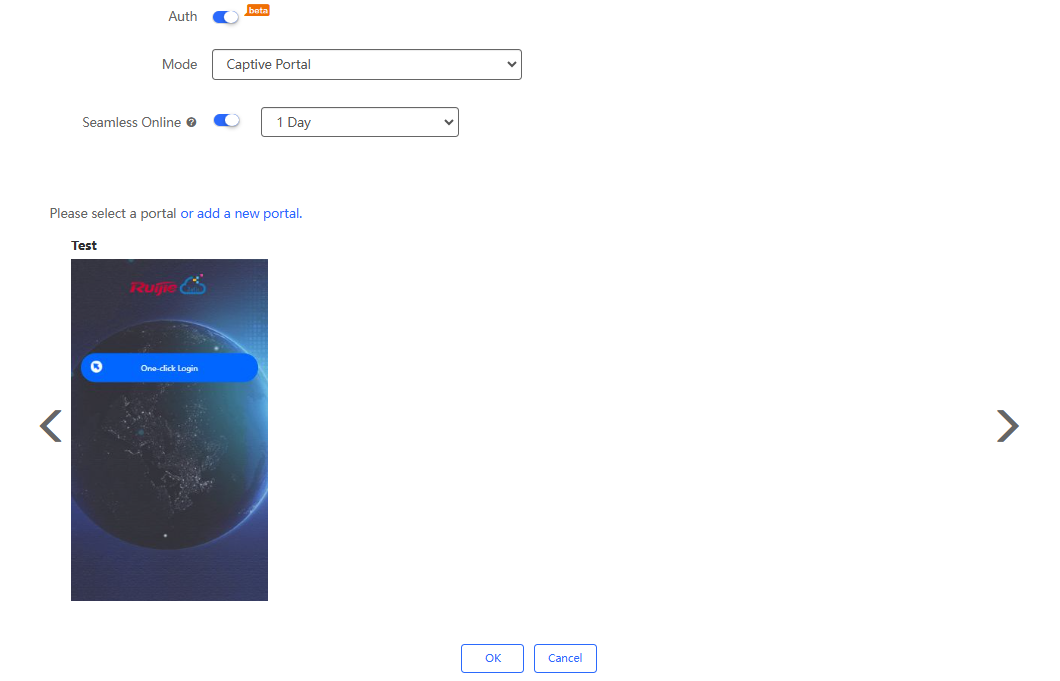
(1) Seamless Online: It is disabled by default. When it is enabled, once a client passes the authentication it does not need to authenticate again within the specified period. Supported time periods: 1 day/1 month/1 year/permanent.
(2) Portal Selection: Required. You can select an existing authentication portal. If you want to create a new portal, click "or add a new portal". For the steps to add a captive portal, see "Configuring Captive Portal".
If you choose the external portal, the following interface will appear:
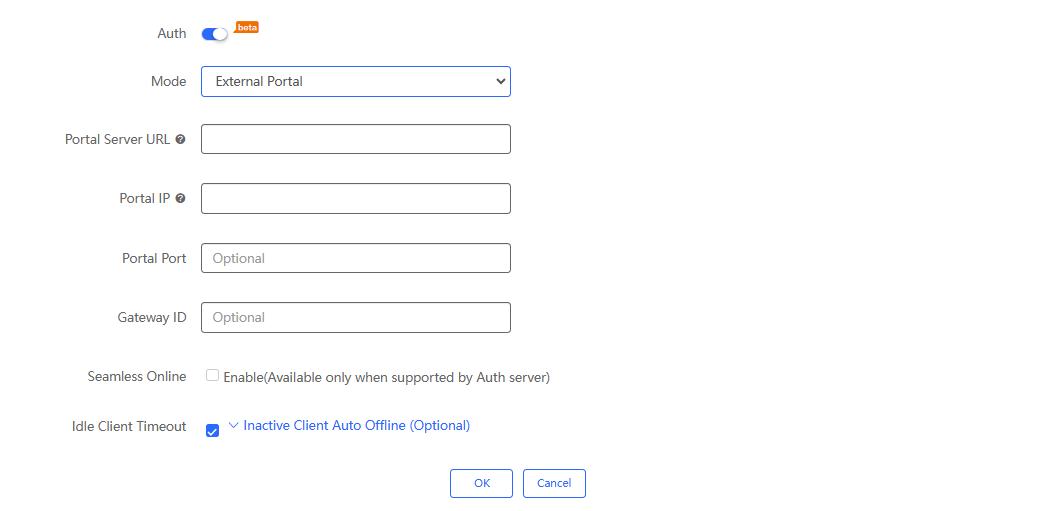
(1) Portal Server IP: Required. After it is set, unauthenticated users will be redirected to this URL for authentication before they can access the Internet.
(2) Portal IP: Required. Set the IP address of the authentication portal.
(3) Portal Port: Specify the portal port.
(4) Gateway ID: Specify the gateway ID.
(5) Seamless Online : Disabled by default. When it is enabled, once a user passes authentication for the first time, there is no need to authenticate again.
(6) Idle Client Timeout: Enabled by default. When it is enabled, clients with traffic less than the set value (0- 4,294,967,294 bytes) will be forced offline within the specified time (1-65,535 minutes).
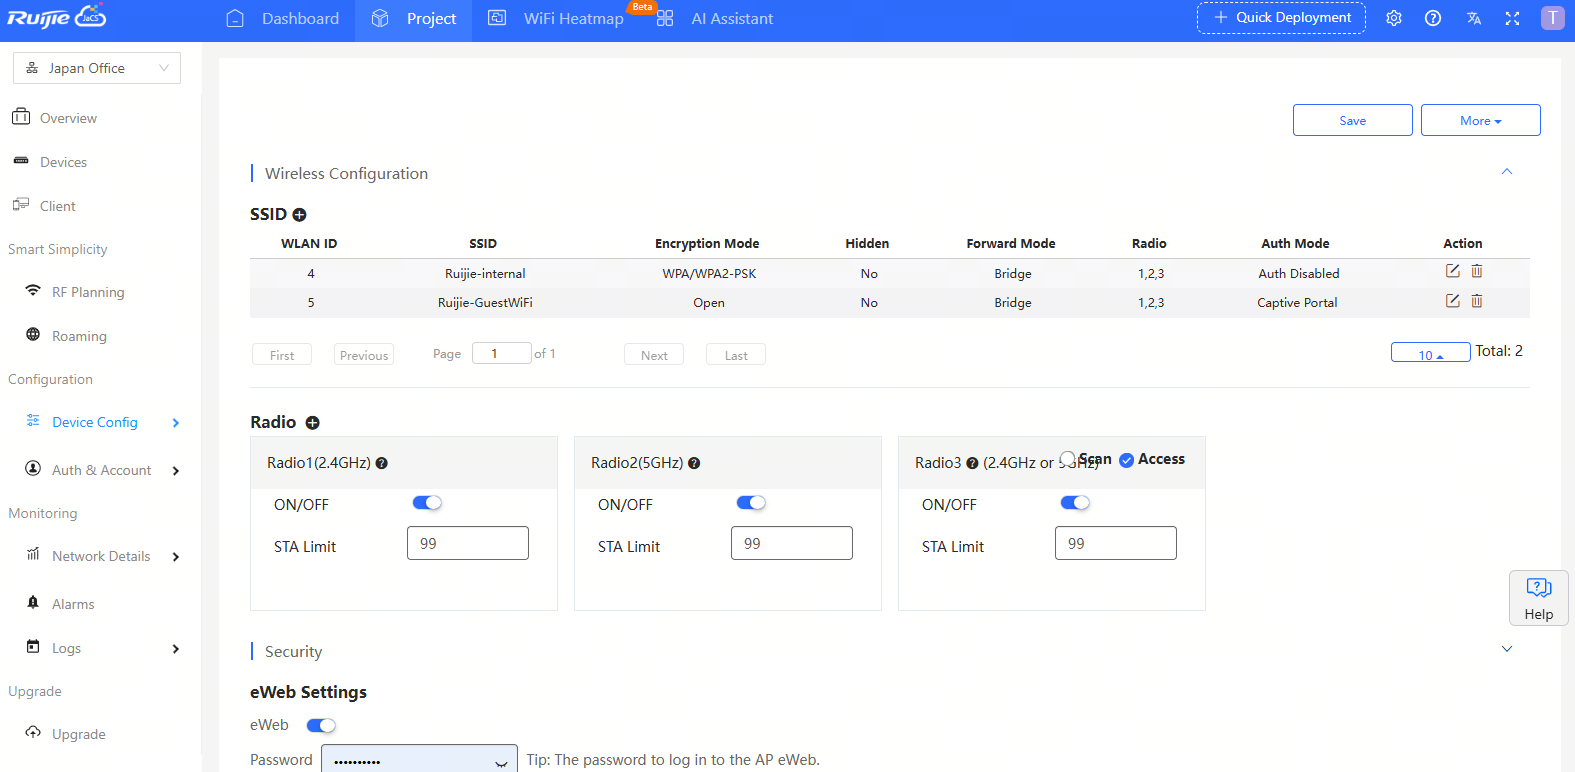
In the Radio interface, you can configure the radio frequency of the AP. After configuration, click the Save button in the upper right corner of the interface to save.
The configuration items are described as follows:

(1) ON/OFF*: By default, Radio1 (2.4GHz) and Radio2 (5GHz) are turned on.
(2) STA Limit: Set the number of clients that can access each frequency band (range: 1-100). If this field is left blank, there is no limit on the number of clients. If the devices that access the Radio 1 (2.4GHz) or Radio 2 (5GHz) need to be set with different limited number of clients, you need to go to the "Advance Settings (Optional)" interface and use the CLI command to set them separately.
(3) Scan: This configuration item is only available for Radio 3 (2.4GHz or 5GHz). After selecting this item, Radio 3 is used to collect RF information around the AP, but STAs are not allowed to access the AP.
(4) Access: This configuration item is only available for Radio 3 (2.4GHz or 5GHz). After selecting this item, Radio 3 is used to provide wireless signals and allow STAs to access the AP.
On the security configuration page, you can set the eWeb password, Telnet, client isolation, wireless intrusion detection, etc. After configuration, you need to click the Save button in the upper right corner of the interface to save, otherwise the configuration will not take effect.
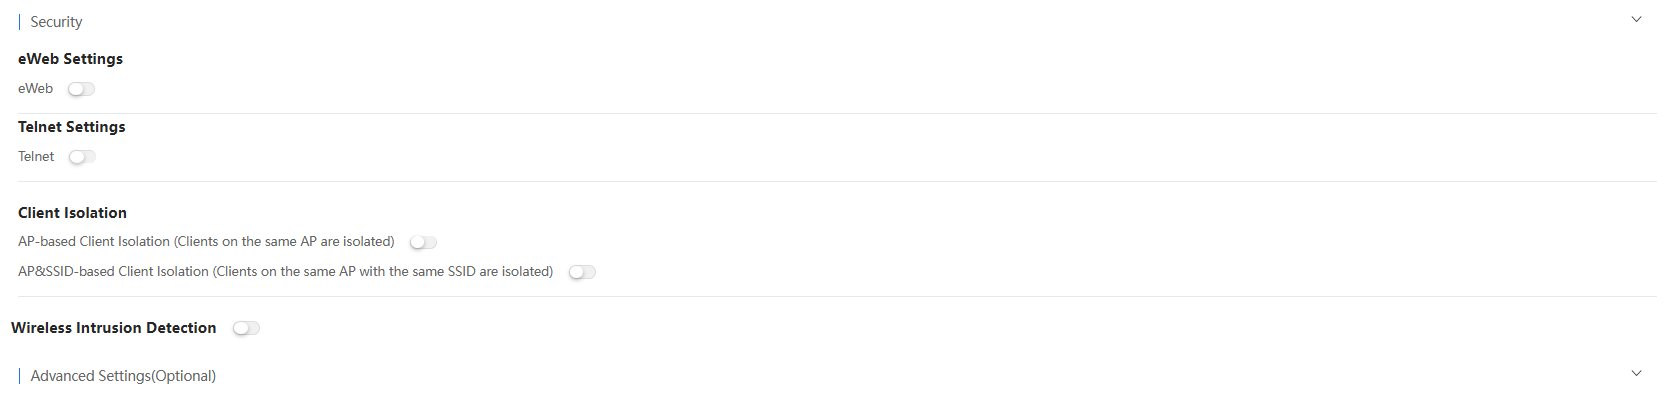
(1) eWeb: Disabled by default. When it is enabled, you can set the Web login password for accessing the AP’s eWeb. When the password is not configured, the system will not send the password to the AP.
(2) Telnet: Disabled by default. When it is enabled, you can set a Telnet password. The password cannot be left empty and its length must be between 8 and 25 characters.
(3) Client Isolation: With the feature enabled, clients will be isolated without affecting the network access to ensure that the clients cannot communicate with each other so as to ensure security. You can choose to isolate the clients based on APs or AP&SSID.
AP-based Client Isolation: Disabled by default. When it is enabled, all Layer 2 clients connected to the same AP cannot communicate with each other.
AP&SSID-based Client Isolation: Disabled by default. When it is enabled, clients connected to the same AP and the same SSID cannot communicate with each other.
(4) Wireless Intrusion Detection: Disabled by default. Supports four types of attack detection: DDOS attack detection, flood attack detection, AP spoofing attack detection, and weak IV attack detection. If this function is enabled, at least one of the above four detection modes must be enabled. Clients detected to have attack actions will be added to the dynamic blacklist, and their packets will be discarded. Supports setting the duration of the client in the blacklist. The supported duration range is 60-86,400 seconds , and the default value is 300 seconds.
On this Advanced Settings interface, you can configure AP radio scheduling, whitelists, and CLI commands. After configuration, you need to click the Save button in the upper right corner of the interface to save the configuration, otherwise the configuration will not take effect.

(1) RF Shutdown Schedule: Disabled by default. When RF scheduling is disabled, the AP will broadcast the SSID. When it is enabled, you need to configure the time for Wi-Fi to be enabled and disabled. The maximum supported time period is 24 hours.
(2) Whitelist: Set up whitelist websites and websites that can be accessed directly without identity verification. Click  to set up a whitelist. After configuring the domain name (required) and description (optional), click OK to complete the operation. To remove or edit a website in the whitelist, click and in the Action column to perform the corresponding operation.
(3) CLI Command: Click  to enter the CLI configuration interface. In this interface, you can set the commands to be sent to the AP. To remove or edit the existing CLI commands, click and in the Action column.
全部评论