On the Basic page, Wireless, Security, and Advanced Settings can be configured.
Click + in the upper left corner to add an SSID. In addition, the SSID page further enables you to configure the rate limit and the authentication function. Parameters on the SSID page are defined as follows.
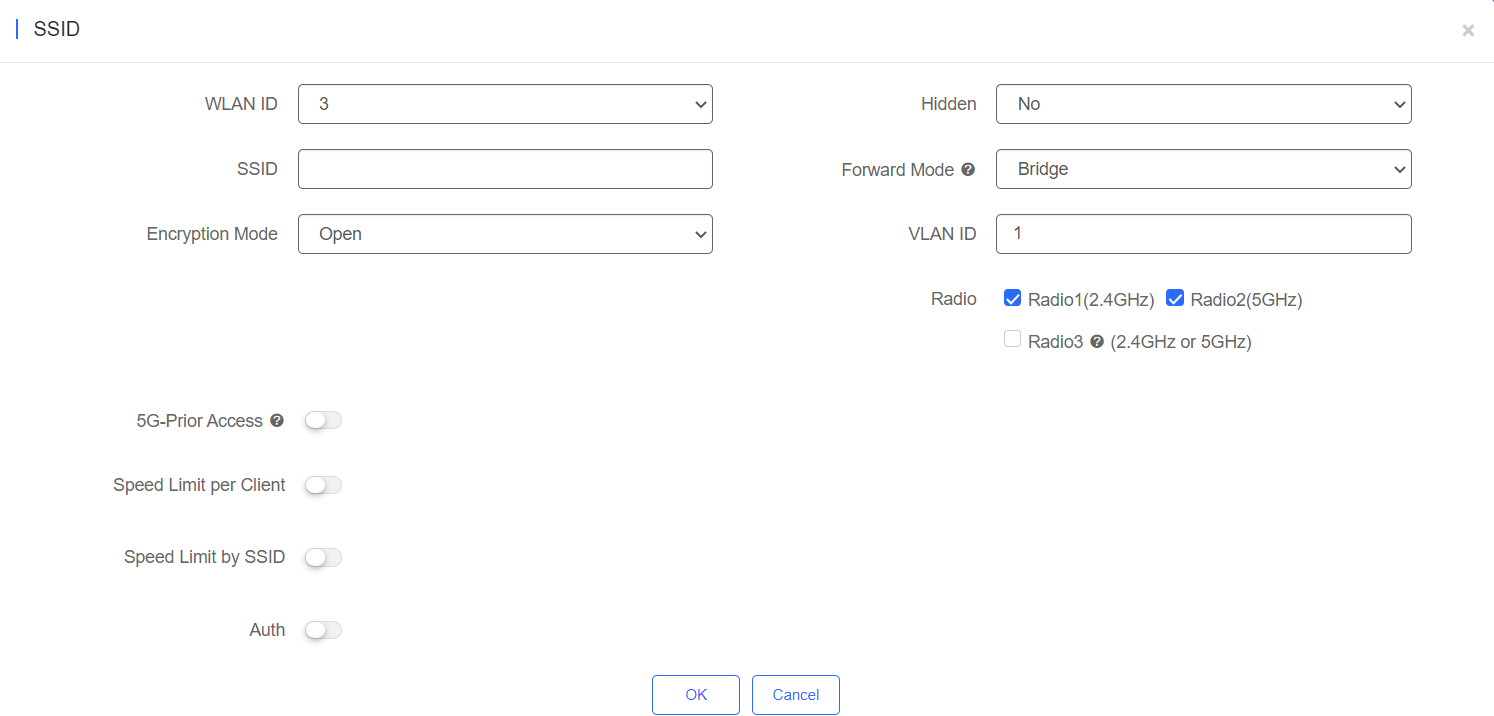
WLAN ID: Select a WLAN ID. An SSID matches a WLAN ID one-to-one. The WLAN ID can be specified only when an SSID is added and can not be changed subsequently. The maximum value of WLAN ID is 16.
SSID: Enter an SSID name.
Encryption Mode: Open, WPA-PSK, WPA2-PSK WPA/WPA2-PSK, WPA2-ENTERPRISE (802.1X), WPA3-PERSONAL, WPA2/WPA3-PERSONAL and PPSK. Open indicates that no password needs to be configured; WPA-PSK or WPA2-PSK indicates that a password needs to be configured. WPA2-Enterprise(802.1x) indicates that the 802.1x authentication mode is adopted for the SSID. PPSK indicates that each terminal device is bound with a unique WiFi account and key. After the PPSK mode is selected, you need to configure your account in CONFIGURATION>AUTHENTICATION>PPSK.
If you select the WPA2-Enterprise(802.1x) mode, the following page is displayed.
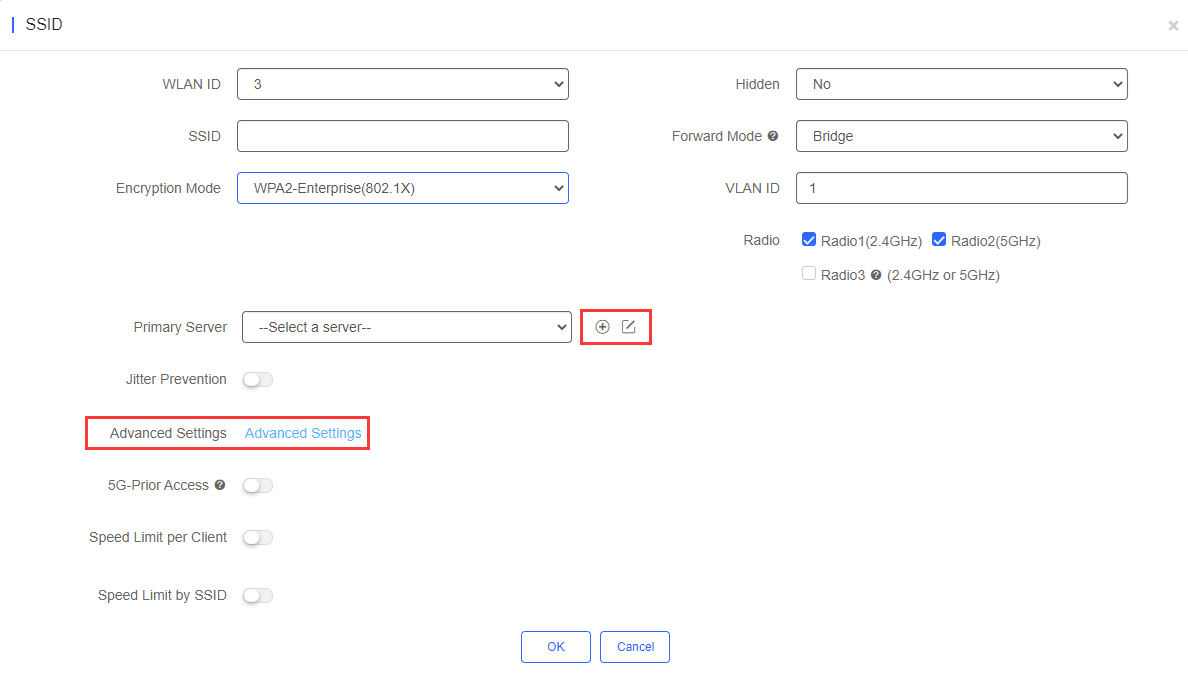
Click  to add an authentication server. A dialog box for a Radius server configuration is displayed, as shown in the following figure.
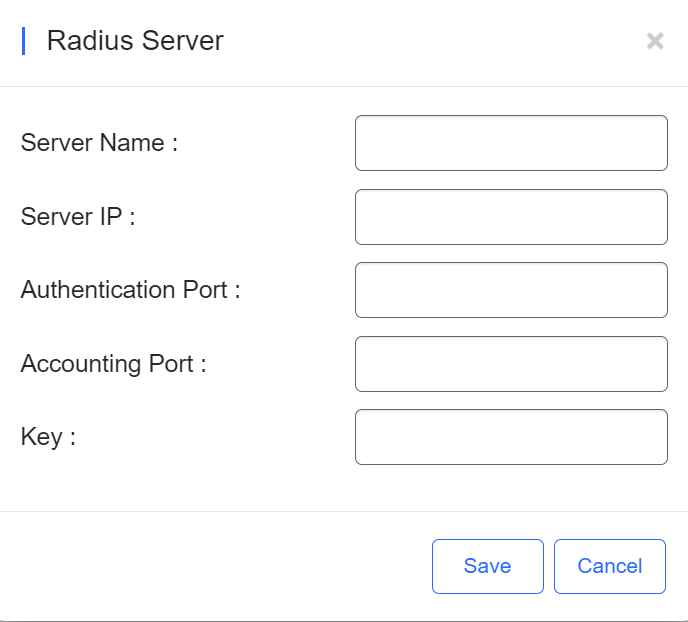
Server IP, Authentication Port, Accounting Port, and Key can be configured for a RADIUS server. Authentication Port and Accounting Port are optional, and respectively set to the default values 1812 and 1813 if no values are entered.
The jitter prevention function can be configured in 802.1x authentication mode, as shown in the SSID configuration page with Encryption Mode set to WPA2-Enterprise(802.1x). In case of jitters: after the jitter prevention function is enabled (the jitter prevention duration range is 0–600), clients will not go offline within the duration of jitter prevention. The default jitter prevention duration of an AP is 2 seconds. Note that the jitter prevention function may not be supported in earlier AP versions. In addition, the Advanced Settings function is provided for 802.1x authentication. In Advanced Settings, the NAS IP address (available in the NAT environment) and accounting update period can be configured and the added authentication server can be managed.
Hidden: Specify whether to hide the SSID, which can be set to Yes or No.
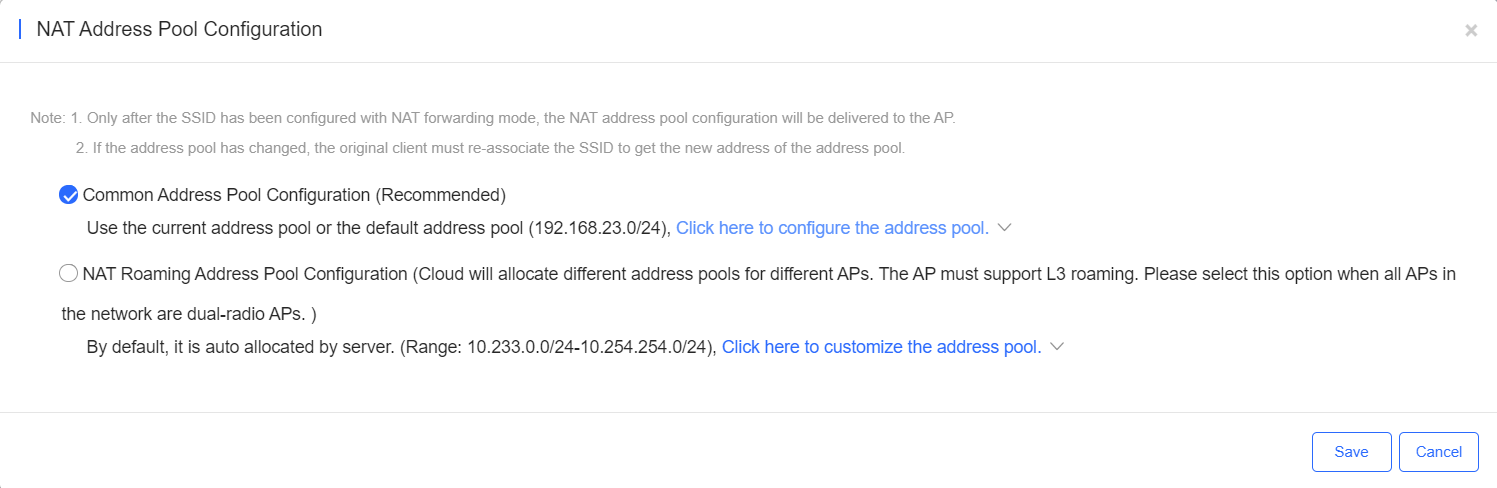
Forward Mode: Select a forward mode of a wireless AP. NAT indicates that an IP address is allocated to a client by an AP; Bridge indicates that an IP address is allocated to a client by an AP’s upstream device. A VLAN ID must be configured when the Bridge mode selected.
NAT Address Pool Configuration: Click the NAT Address Pool Configuration link to display the window.
5G-Prior Access: It is enabled when the SSID is associated with Radio 1 and Radio 2 for dual-band APs (2.4 GHz and 5 GHz) to ensure that clients supporting dual bands access the 5 GHz frequency band preferentially. This reduces the load in the 2.4 GHz frequency band and improves user experience. When it is enabled, it is applied to all SSIDs of MA series access points in a hotel scenario.
Speed Limit per Client: Specify whether to enable the speed limit function for a client. When this function is enabled, uplink and downlink speeds must be configured.
Speed Limited by SSID: Specify whether to enable the speed limit function for the SSID. When this function is enabled, uplink and downlink speeds must be configured.
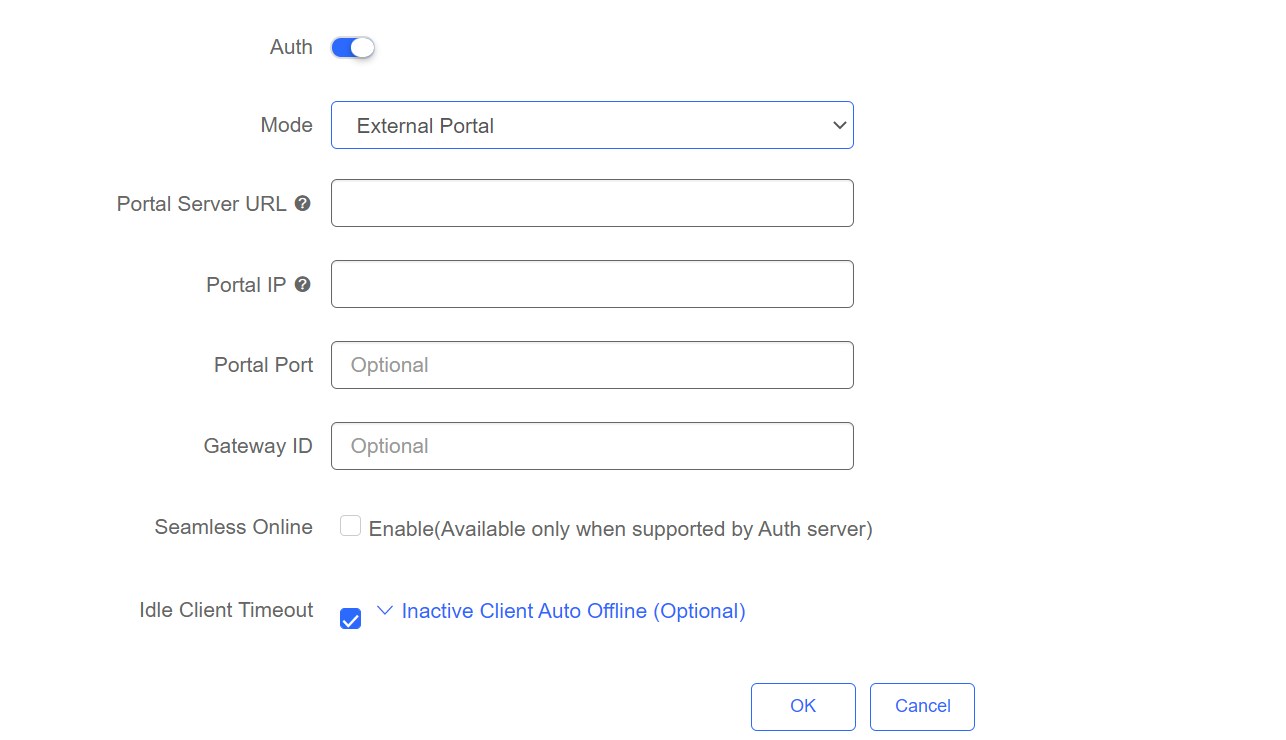
To edit SSID, enable Auth and select External Portal. Enter the required information and click OK.
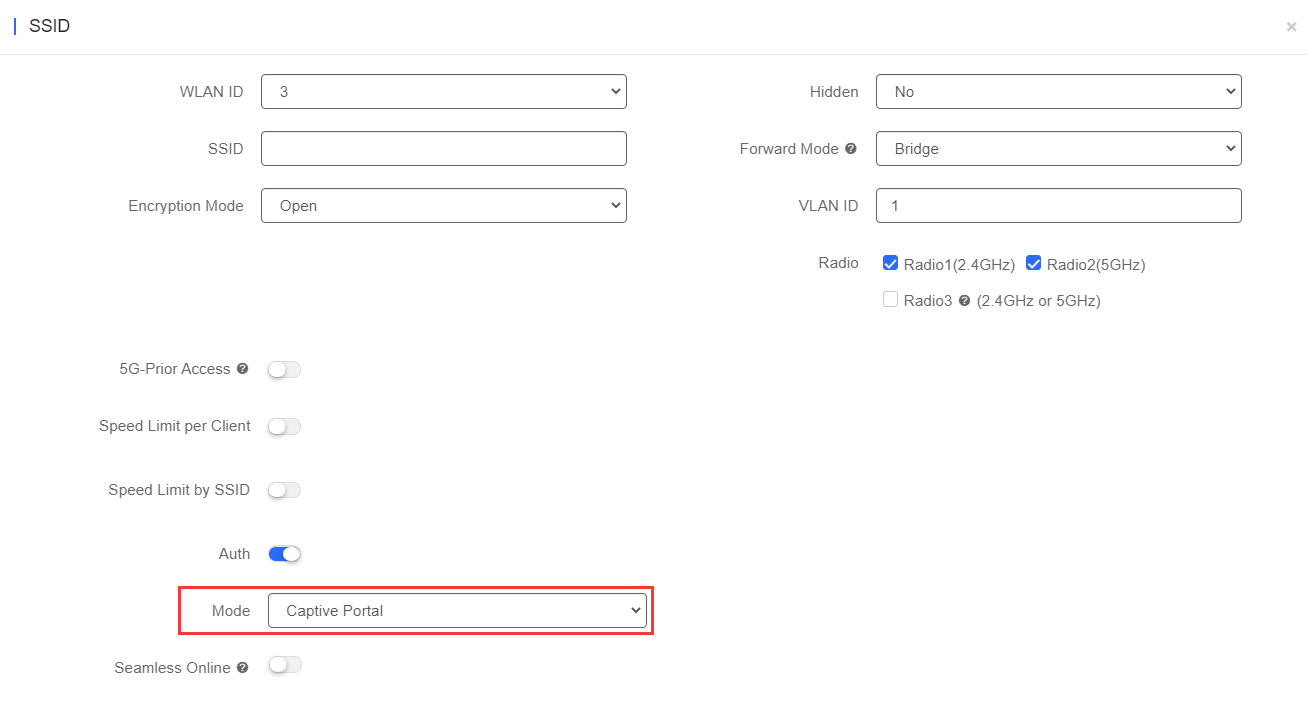
Step 1: On the SSID page, enable Auth and select Captive Portal.
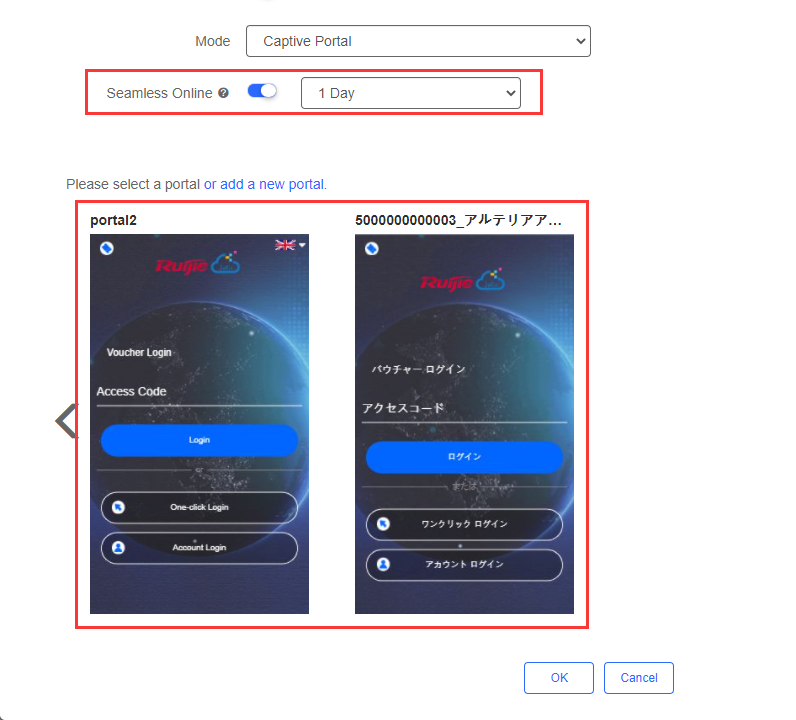
Step 2: Enable Seamless Online and select the portal.
The Radio page enables you to configure the AP radio ports. The Radio page provides the On/Off and Max Clients items. Parameters on the Radio page are defined as follows:
On/Off: Specify whether to enable the radio function. When it is set to Off, the SSID is invalid; the corresponding SSID can be used proerly only when this function is set to On.
Max Clients: Enter the upper limit of associated clients in a frequency band.

Note: Deletion of radio configurations indicates that the system preserves the current configurations.
As shown in the preceding figure, eWeb Settings, Telnet Settings, Client Isolation, and Wireless Intrusion Detection can be configured.
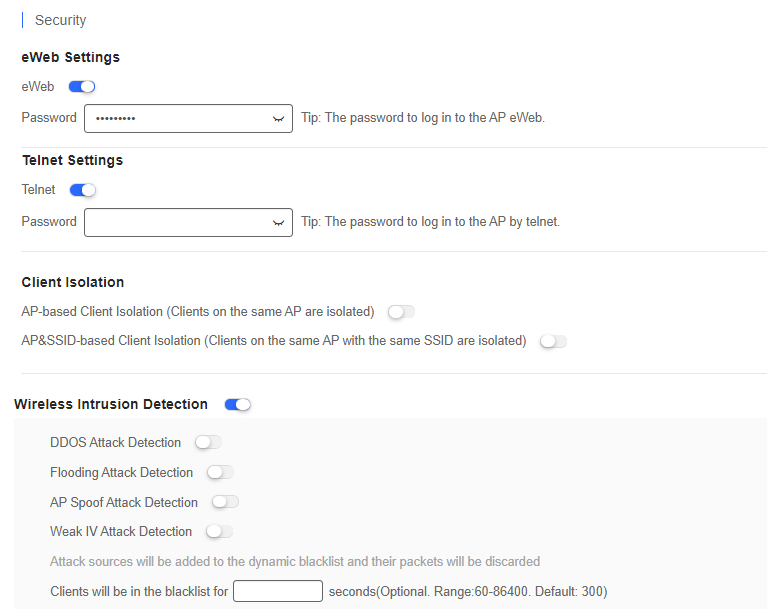
eWeb Settings: Enter the Web login password of an AP. When the password is empty, the system does not push the password to AP.
Telnet Settings: Enable the Telnet service of AP. When the Telnet service is enabled, the password is required.
Client Isolation: Clients are isolated without affecting their network access to ensure that they cannot communicate with each other, thereby ensuring client service security. AP-based client isolation or AP&SSID-based client isolation can be selected. If AP-based client isolation is enabled, all layer-2 clients associated with the same AP cannot communicate with each other. If AP&SSID-based client isolation is enabled, clients in the same WLAN on the same AP cannot communicate with each other.
Wireless Intrusion Attack Detection: Include DDOS attack detection, flooding attack detection, AP spoof attack detection, and weak IV attack detection. If this function is enabled, at least one of the preceding four detection functions needs to be enabled.
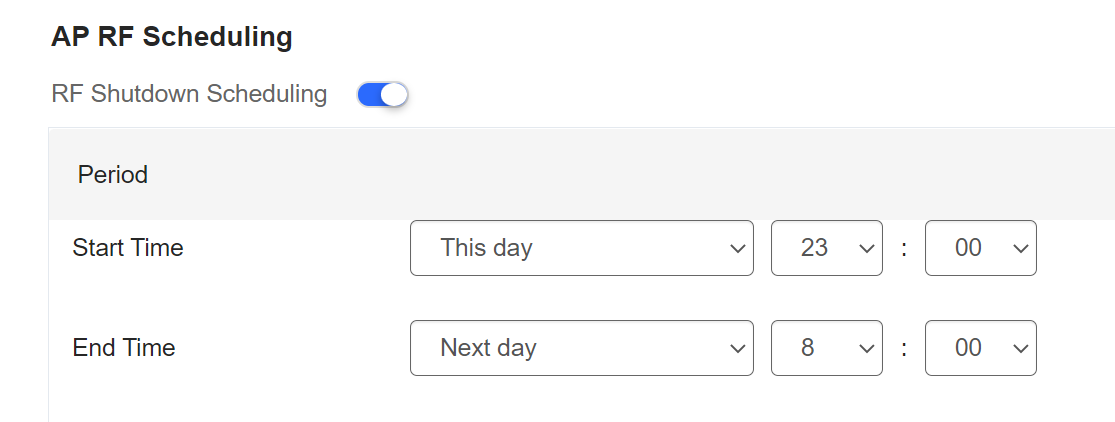
(1) AP RF Scheduling
If AP RF Scheduling is disabled, AP will broadcast the SSID.
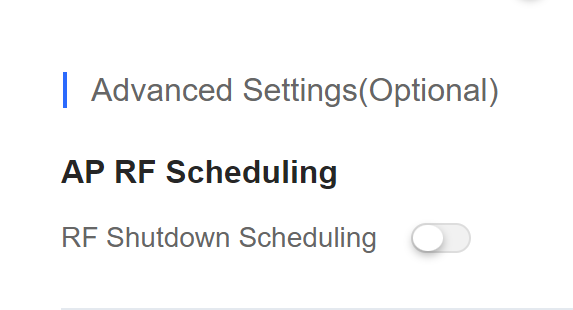
To specify the time of turning on/off WiFi, enable RF Shutdown Scheduling and configure the period.
(2) Whitelist
Enter whitelisted websites, and websites that can be accessed directly without authentication.

(3) CLI Command
Enter commands to be pushed to APs. This function allows you to perform some configurations unsupported via CLI commands.

全部评论