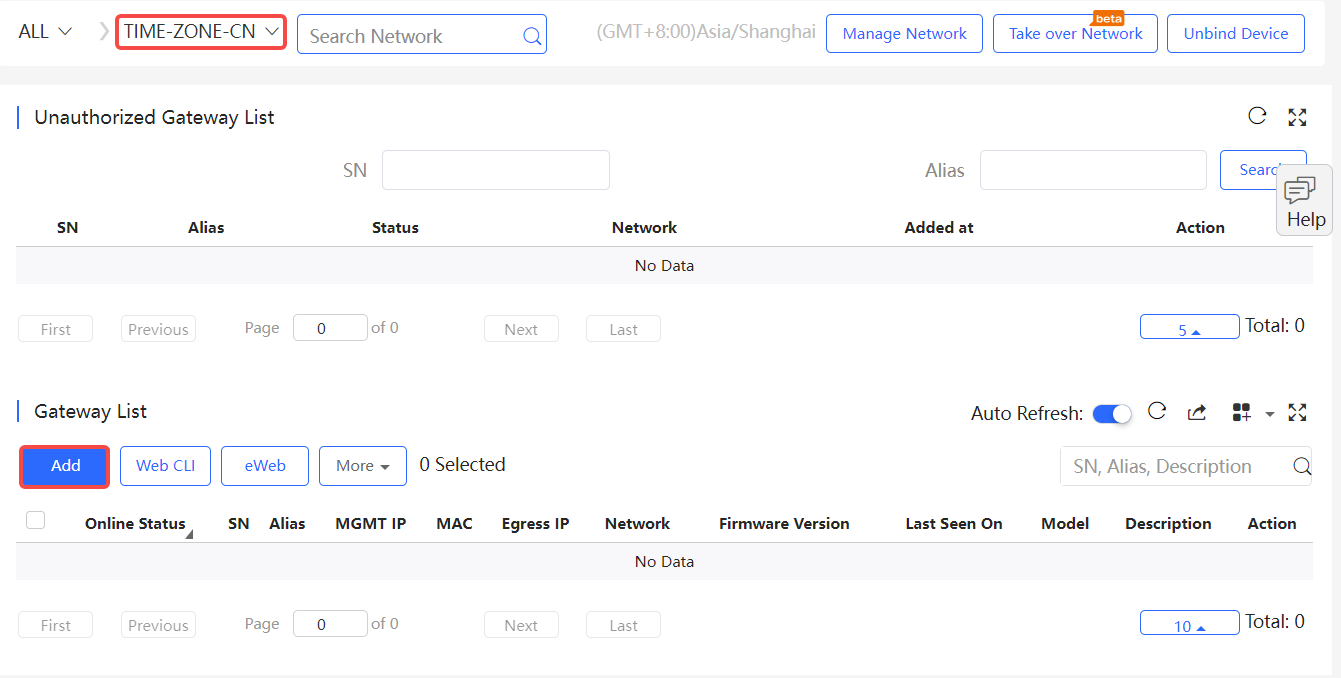
Select MONITORING > DEVICE to display the Devices page, and select a network on the top to filter devices.
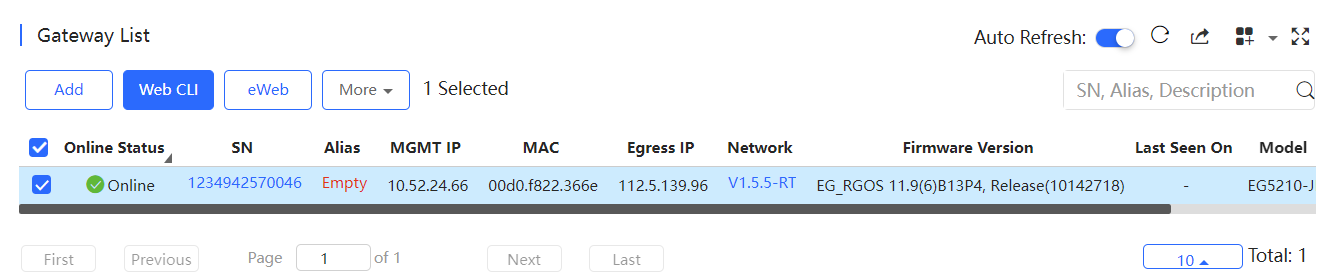
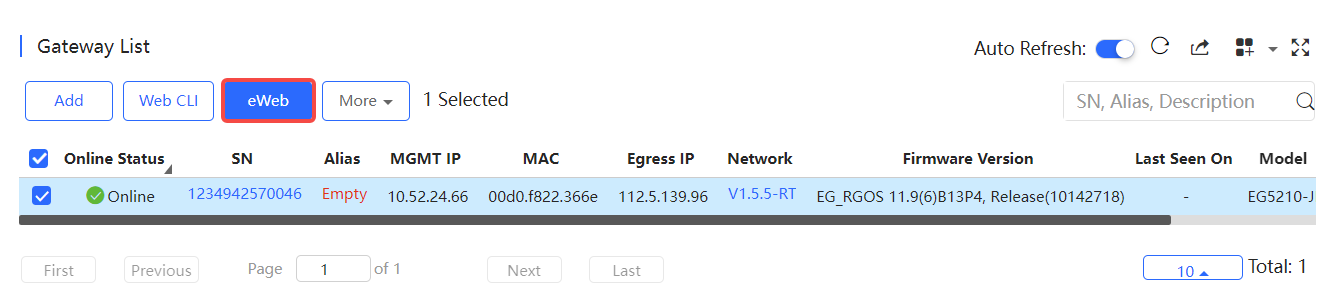
The Gateway List displays basic device information, including the online/offline status, SN, alias, management IP, MAC, public IP, network, firmware version, offline time, model and description.

The Gateway List automatically refreshes every minute. Click  to enable/disable the auto refresh function.
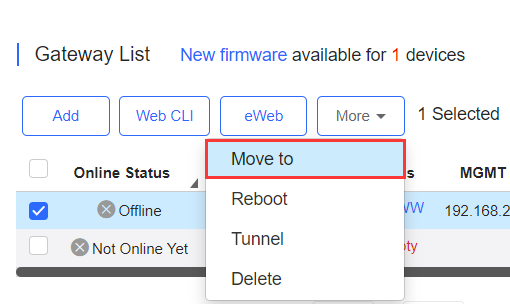
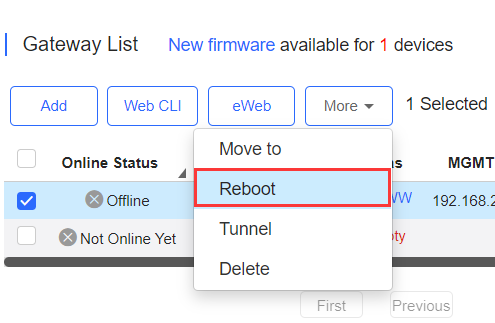
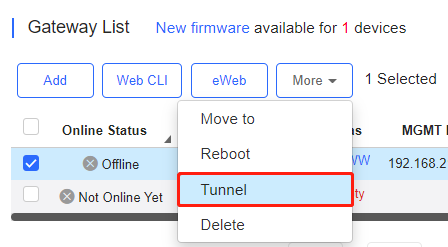
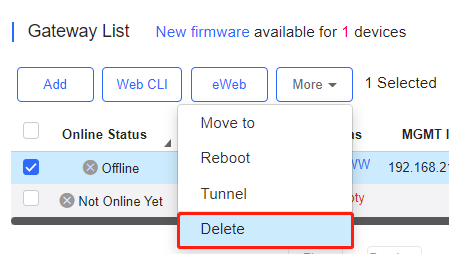
Above the list are the Add, Web CLI and eWeb functions. Click  to display the Move to, Reboot, Tunnel and Delete functions. For more information, refer to Basic Gateway Operations .
The Search function supports fuzzy queries based on the serial number, alias and description, and also supports queries based on online/offline status.
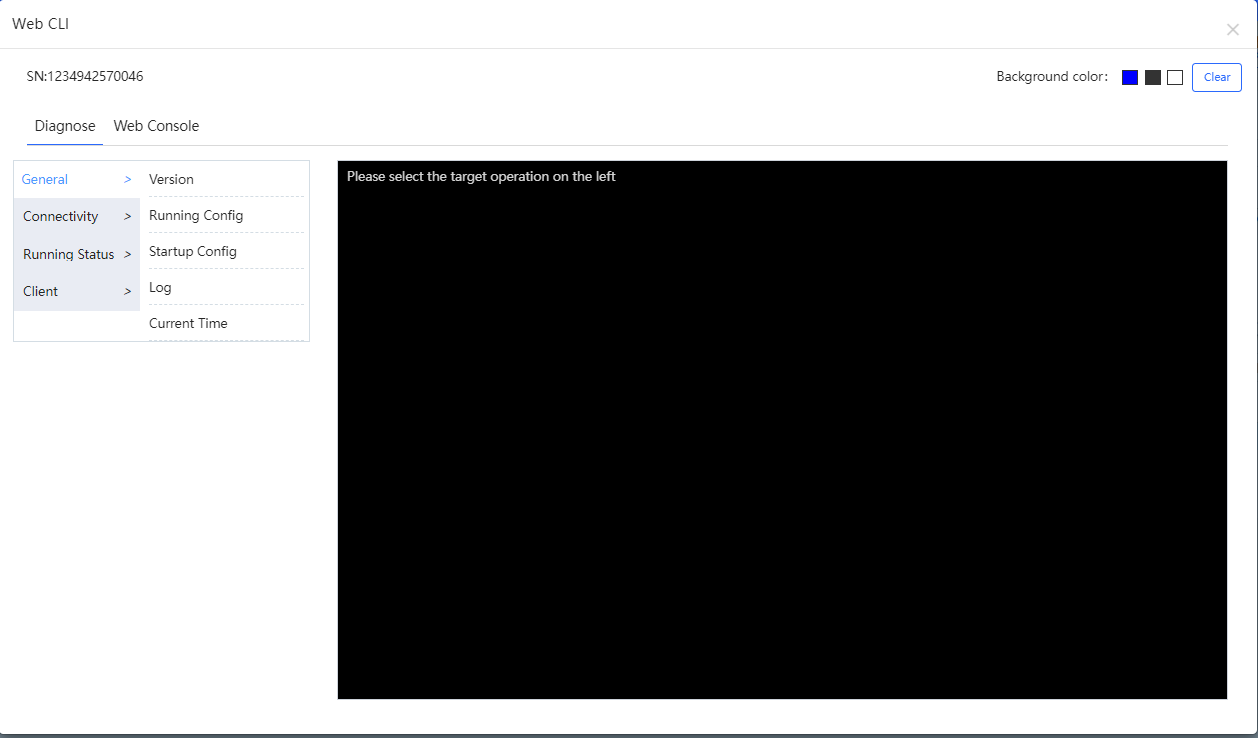
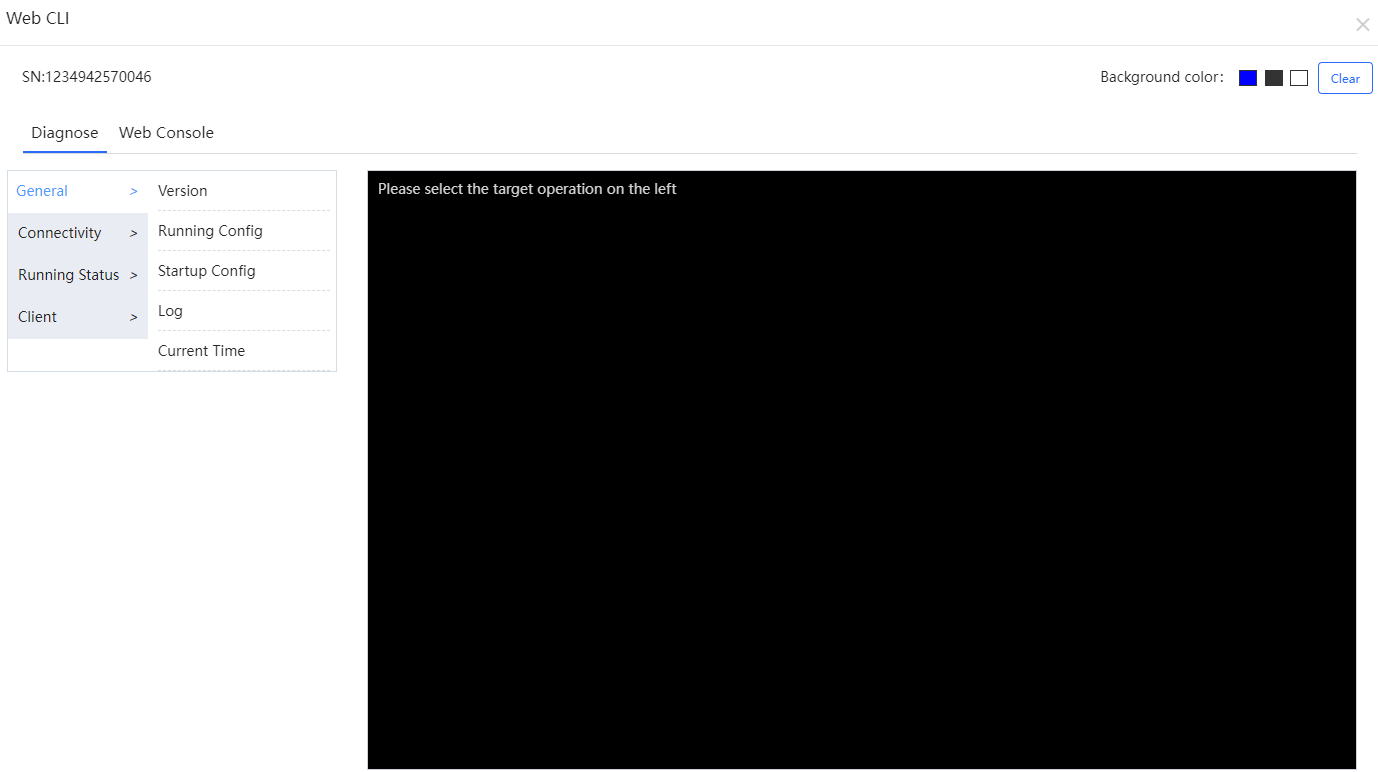
Click Web CLI , and the Web CLI page is displayed. The Web CLI page provides commonly-used CLI commands on the left. Click the command, or manually enter the command and click Send .
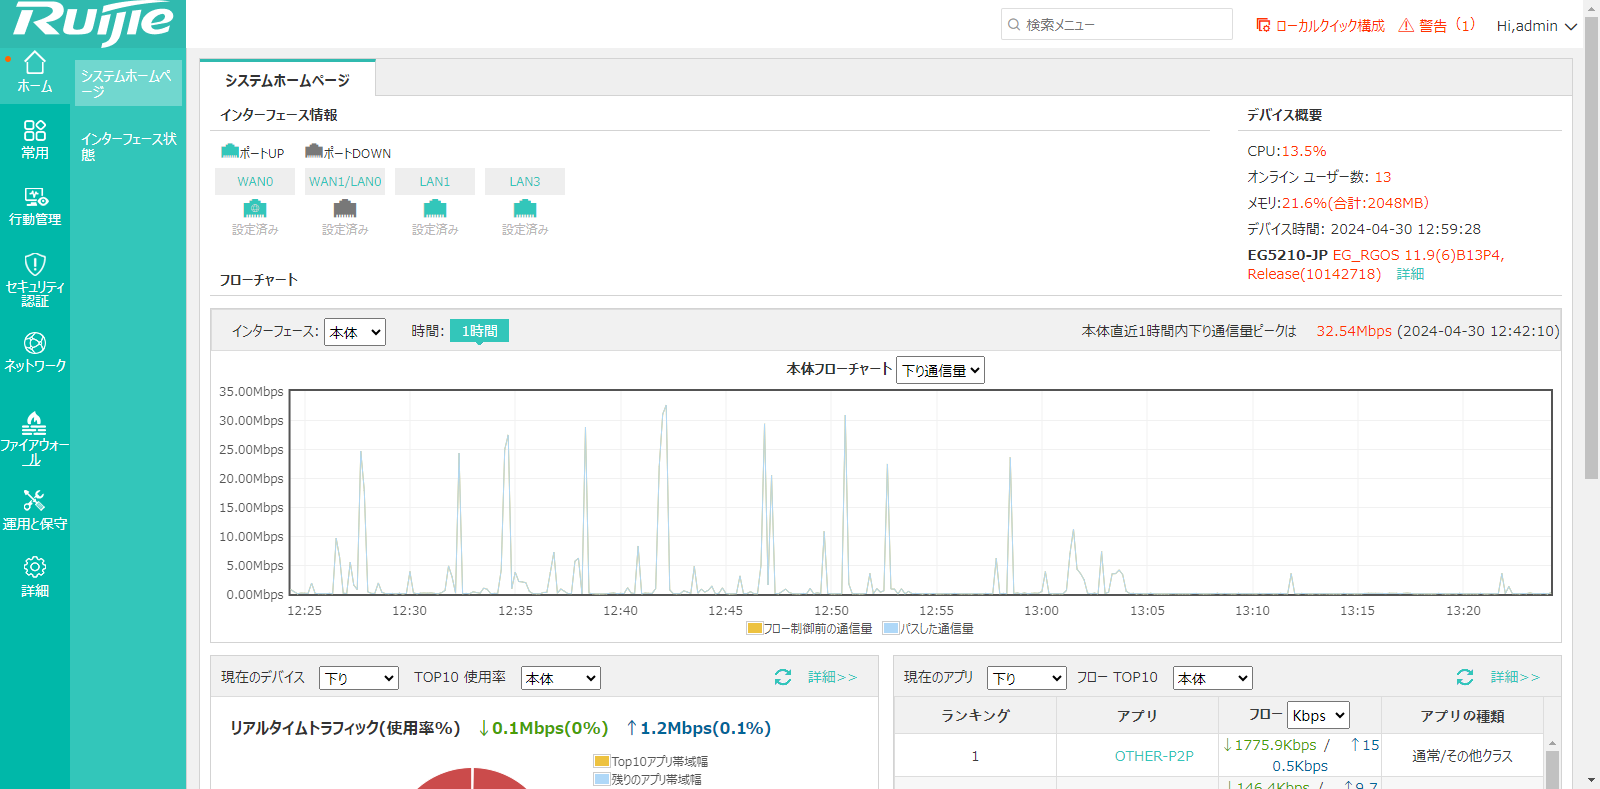
Click eWeb to open the eWeb system in a new window.

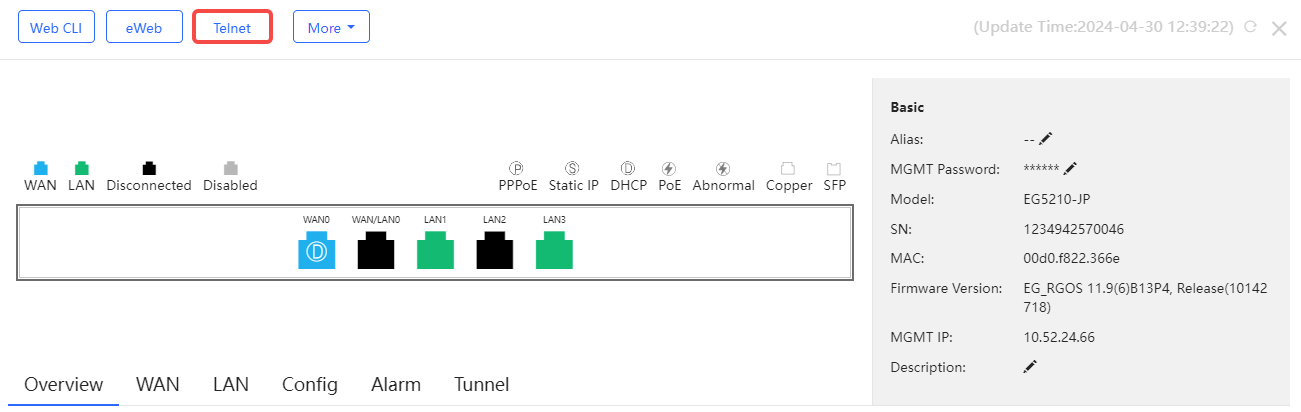
Click Telnet, and a window is opened to connect to the gateway by Telnet protocol. Enter CLI commands to configure the gateway.

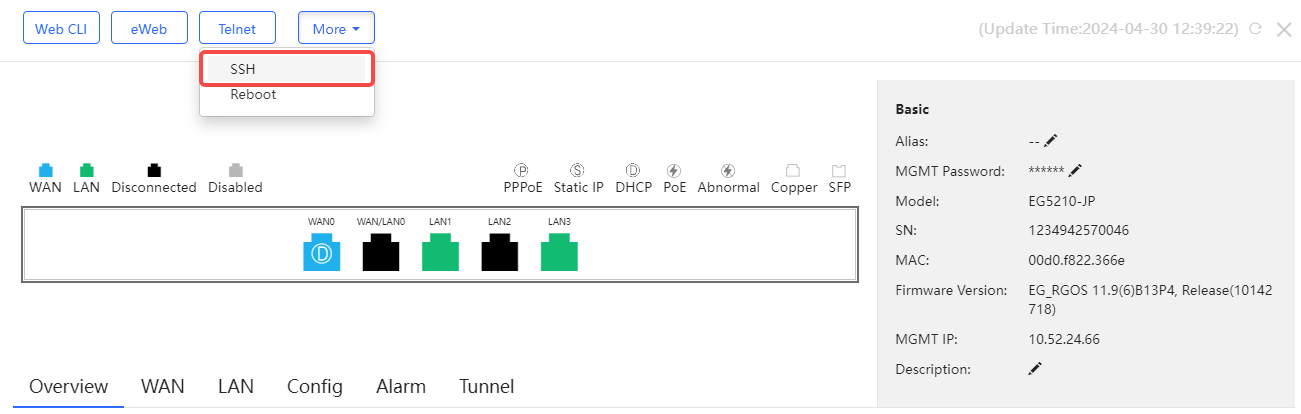
Click More > SSH , and a window is opened to connect to the gateway by SSH protocol. Use other SSH tools to connect to the gateway.
Click More > Reboot to reboot the gateway.

Click  to refresh all data in the page.
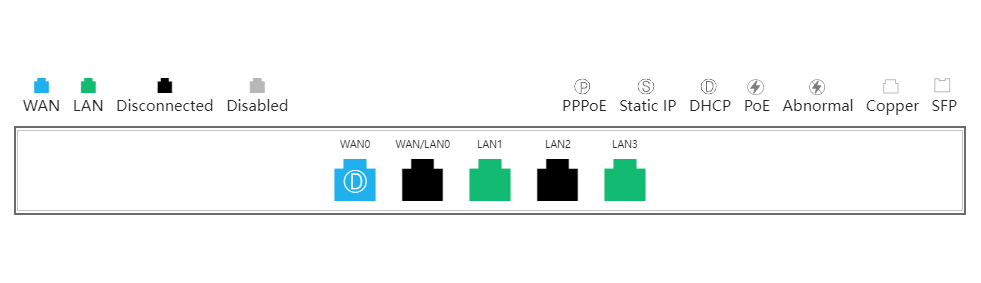
The port panel imitates the actual gateway panel, displaying the port type and status.
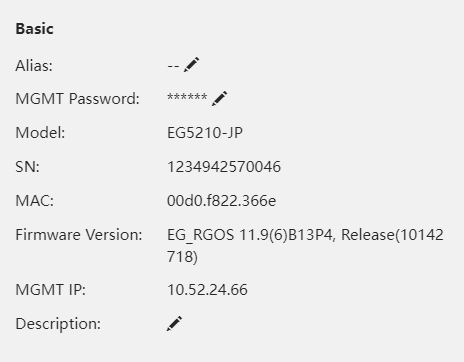
Basic information includes the alias, model, SN and other information. Alias, MGMT Password and Description can be edited.
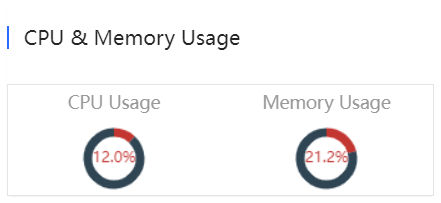
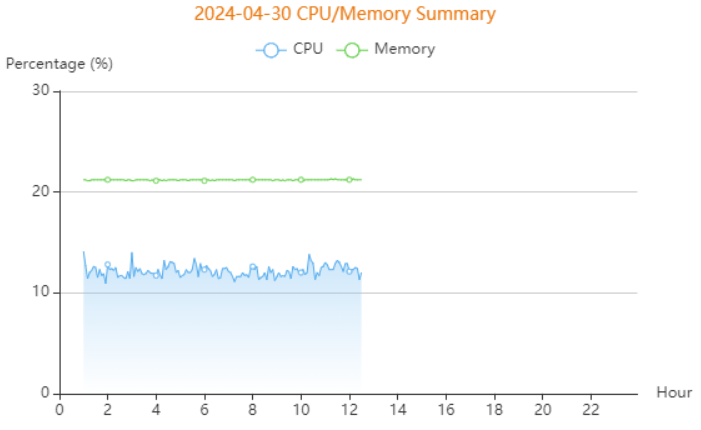
CPU & memory usage are displayed here.
Device status includes online status, online clients and sessions.

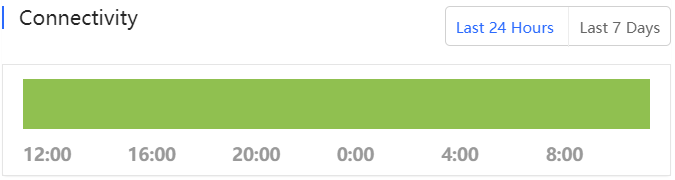
Connectivity refers to the connectivity (online status) between Gateway and Cloud Service within a period (1 day or 7 days).
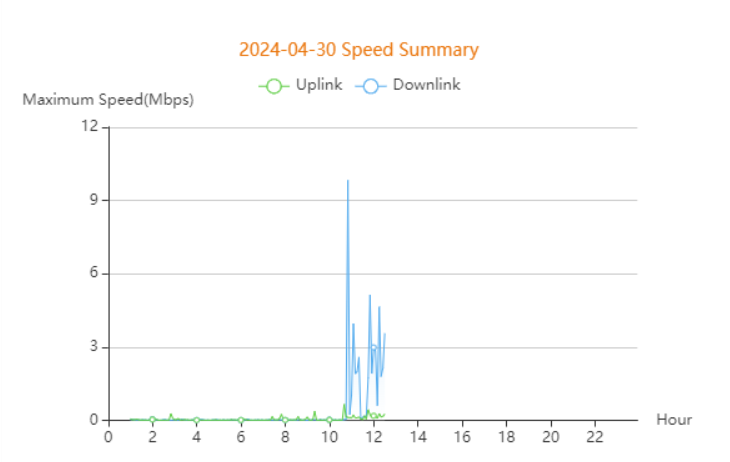
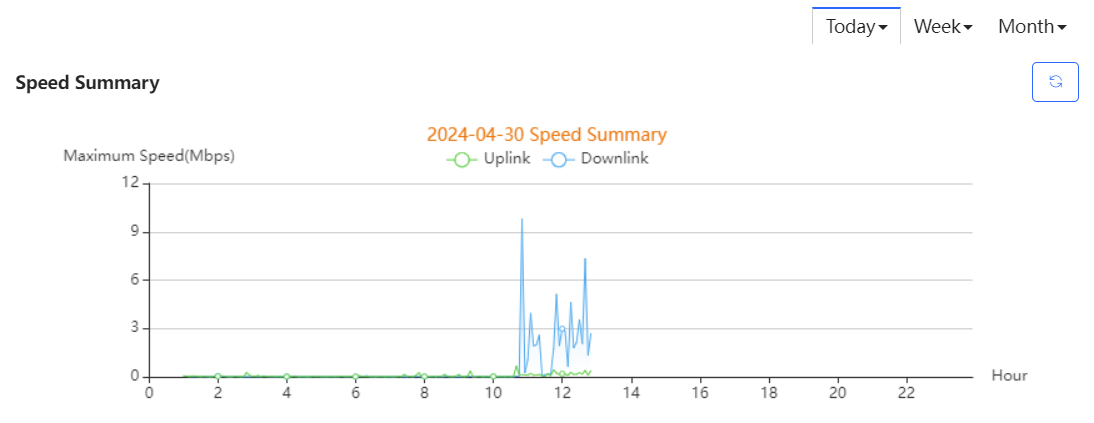
The uplink/downlink speed summary over the 24 hours is displayed.
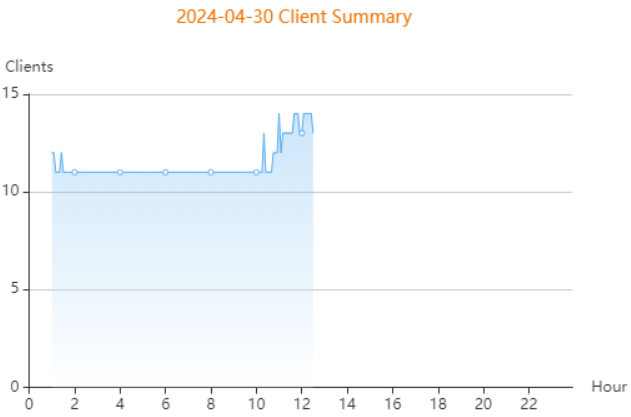
The client statistics over the 24 hours are displayed.
CPU/memory summary over the 24 hours are displayed.
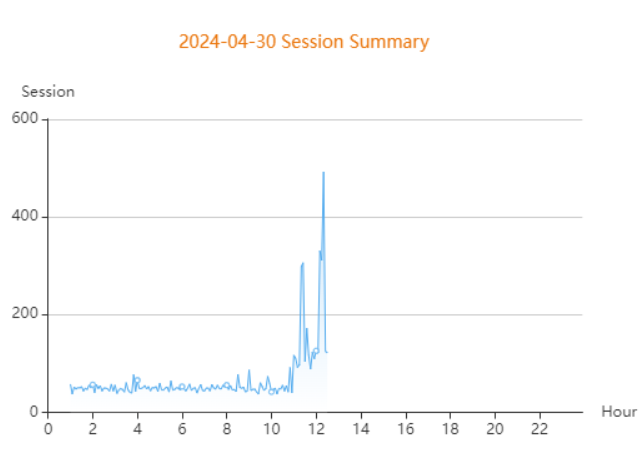
Session summary over the 24 hours is displayed.
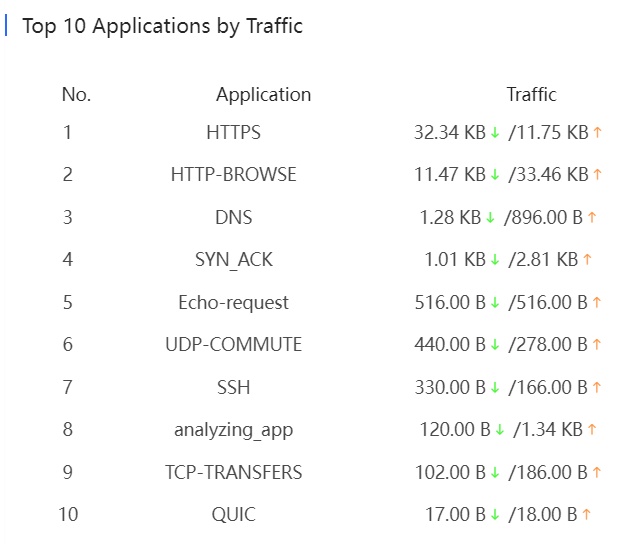
Top 10 applications by downlink traffic are displayed.
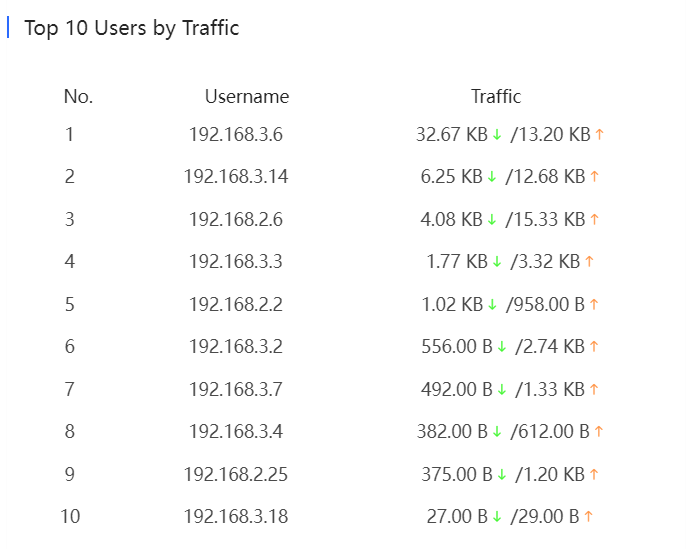
Top 10 users by downlink traffic are displayed.
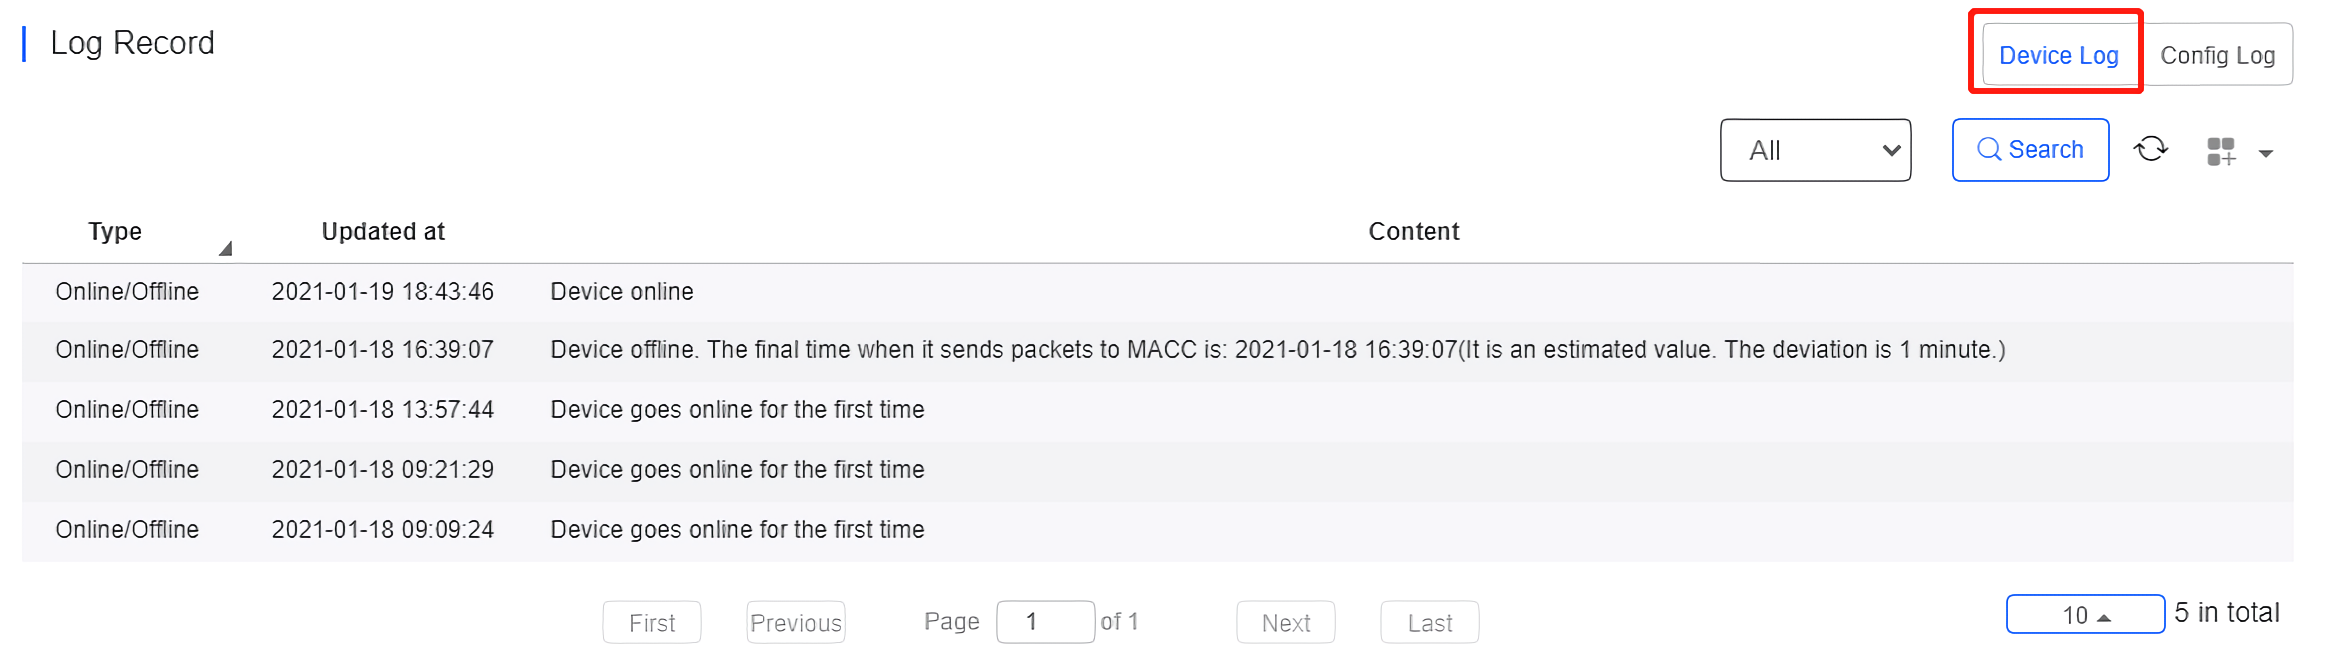
The device log records the historical operations, including online/offline, restart, upgrade and VLAN change, and supports queries based on log type and time.
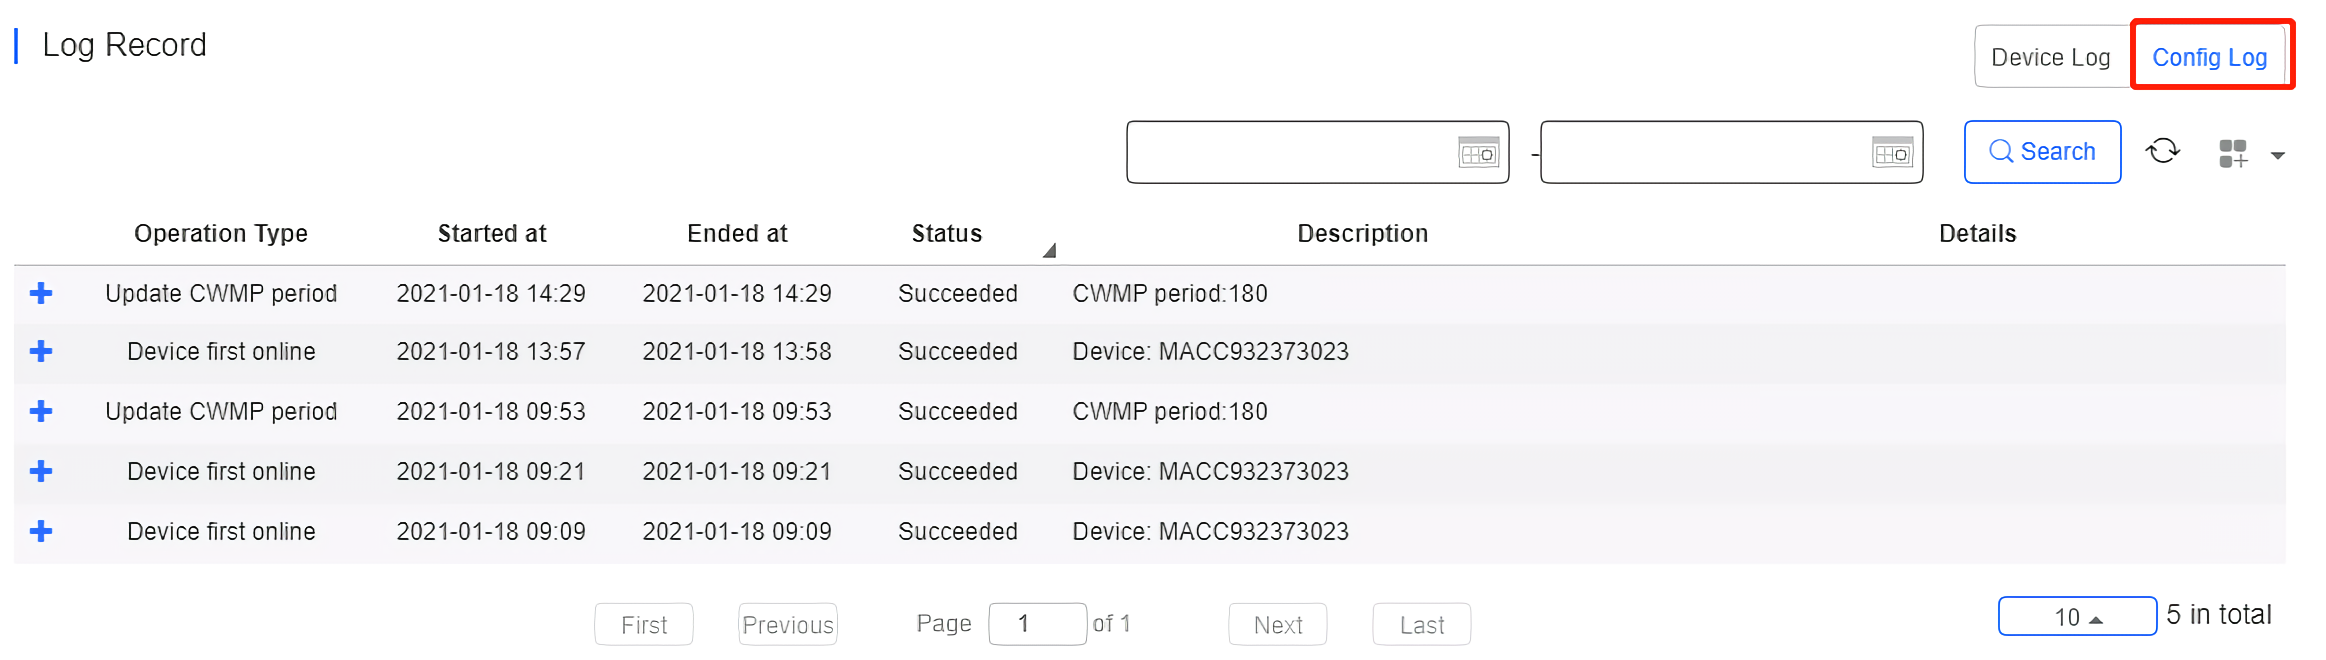
The Config log records the historical configuration delivery, and supports queries based on status and time.
Select one WAN port to display the corresponding port information and rate summary.
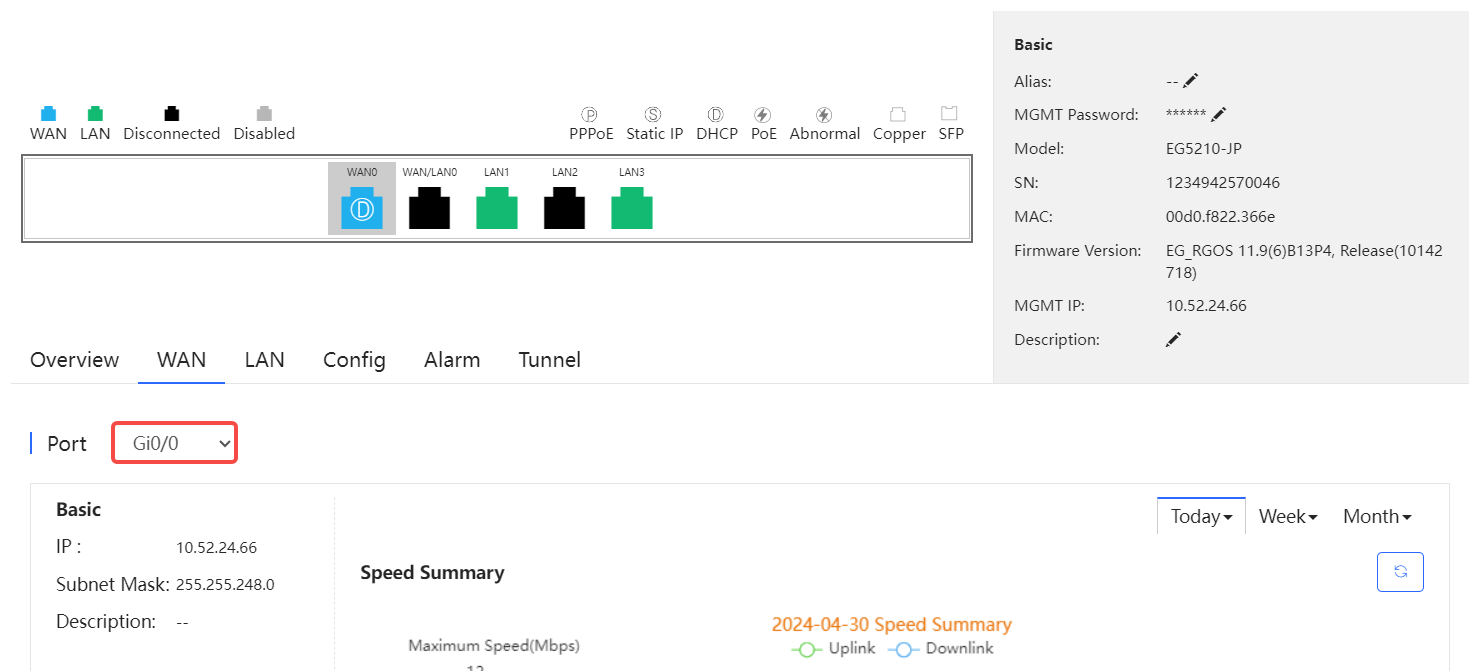
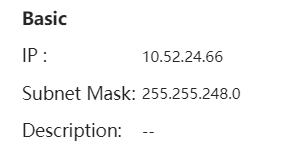
Basic information includes the IP, subnet mask and description. If PPPoE is enabled and dialing port is configured, the PPPoE information is displayed.
Uplink & downlink rate of WAN port are displayed. This page supports queries based on day, week and month. Click  to refresh the summary.
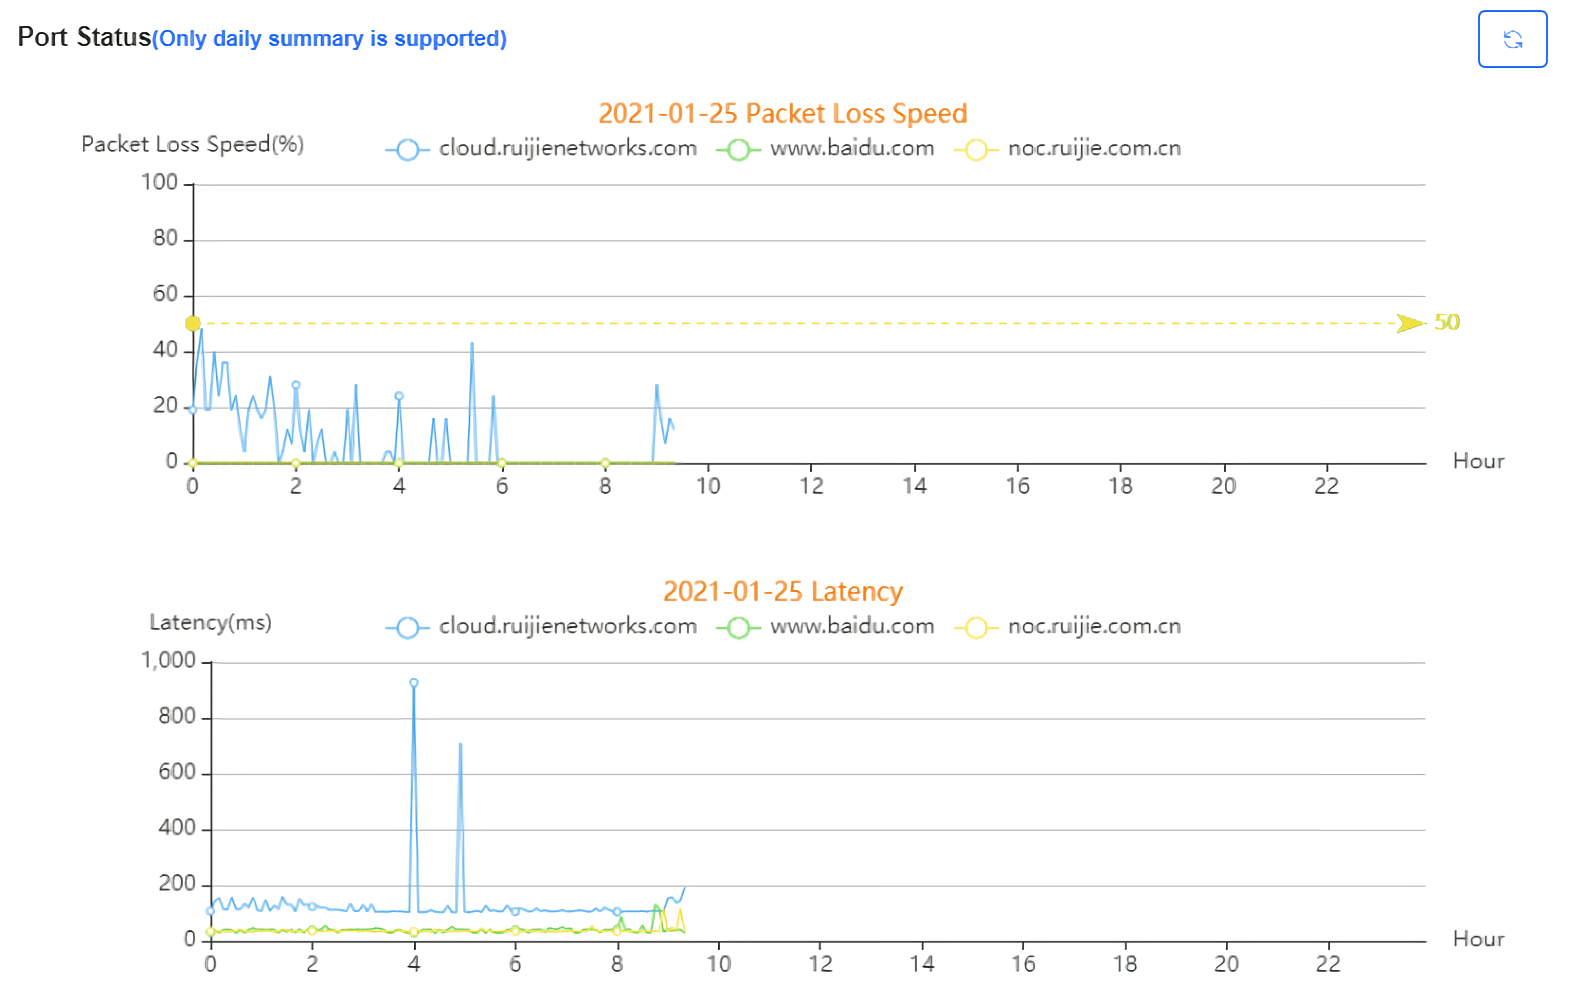
Packet loss rate and latency summary are displayed. This page supports queries based on day, week and month. Click  to refresh the summary.
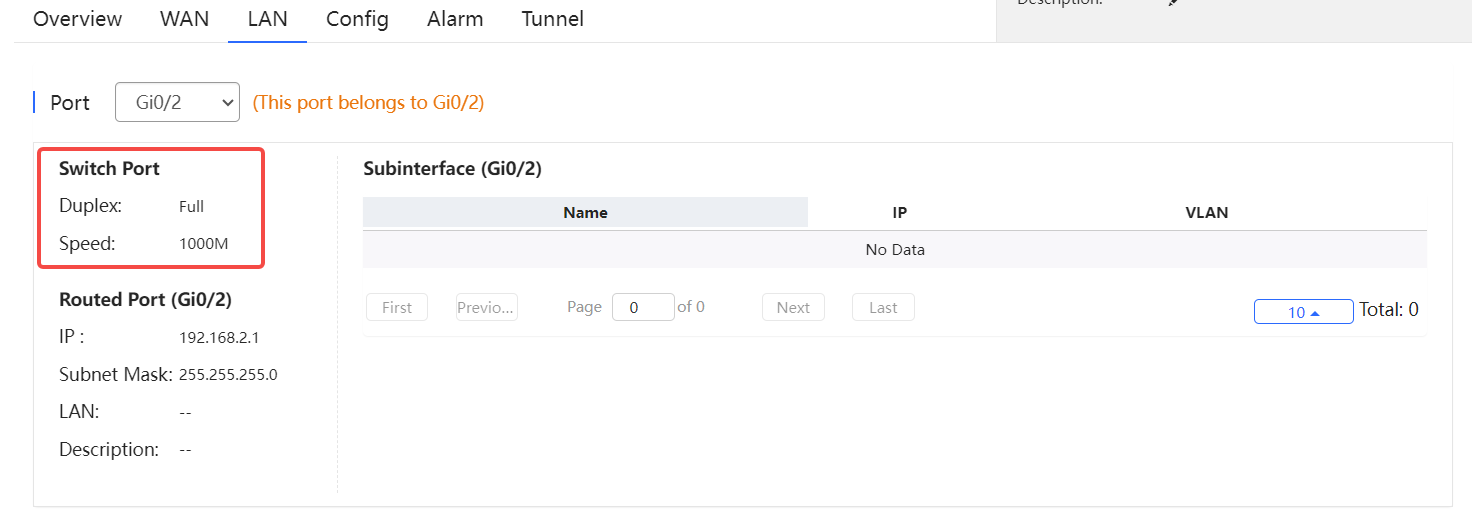
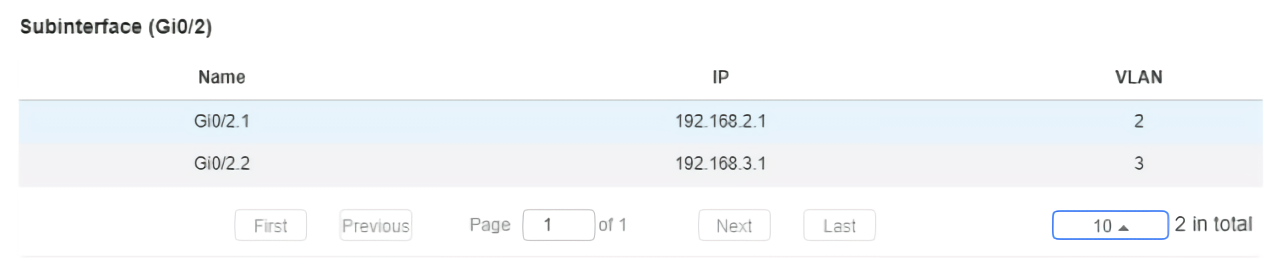
Select a LAN port to display the corresponding information of its switch port, routed port and subinterface.
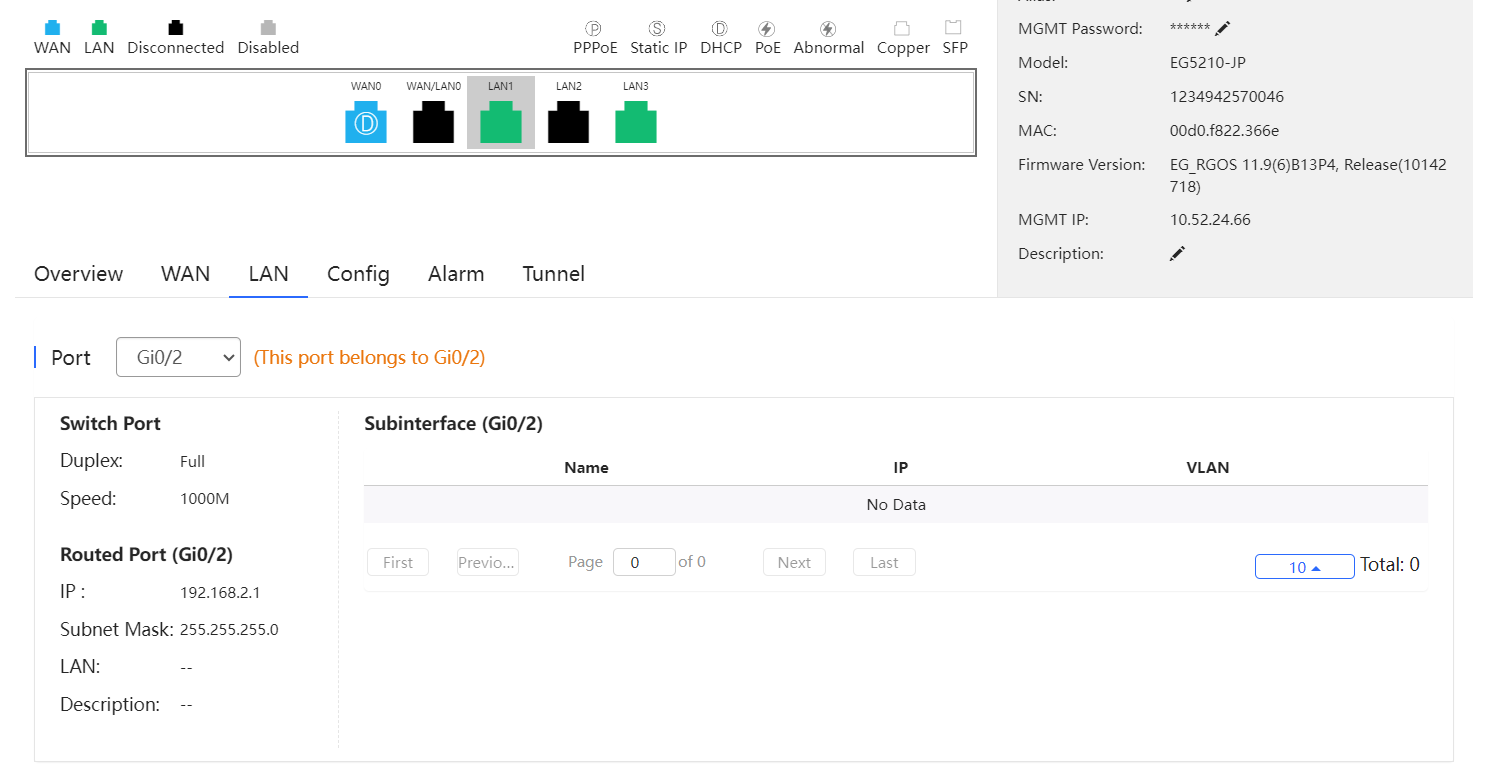
Switch port information includes the switch port, including duplex and speed.
Routed port information includes the IP address, subnet mask, LAN and description.
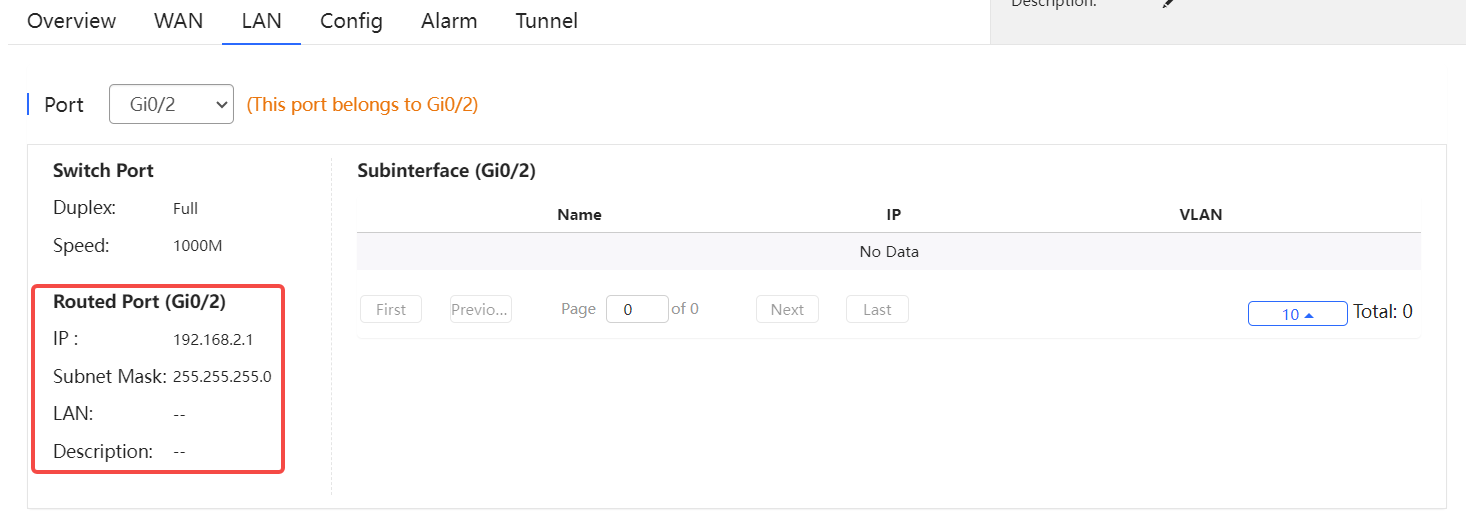
Subinterface information includes the name, IP address, and VLAN.
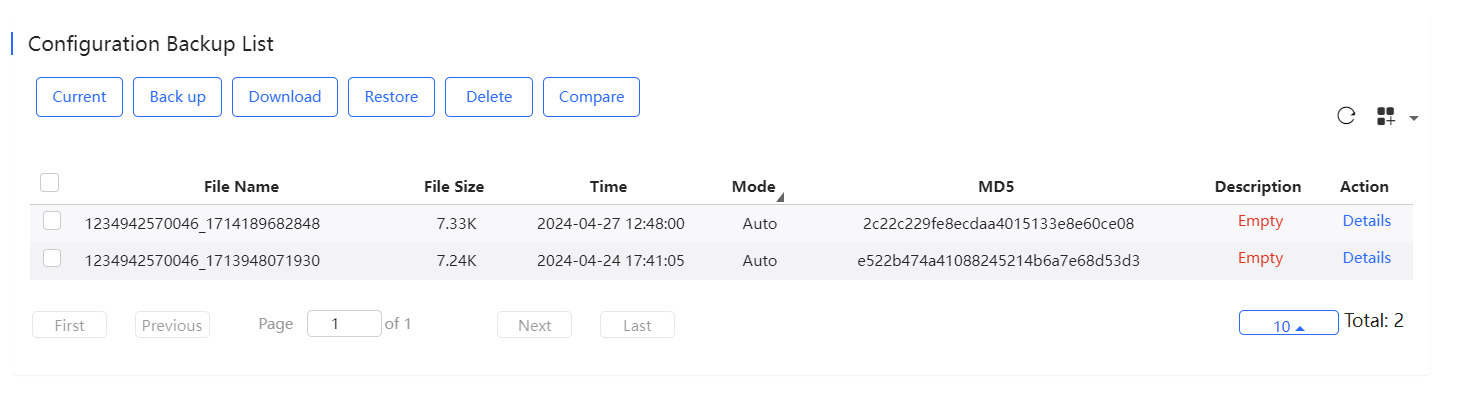
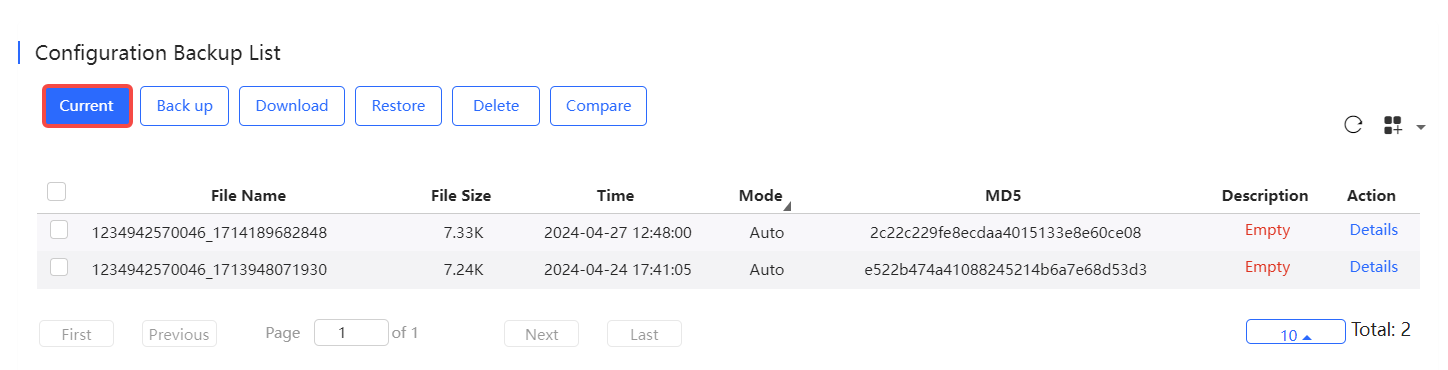
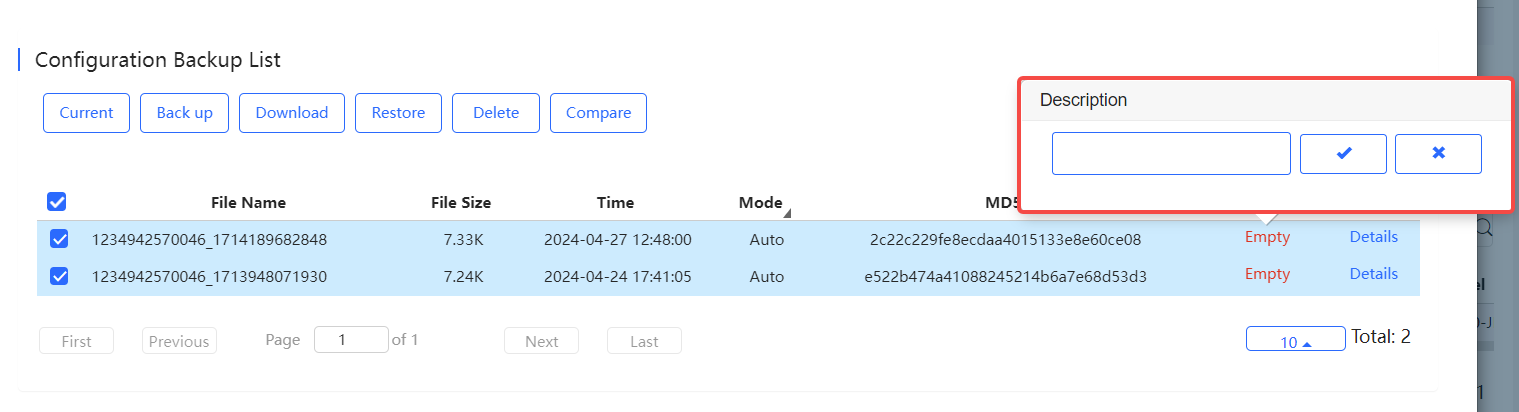
The backup records include configuration file name, size, time, mode and MD5.
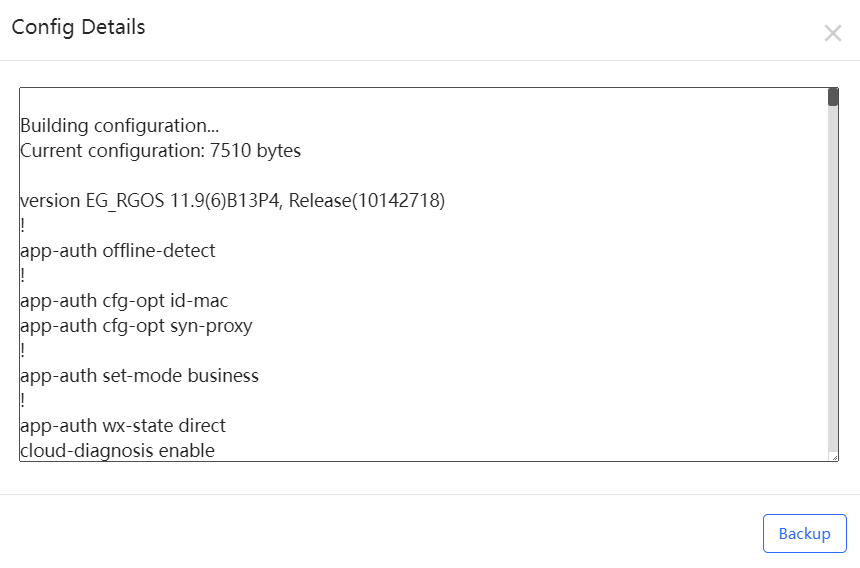
Step 1: Click Current to display the current configuration.
Step 2: Click Backup in the Config Details page to back up the current configuration.
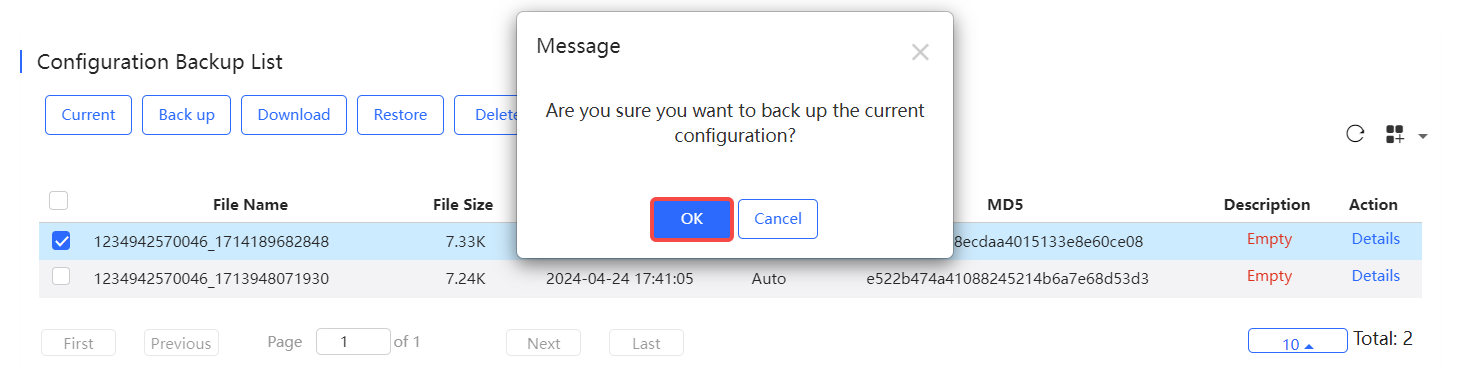
Step 3: Click Back up and then click OK in the message box to back up the current configuration.
Select one record, and click Download to download the configuration file.
Select one record, and click Restore to restore the current configuration.
Select one or multiple records, and click Delete to delete the backup record.
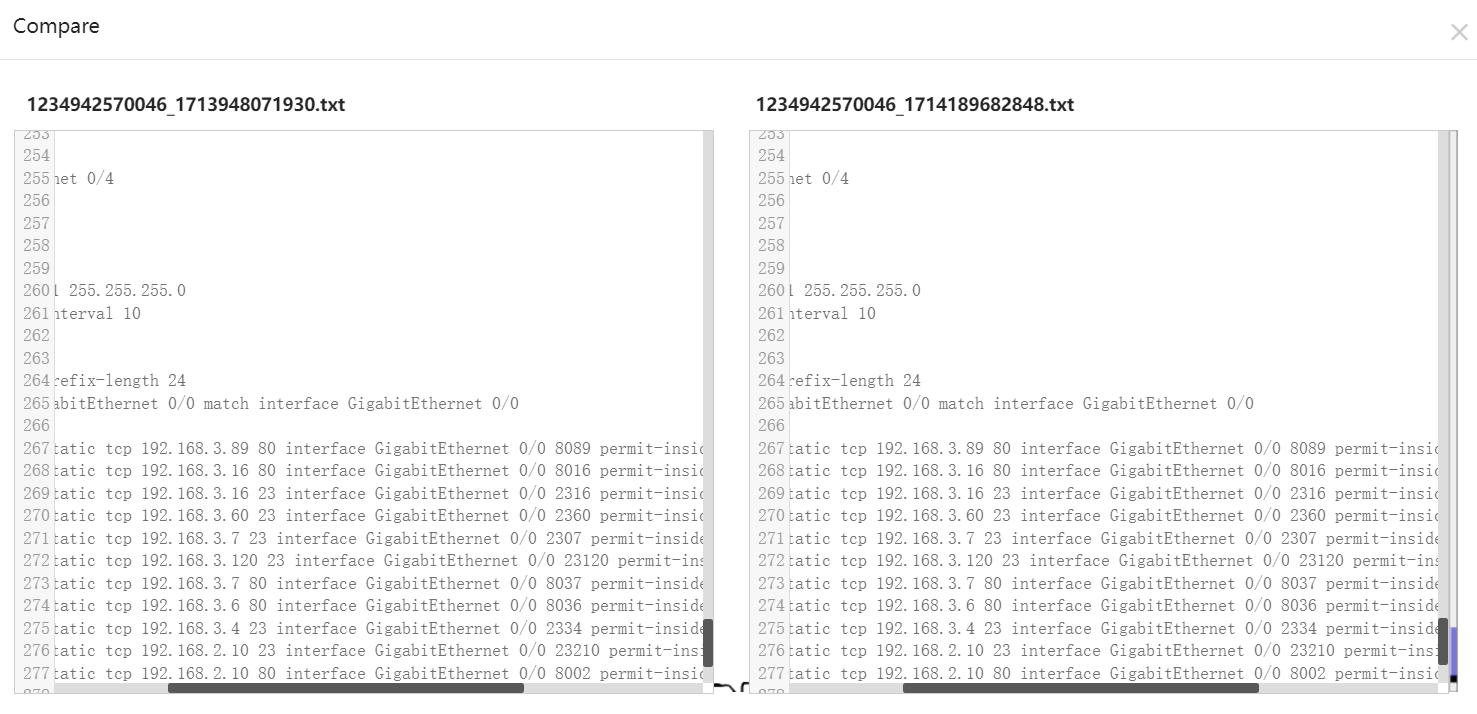
Select two records, and click Compare to compare the differences.
Description can be edited. Click Details in the Action column to check the backup configuration
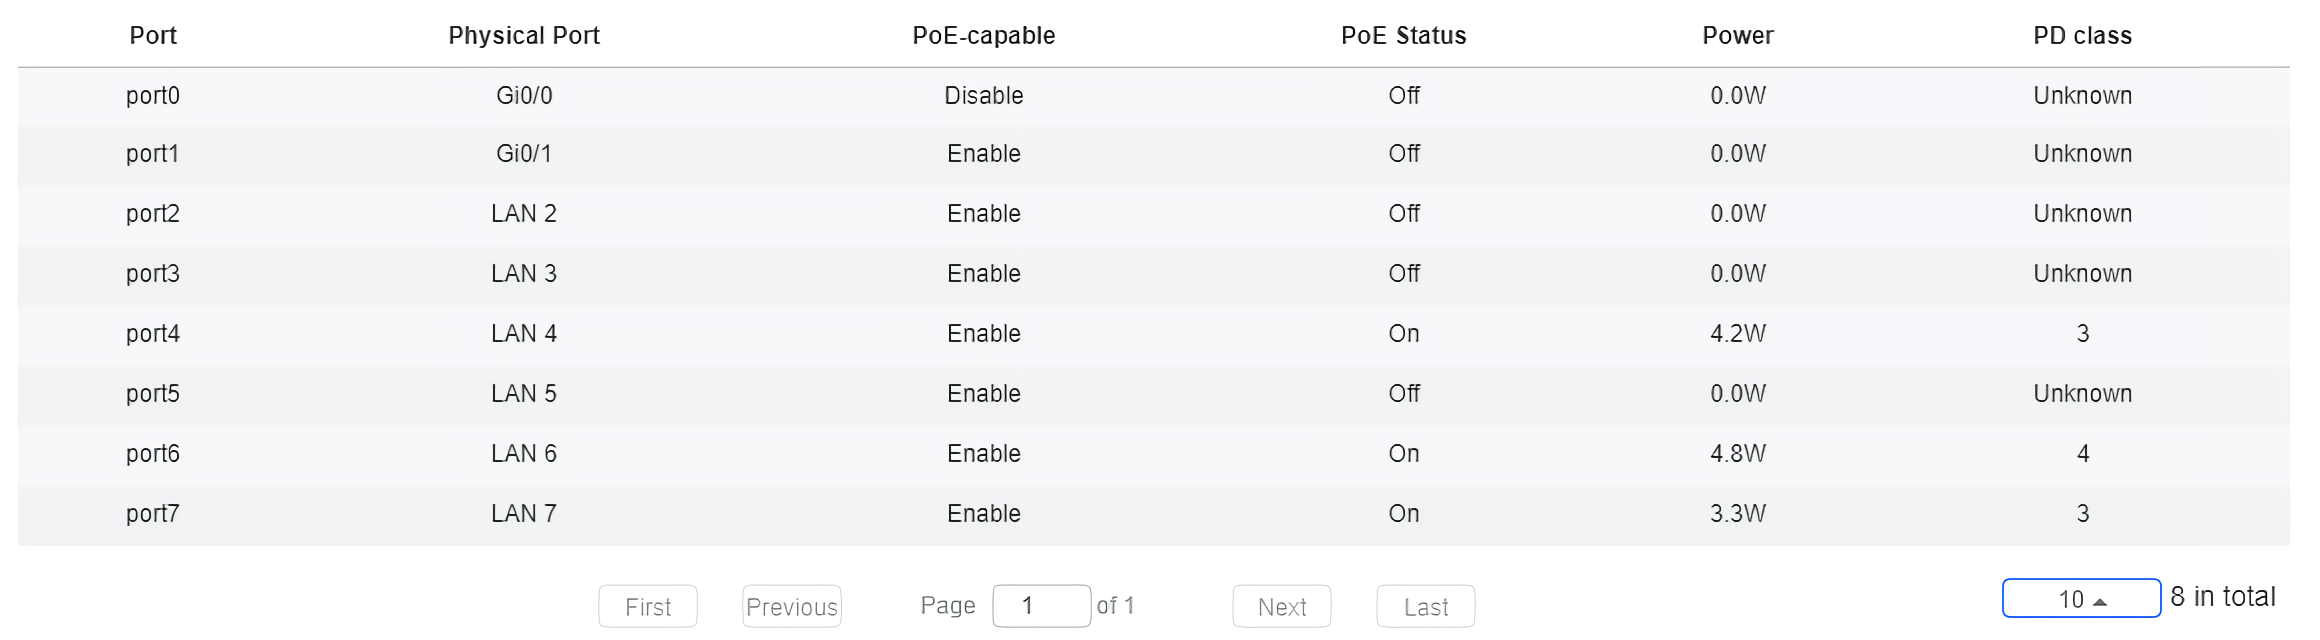
PoE configuration includes the port, physical port, PoE-capable, PoE status, power and PD class.
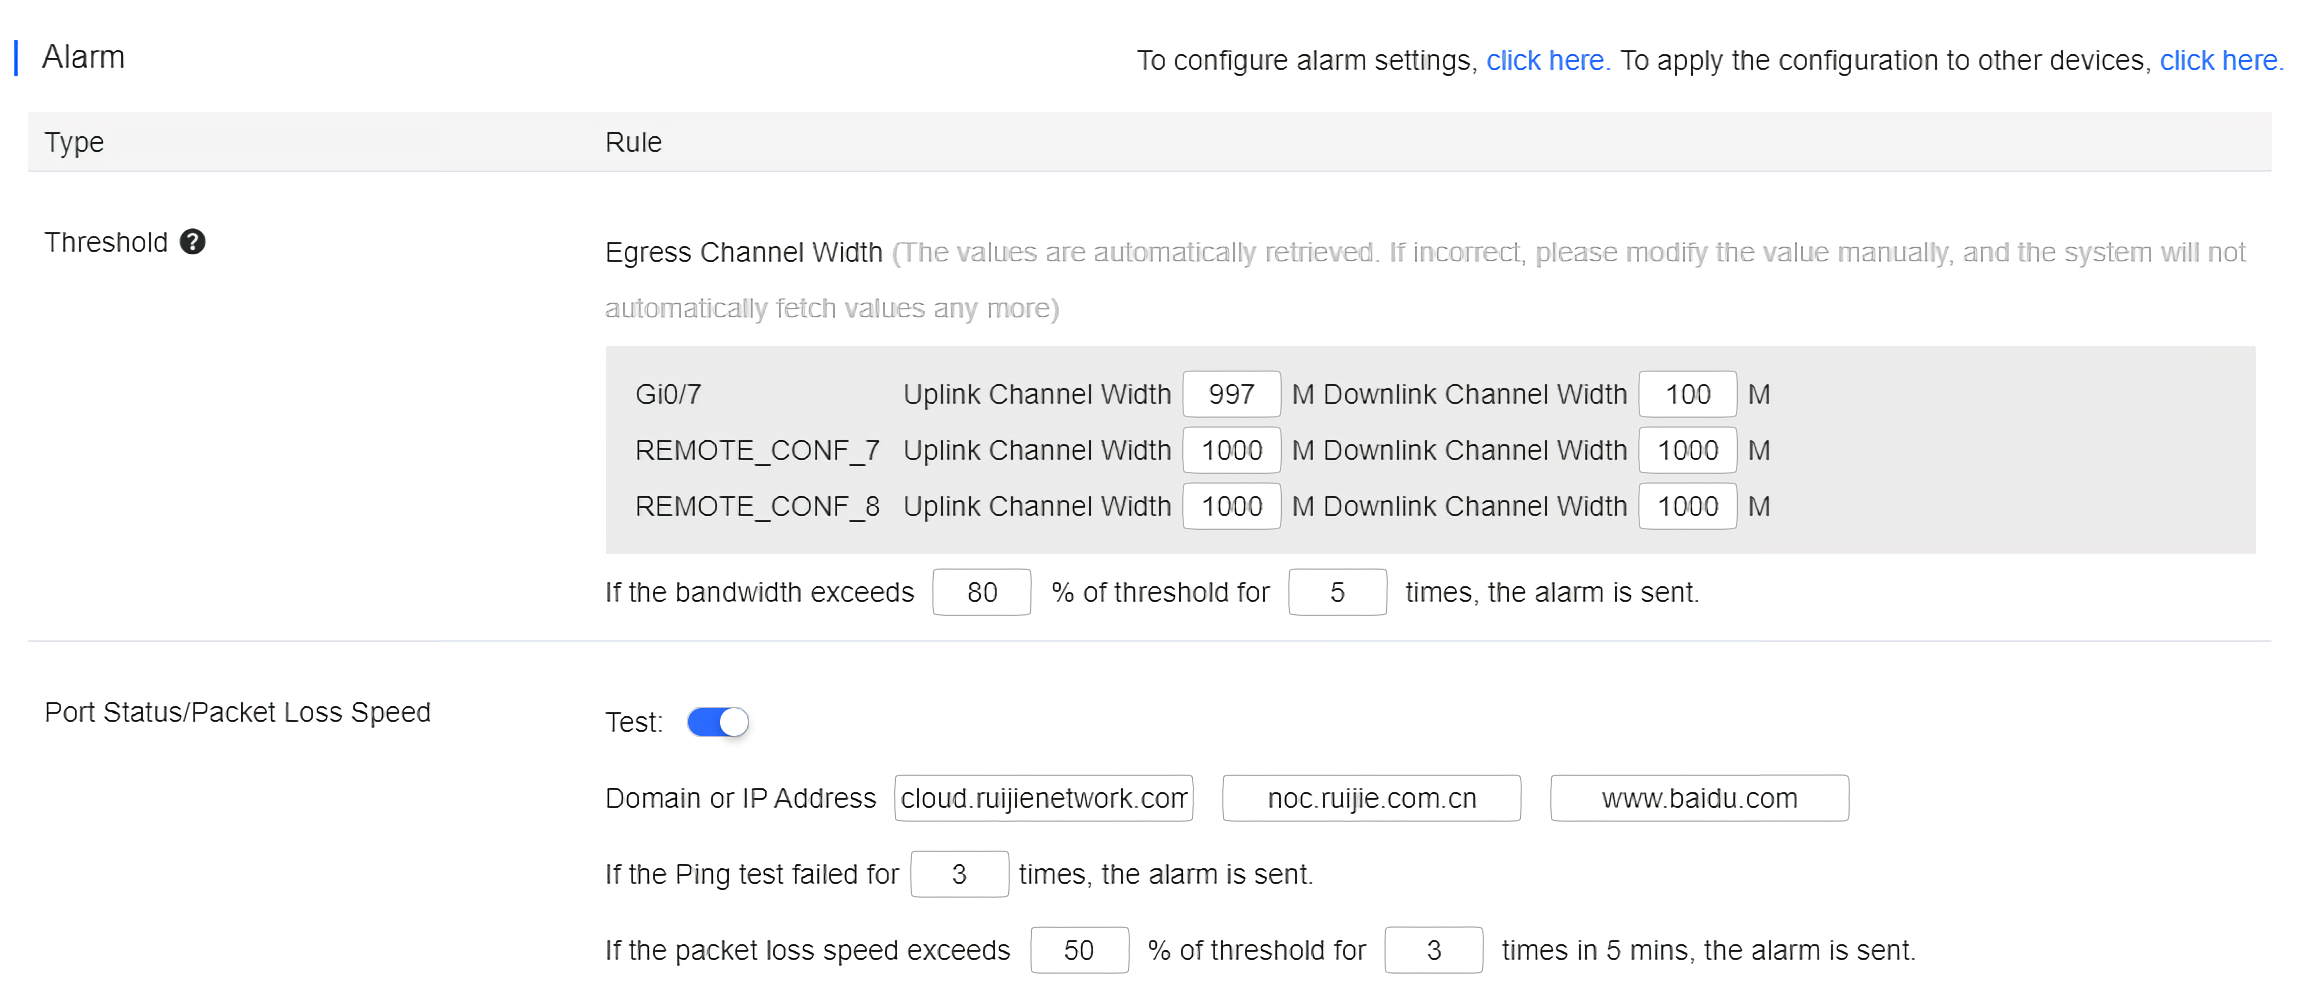
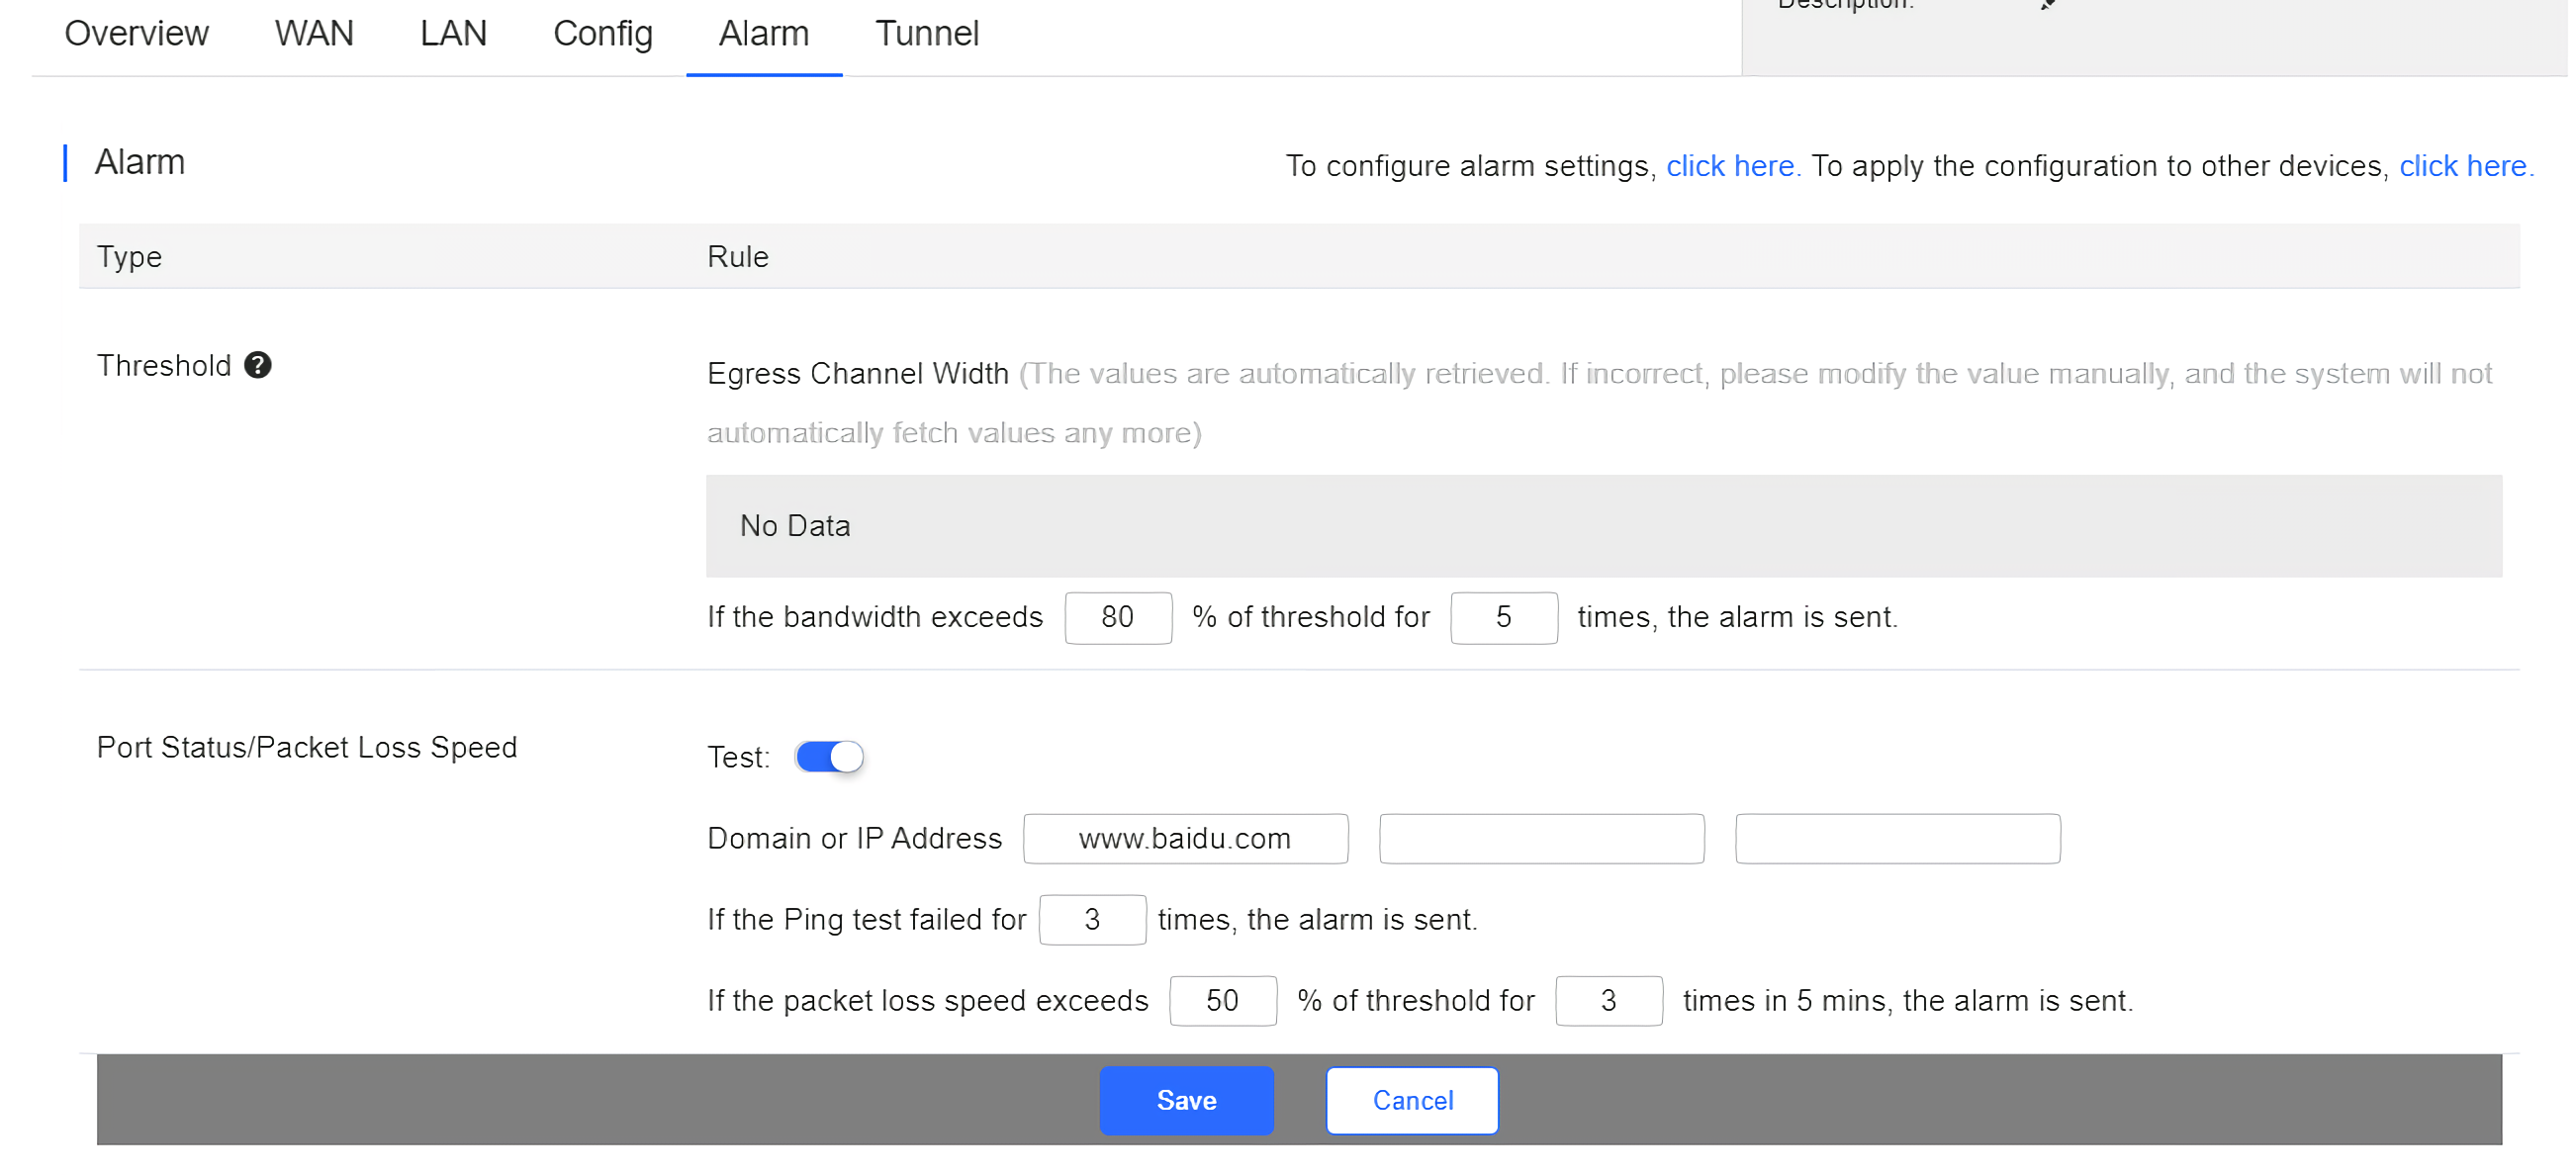
Insufficient bandwidth: When the bandwidth exceeds the specified percentage of threshold for several times, the alarm is sent. The threshold, times and percentage can be configured manually.
Ping failure: When the Ping test failed for the specified times, the alarm is sent. The times and domain/IP address can be configured manually.
High packet loss rate: When the packet loss rate exceeds the specified percentage of threshold for several times in 5 minutes, the alarm is sent. The times and threshold can be configured manually.
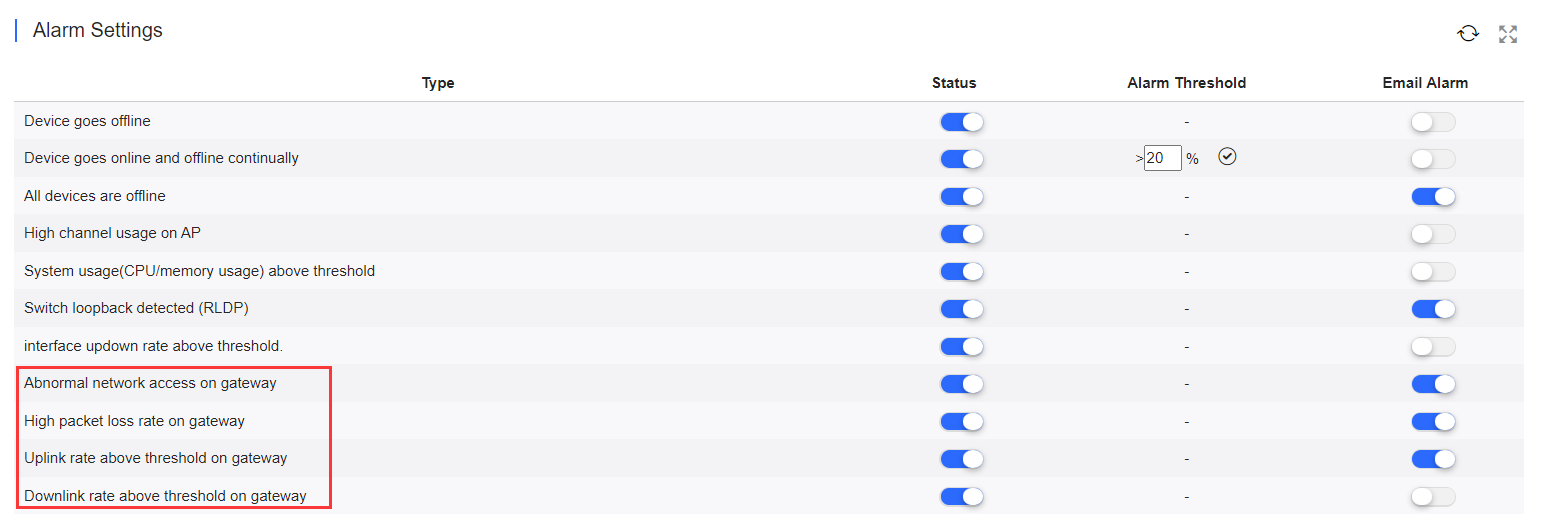
Besides, the corresponding alarm should be enabled in the Alarm Settings page. For insufficient bandwidth, the alarm types are Uplink rate above threshold on gateway and Downlink rate above threshold on gateway; for Ping failure, the alarm type is Abnormal network access on gateway; and for high packet loss rate, the alarm type is High packet loss rate on gateway.
After changing the configuration, click Save below.
When the modified bandwidth and the actual bandwidth do not match, click Fetch Channel width to check the actual bandwidth which will then be set as the threshold.
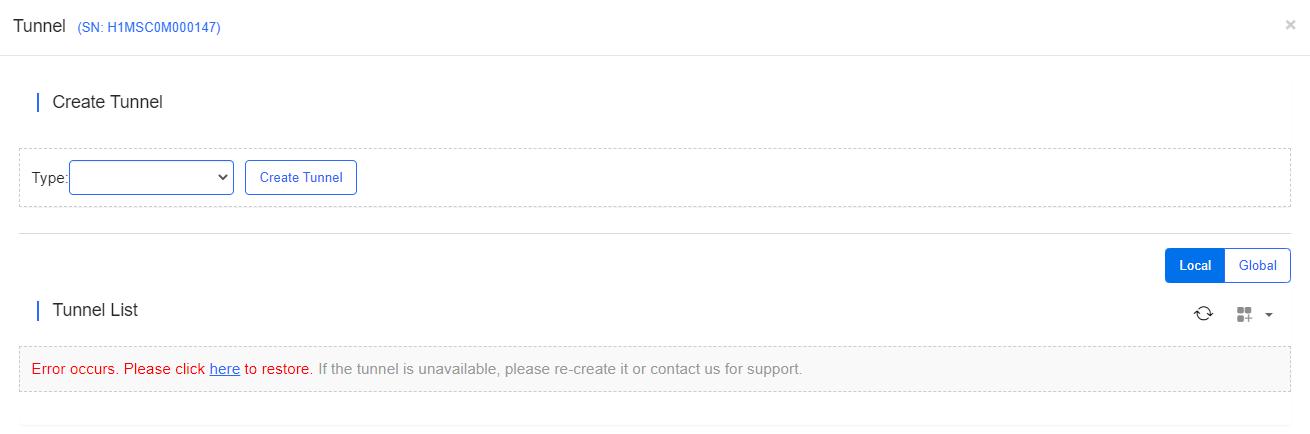
Select the tunnel type and click Create Tunnel . The tunnel types include Telnet , eWeb and SSH.
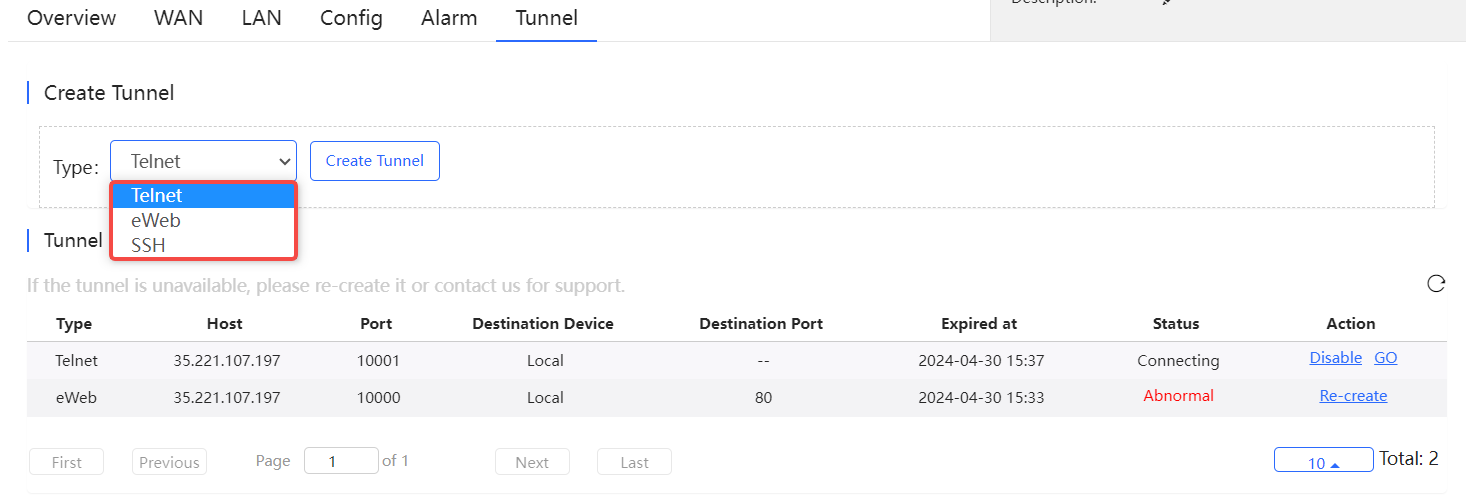

Tunnel information includes tunnel type, host, port, destination device, expiration time and status. Click Re-create in the **Action ** column to re-create a tunnel.
(1) Select a network and then click Add.
(2) Enter the SN, Alias and Web Password, and click OK to add a gateway to the network. Only one gateway can be added to a network.
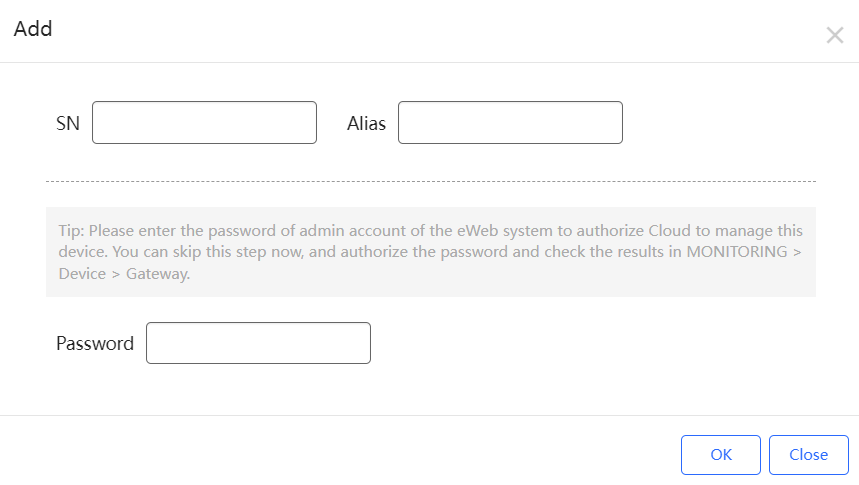
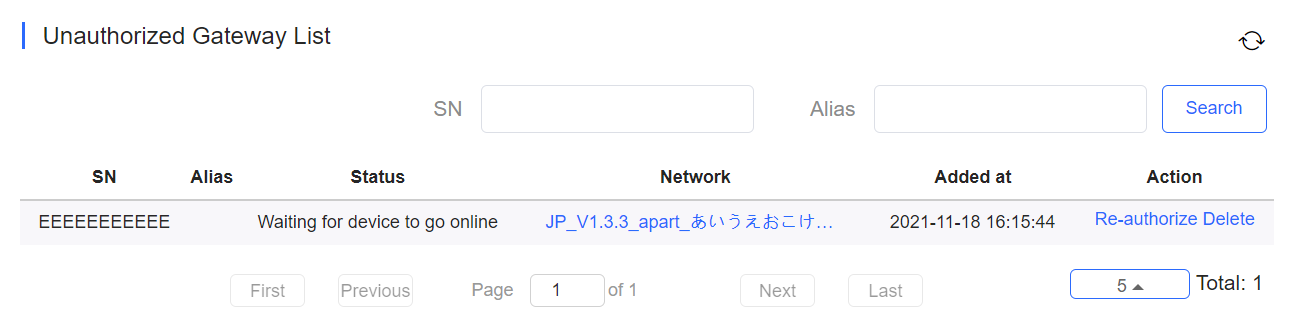
Before a gateway is authorized, it is displayed in the Unauthorized Gateway List . If authorization fails, you can click Re-authorize in the Action column to re-enter the Web password to re-authorize the device.
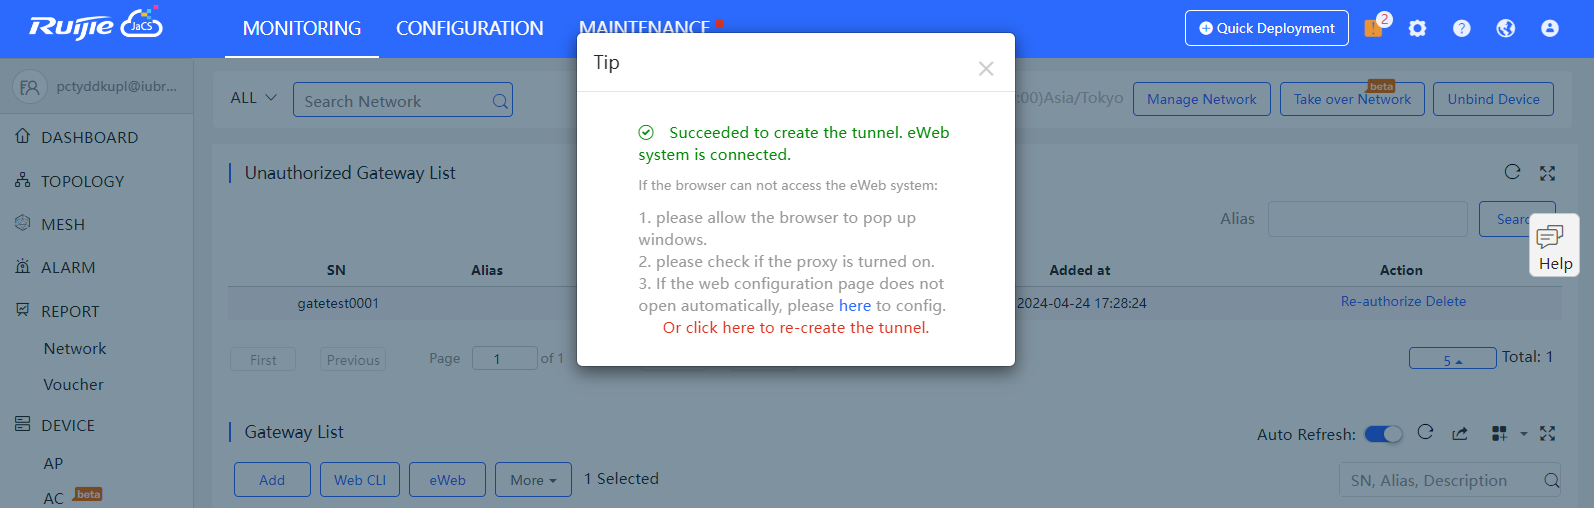
Select the device to be managed by eWeb, and click eWeb.
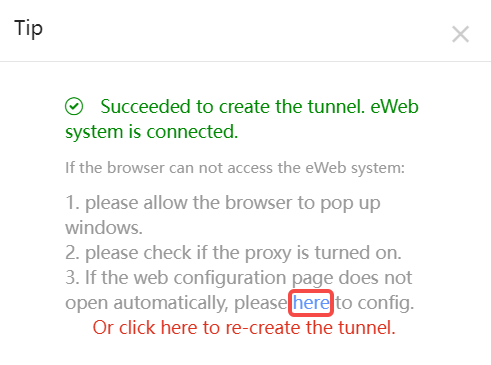
The system will try to connect the gateway and automatically open the eWeb page in a new window.
If a tunnel is created successfully but the eWeb page does not automatically open, the system will pop up a message. The user can manually click here to open the page.
Select the device to be managed by CLI command, click Web CLI. The Web CLI page provides commonly-used CLI commands on the left. Click the command, or manually enter the command and click Send.
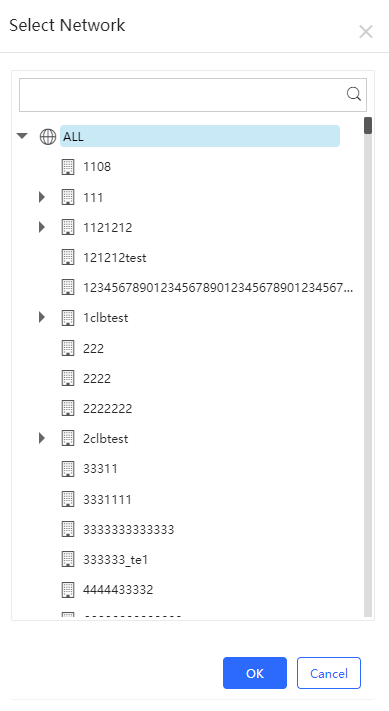
Select the device in the Gateway List , click More > Move to , select the new network and click OK .
Select the device in the Gateway List, click More > Reboot and click OK .
The user can create a Web-based tunnel to enter the eWeb system of a gateway for more monitoring and management functions.
Note: If any security system exists in the network, such as a firewall, the traffic of destination TCP port 10000-12000 should be permitted.
Select the device for tunnel management, and click More > Tunnel.
On the Tunnel Management page, WEB, Telnet and SSH types can be selected or you can customize the tunnel configuration. The Tunnel List displays the tunnels already created.
Select the device in the Gateway List, click More > Delete and click OK.
全部评论