The Switch List displays basic device information, including the online/offline status, SN, MAC, alias, management IP & public IP, offline time, network, model, firmware version and description.

The Switch List automatically refreshes every minute. Click  to enable/disable the auto refresh function.
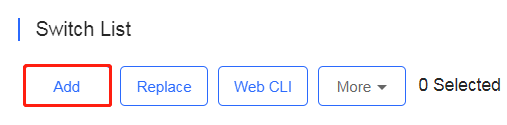
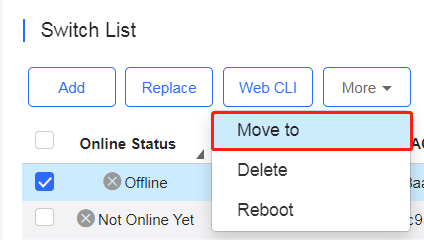
Above the list is the Add Switch and Web CLI function. Click  to display the Move to, Delete, and Reboot functions. For more information, refer to Basic Switch Operations.
The Search function supports fuzzy queries based on the serial number, alias and description, and also supports queries based on online/offline status.
Click the serial number in the device list to open the details page of a single device. The page displays detailed device information, including the port panel, basic information, overview, ports, config, PoE and diagnosis.

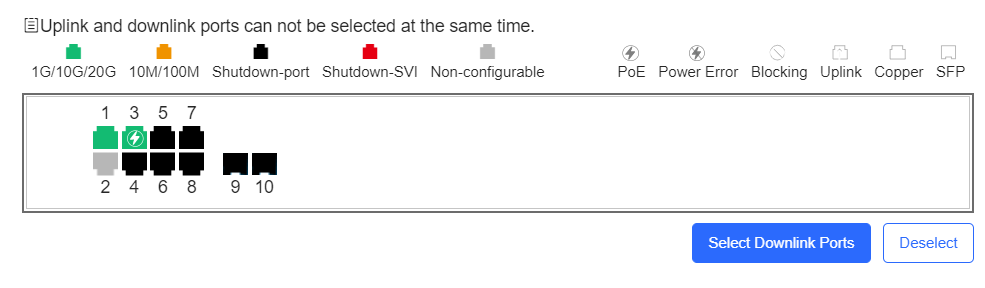
The port panel imitates the actual switch panel, displaying the port type, status and speed.
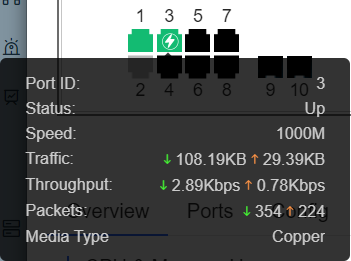
When you point the mouse to a port, the traffic, speed and other information of the port will be displayed.
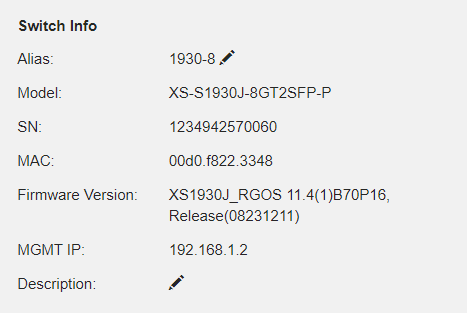
Switch information includes the alias, model, SN and other information. Alias and Description can be edited.
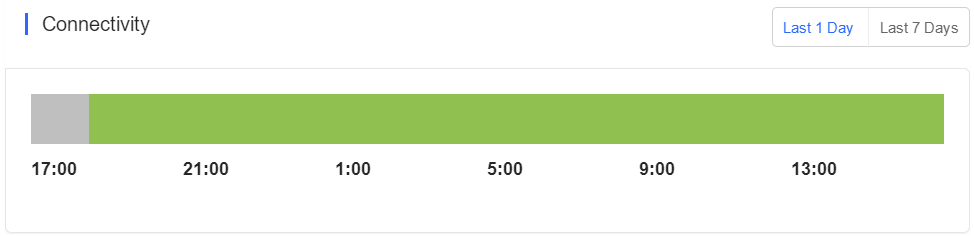
Connectivity refers to the connectivity (online status) between Switch and Cloud Service within a period (1 day or 7 days).
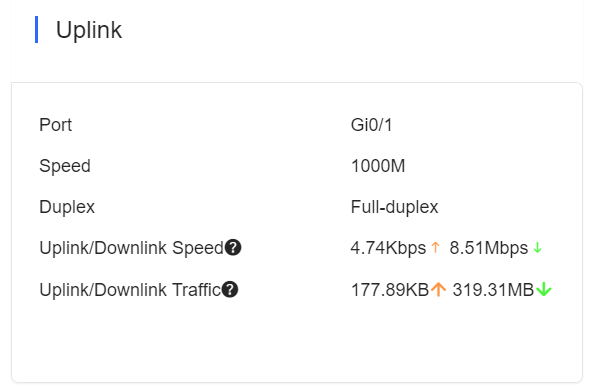
Uplink information includes the port, speed, duplex, uplink/downlink speed and uplink/downlink traffic.
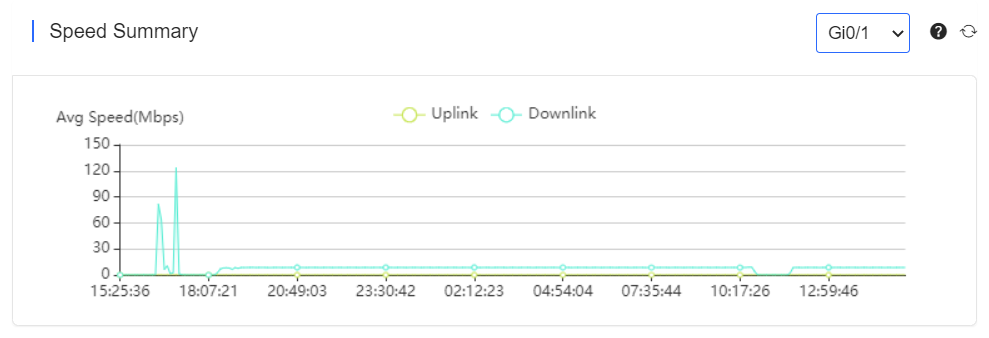
Speed summary includes the uplink/downlink speed summary over the past 24 hours.
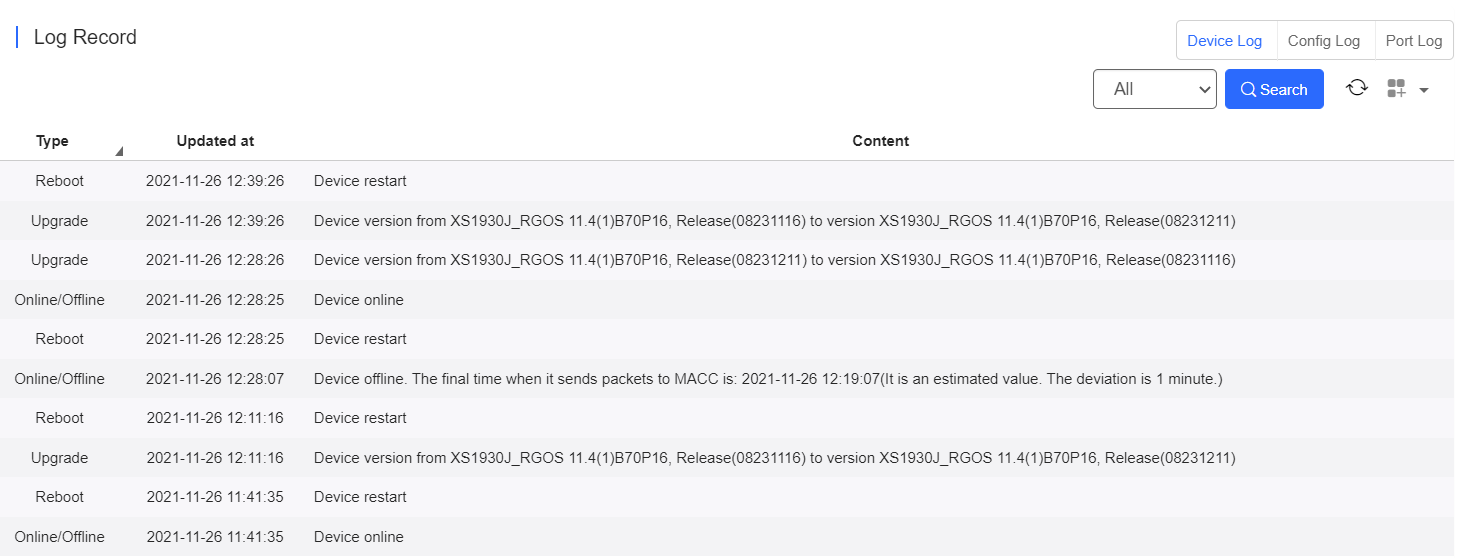
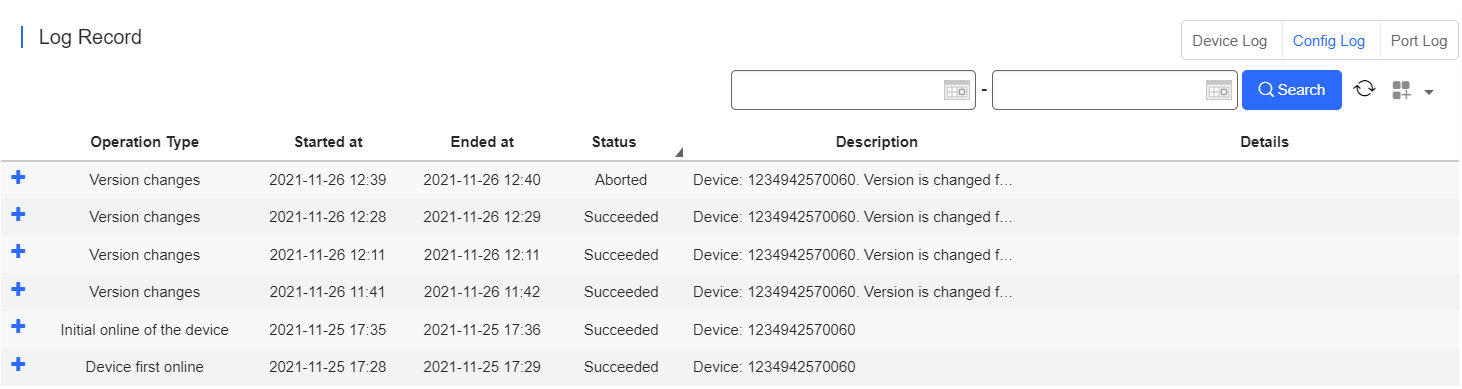
The device log records the historical operations, including online/offline, restart, upgrade, and VLAN change, and supports queries based on log type and time.
The config log records the historical configuration delivery, and supports queries based on status and time.
Select one or multiple ports in the port panel to display and edit the port configuration, including admin status, duplex mode and speed.
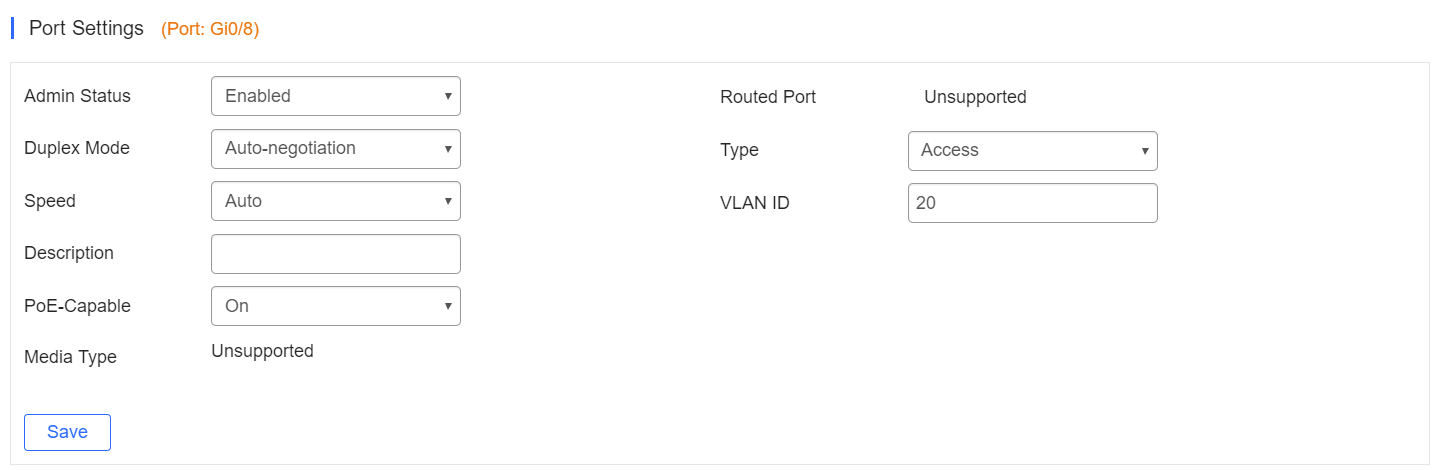
Port list includes the information of all ports, including port ID, admin status, port status, duplex mode, port type, VLAN ID and PoE status, and support queries based on admin status, port type and PoE status.

VLAN list includes the VLAN ID and the correspondingly ports.

Click Add to add VLAN IDs in batches.
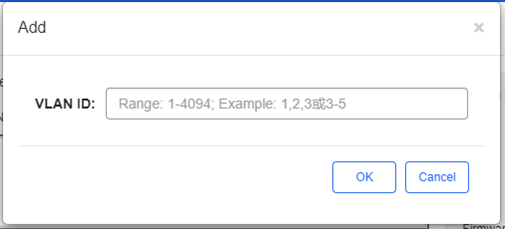
If a VLAN ID you add exists, it will be ignored.
You can use the following two methods to add VLAN IDs in batches:
(1) Use commas (,) to separate multiple VLANs. Up to 10 VLANs are supported.
(2) Use an end dash (-) to indicate a VLAN range. No limit.
Note: Do not support to use commands and end dashes at the same time.
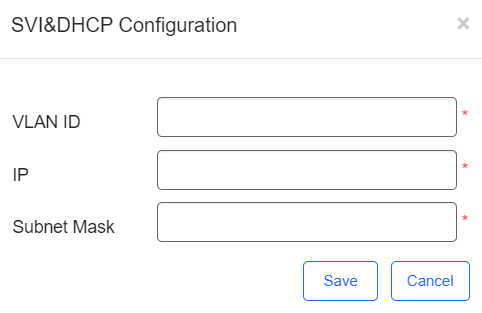
SVI & DHCP information includes VLAN ID, SVI and DHCP pool name. You can add, edit or delete the SVI or DHCP configuration.

Click Add to configure the IP and subnet mask of a VLAN, and configure the name, IP segment, subnet mask and gateway of DHCP service.
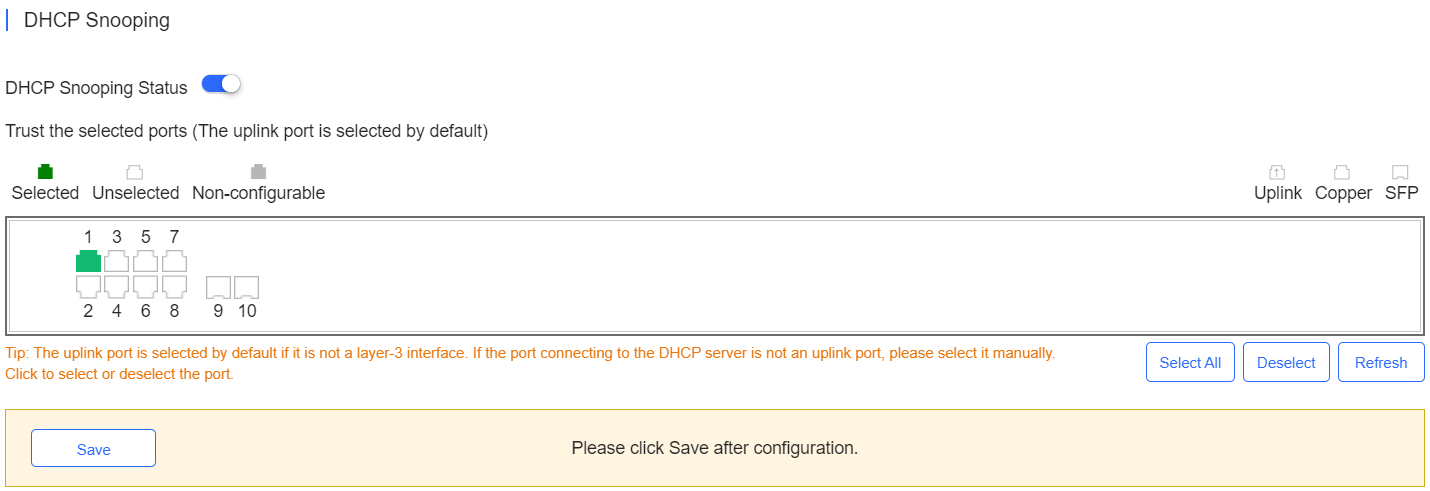
Enable DHCP Snooping Status, select ports and click Save. The uplink port is selected by default if it is not routed port. If the port connecting to the DHCP server is not an uplink port, please select it manually.
Enable RLDP Status, select one or multiple ports, choose the troubleshooting method for a loop, and click Save.
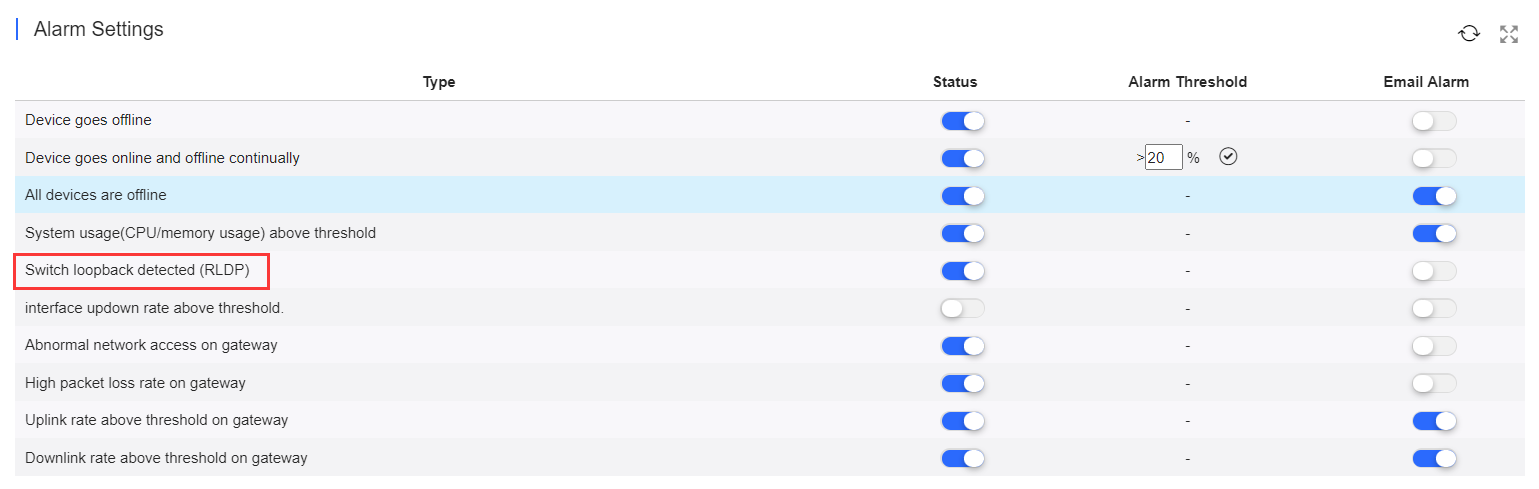
The troubleshooting methods include Warning, Warning and Block, Warning and Shutdown, and Shutdown SVI. If Warning is chosen, the Switch loopback detected (RLDP) alarm should be enabled in the Alarm Settings page.
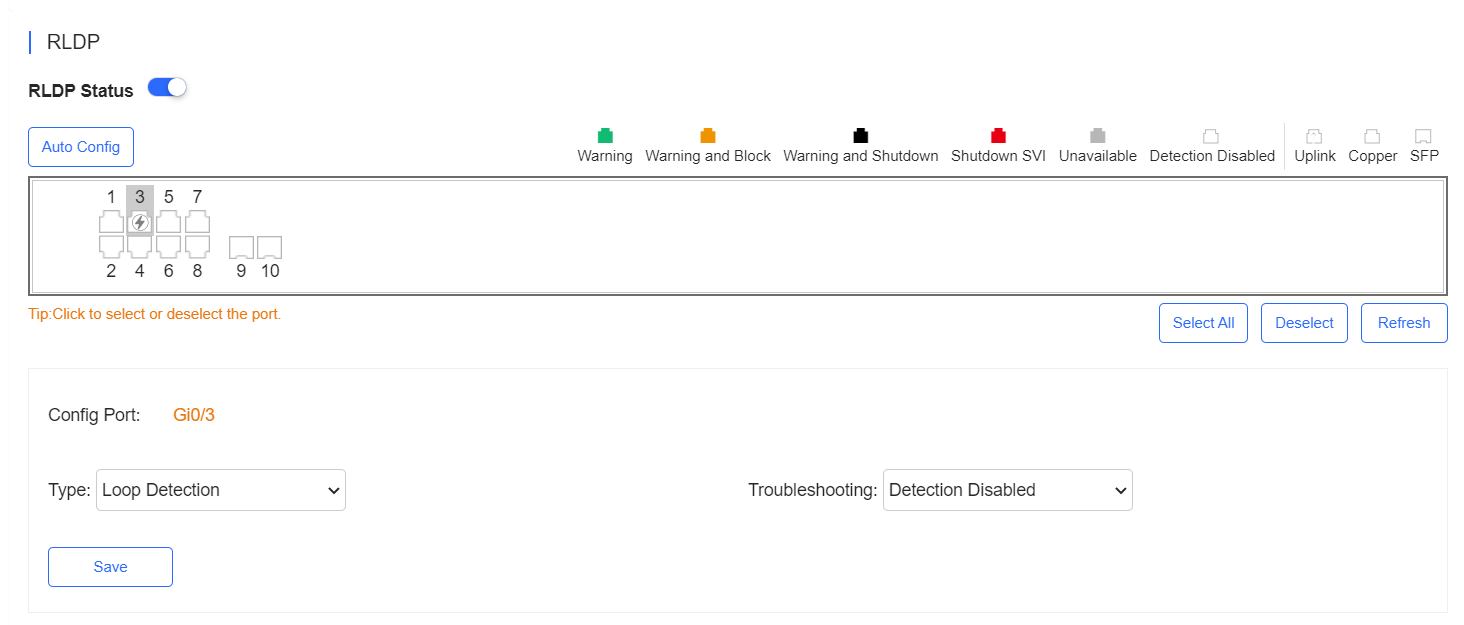
Click Auto Config to enable the default configuration.

Configure the admin status and login password of the eWeb service.

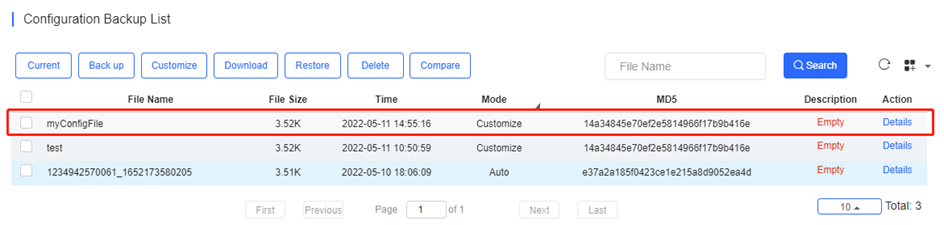
The backup records include configuration file name, size, time, mode and MD5.
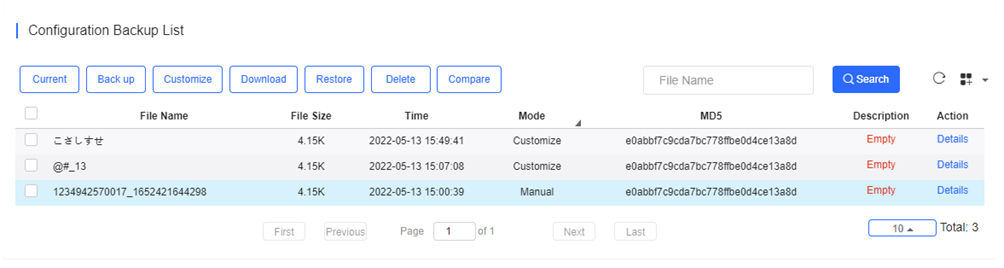
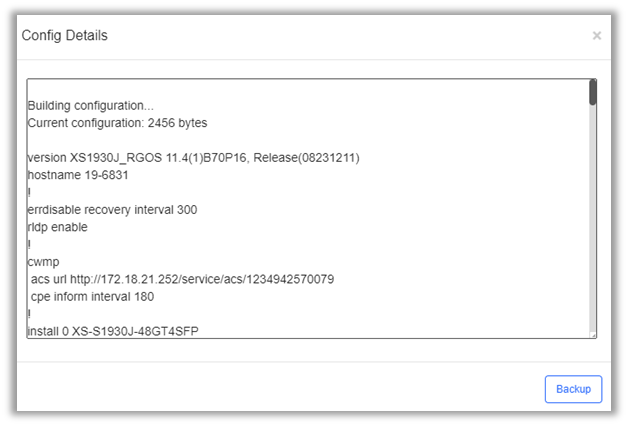
Click Current to display the current configuration. Click Backup in the Config Details page to back up the current configuration.
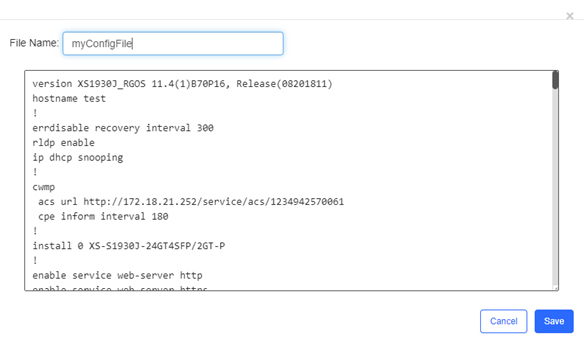
To customize a configuration file, select an existing file and click Customize.
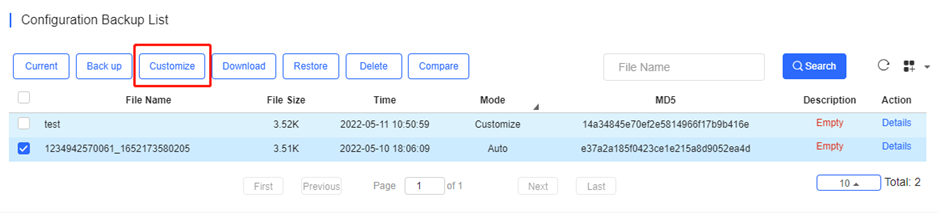
Select one record, and click Download to download the configuration file.
Select one record, and click Restore to restore the current configuration.
Select one or multiple records, and click Delete to delete the backup record.
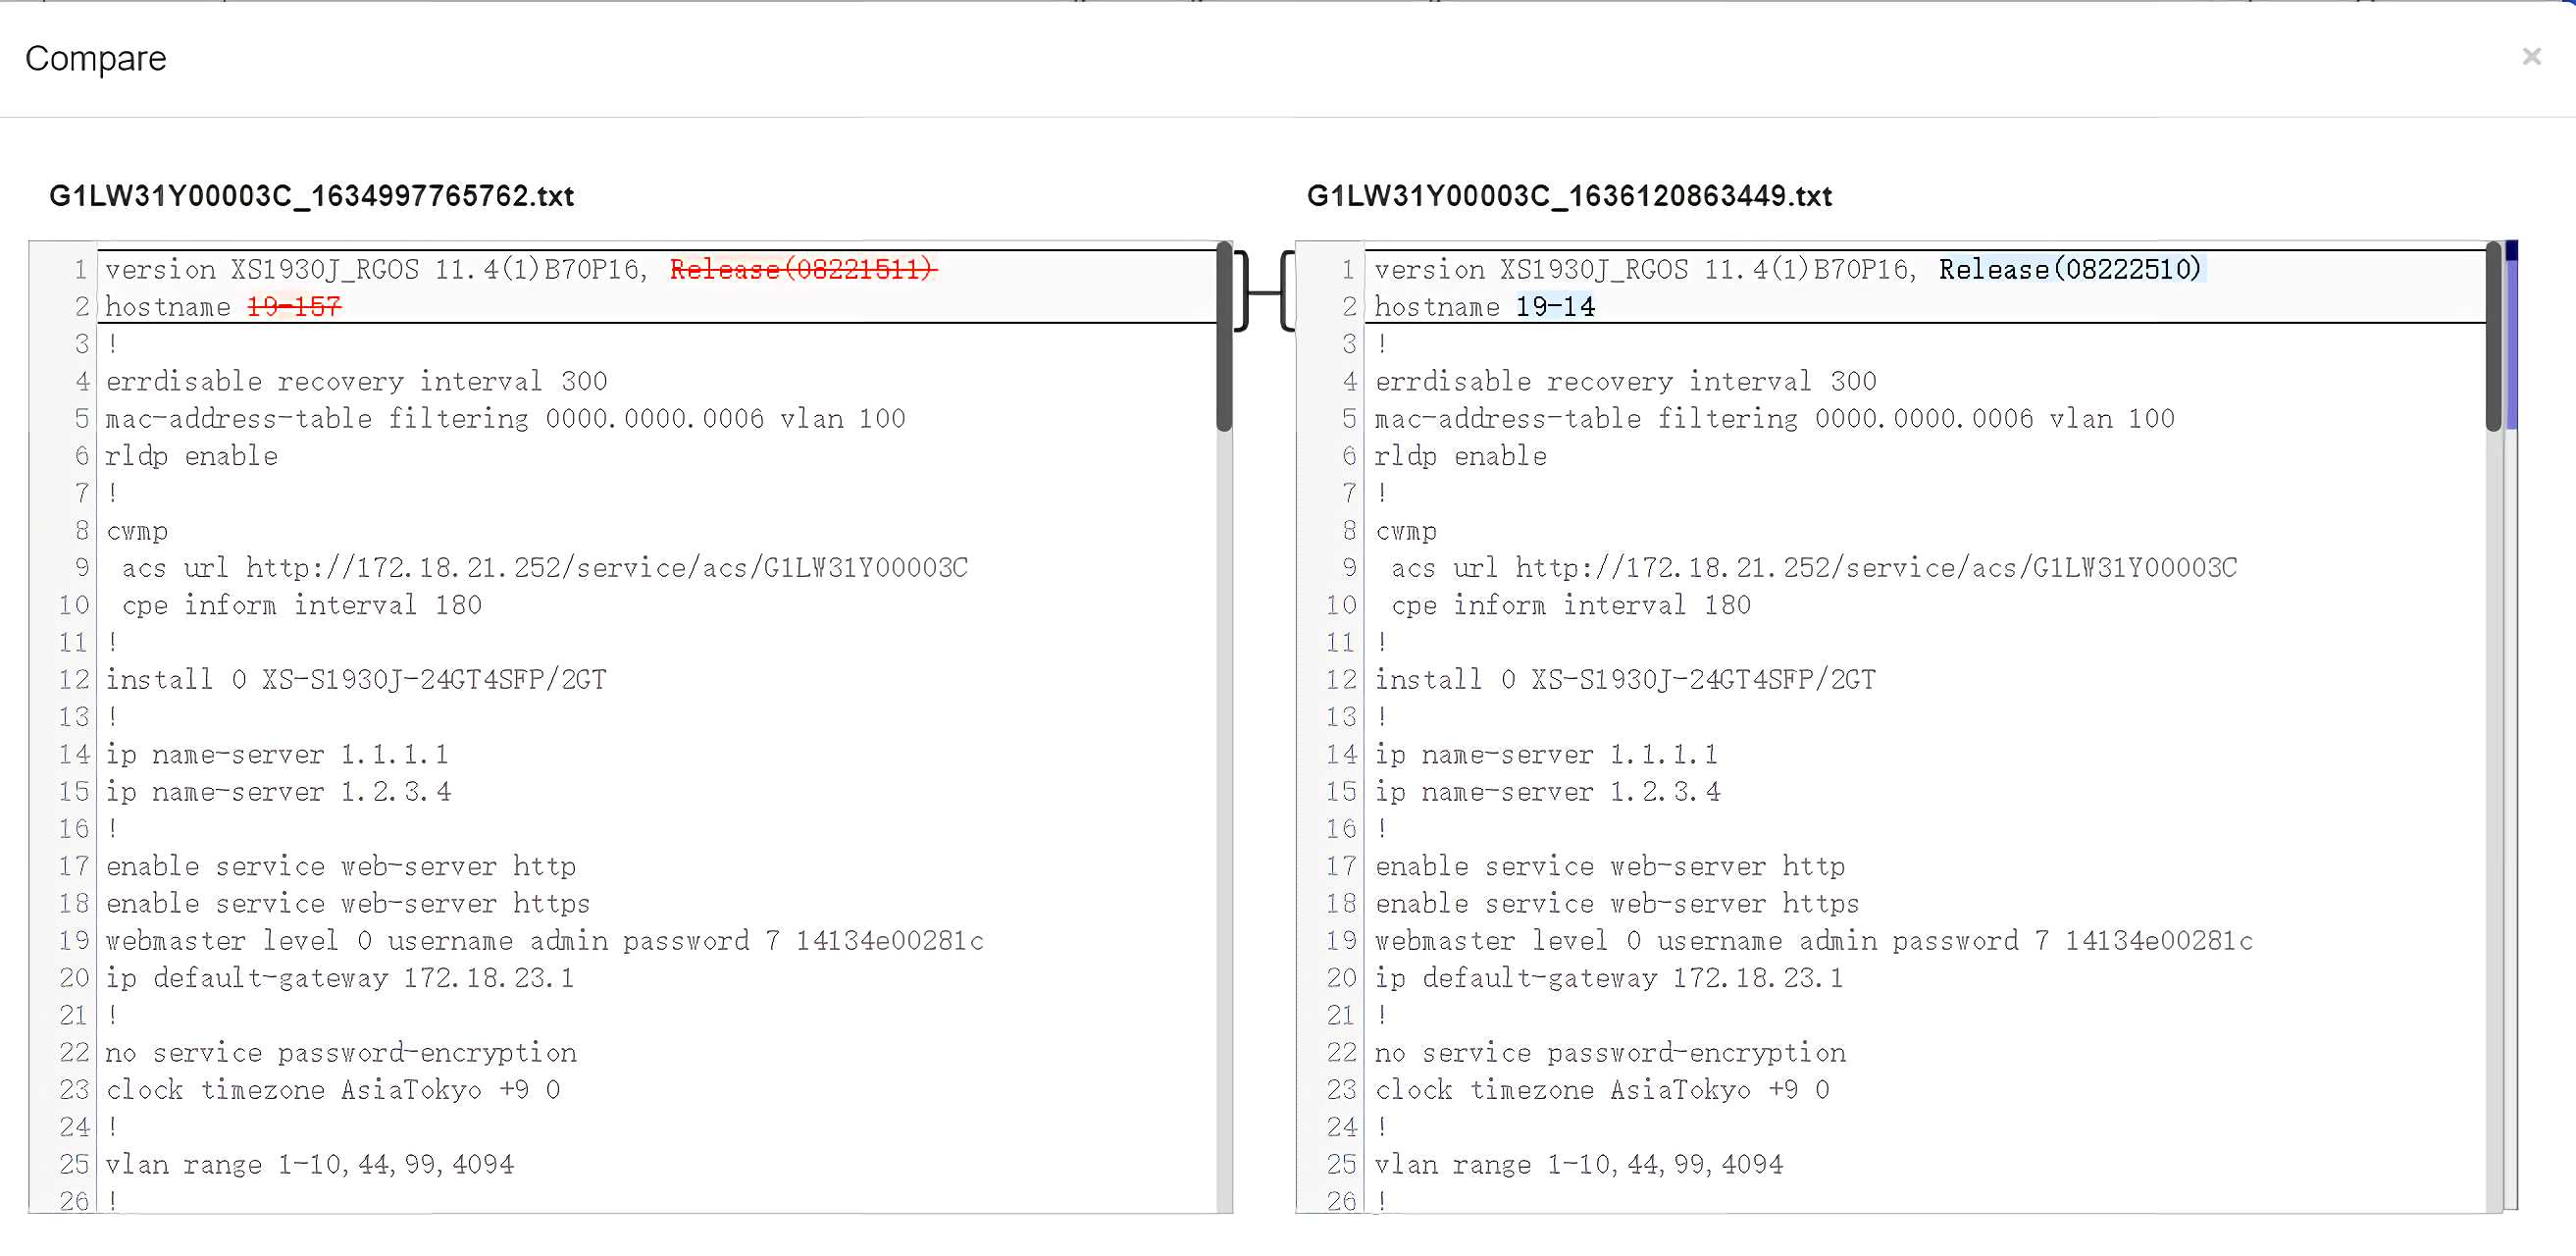
Select two records, and click Compare to compare the differences.
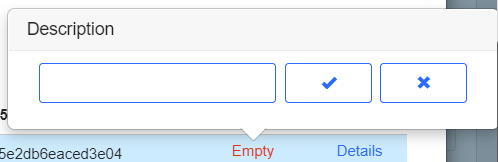
Description can be edited. Click Details in the Action column to check the backup configuration.
PoE statistics are displayed above PoE Port List, including the total power, current power and time.
PoE configuration includes the port, PoE-capable, PoE status, power, PD class and description.

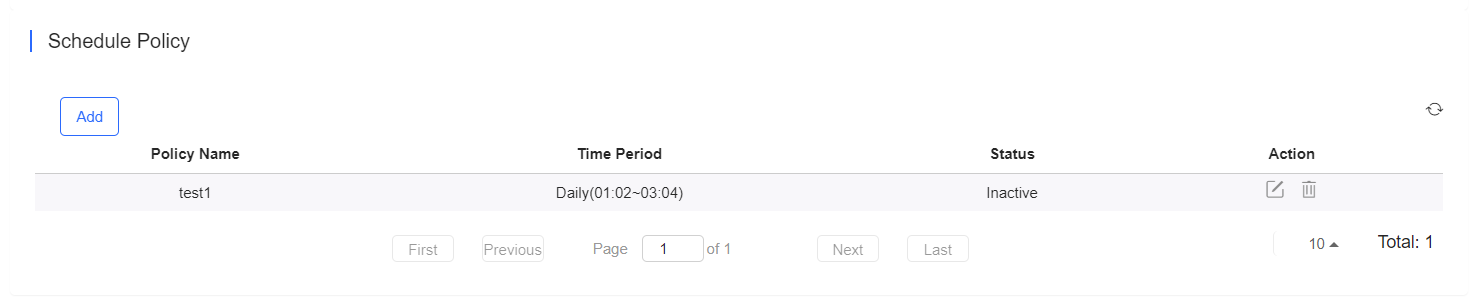
The Schedule Policy displays the time period policy for powering off PoE ports, including the policy name, time period, and status indicating whether the policy has been used on ports.
The Port PoE Setting displays effective port PoE settings, including the power supply priority, maximum power, power supply stop policy.

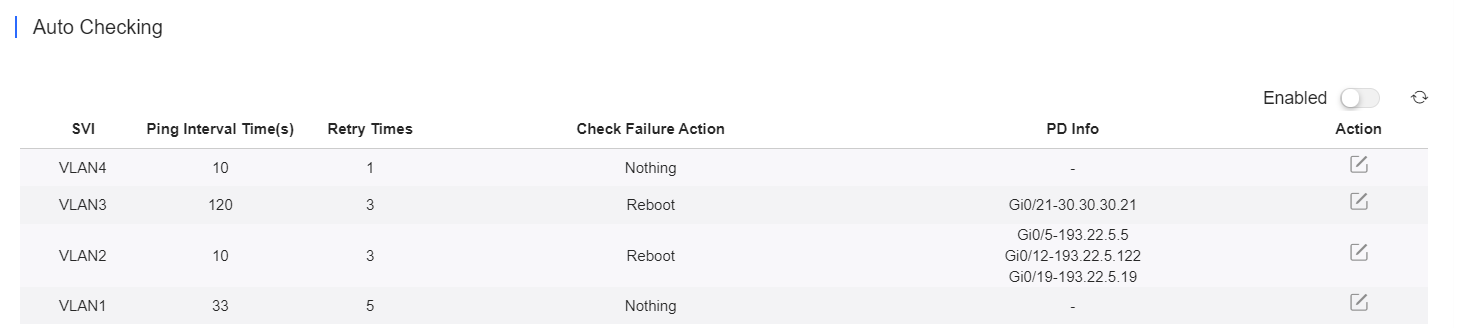
The Auto Checking displays the policy for checking the working status of a PD connected to a PoE port, including the Ping interval, number of retry times, action to be taken upon checking failure and IP address for checking PDs.
There are two types of fault diagnosis: PoE Power Supply and SFP Port. Select a port in the panel, click Diagnose.
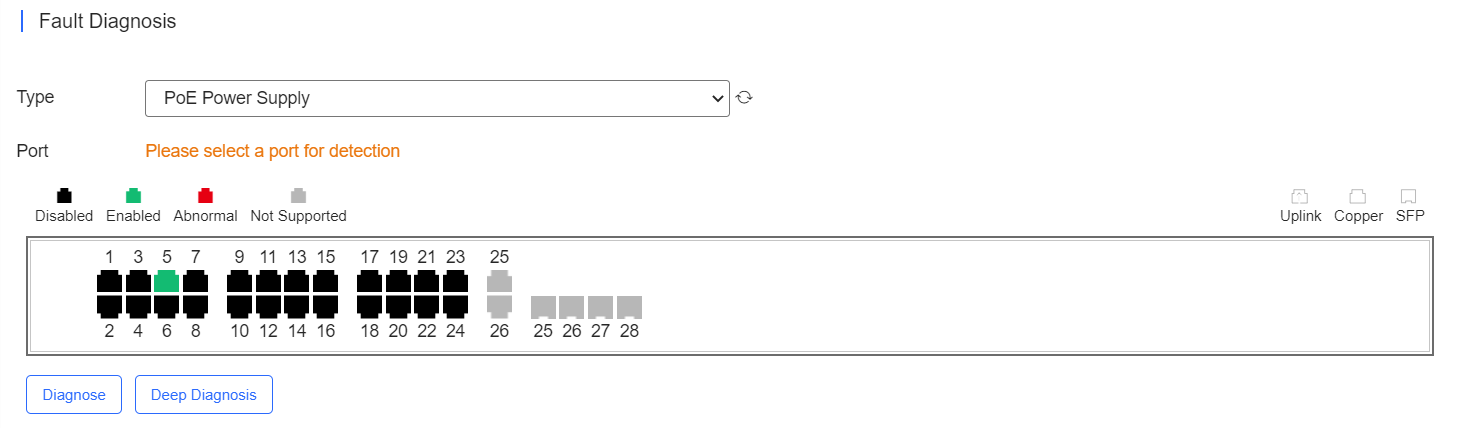
The diagnosis procedure is displayed as below. Then, click History to show the diagnosis history.
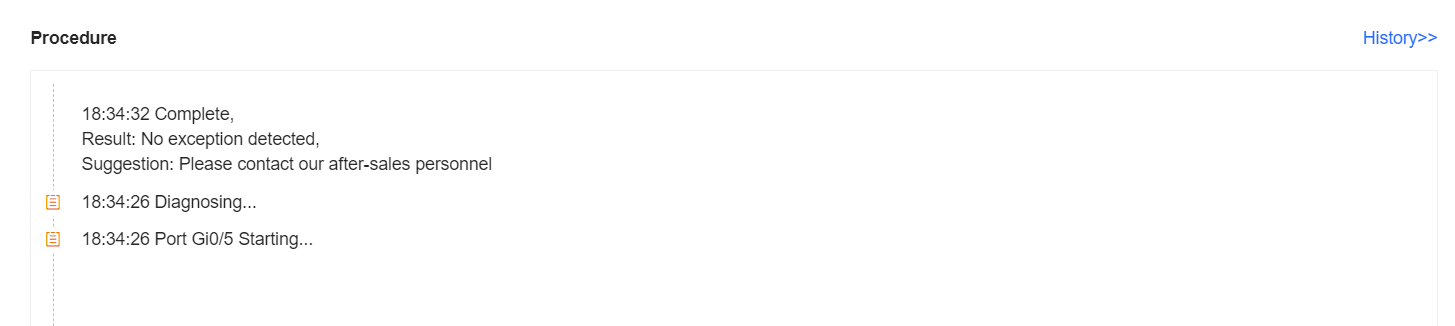
The diagnosis history is displayed.

Select a port in the panel, click Deep Diagnose, and click Diagnose in the PoE Diagnosis page.
Normal diagnosis: The Cloud server delivers CLI commands to collect the switch information, and the diagnosis occurs on the Cloud server.
Deep diagnosis: The diagnosis occurs on the switch, and the results are reported to the Cloud server.

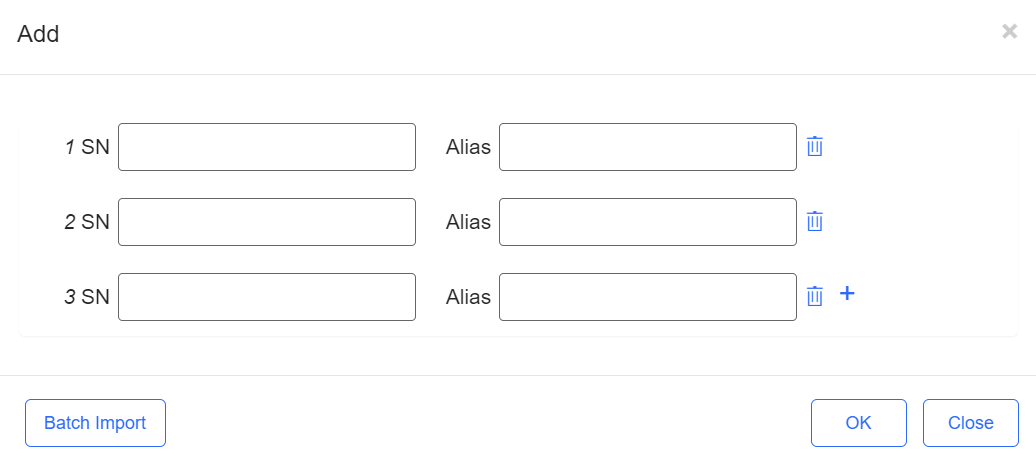
Select the network, and click Add. Both batch import and manual add are supported.
To batch import devices, click Download Template to download the template, enter switch information, and click ‘.xls’ File to import the template.
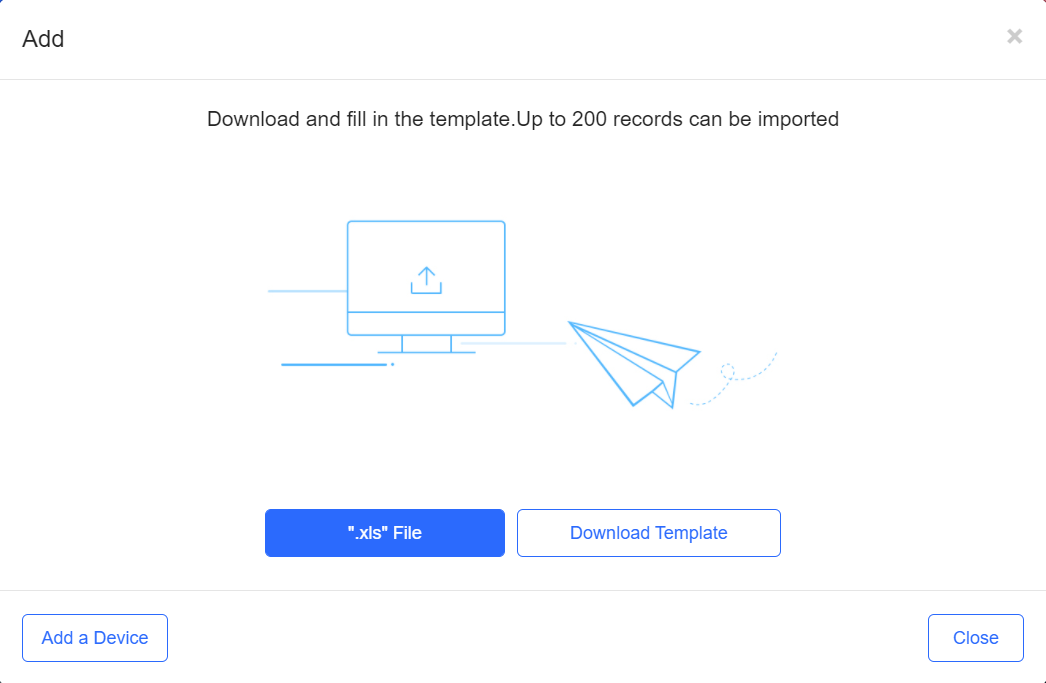
To manually import a device, click Add a Device, enter SN and alias of the switch, and click OK. Click to add multiple switches.
The configuration of old device can be synced to the new device. After the new device goes online, the configuration file of the old device will be delivered.
Step 1: Select an existing device.

Step 2: Click Replace
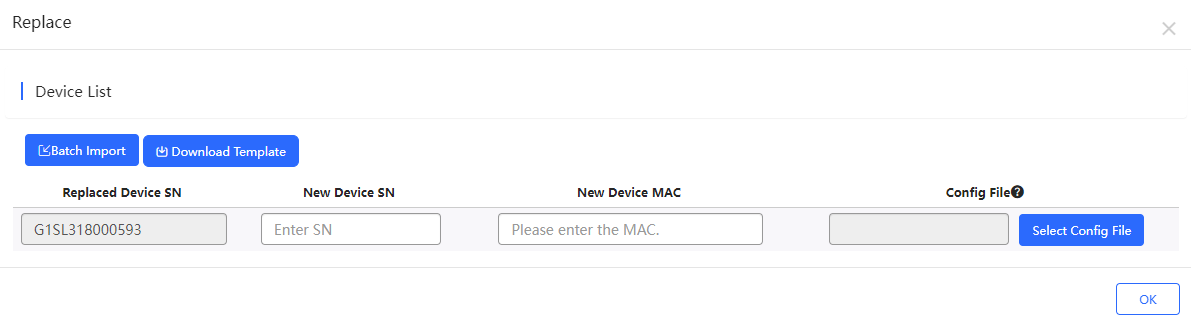
By default, the configuration file of the old device is the latest automatic configuration file, or you can select the history configuration file manually. The MAC of new device is required. The SN and the MAC of device should be consistent, and the models of old device and new device should be the same; otherwise, the replacement cannot be performed.
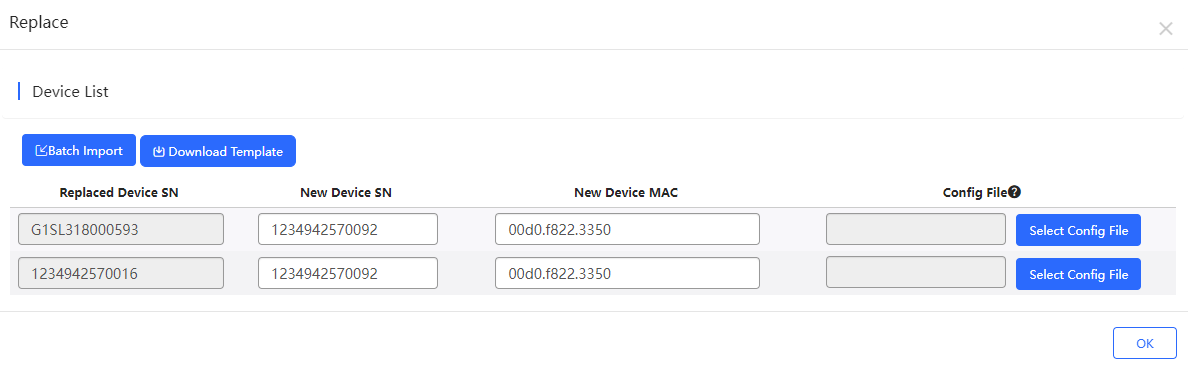
To batch replace switches, click Download Template to download the template and enter the device information.

Click Batch Import to import the template.
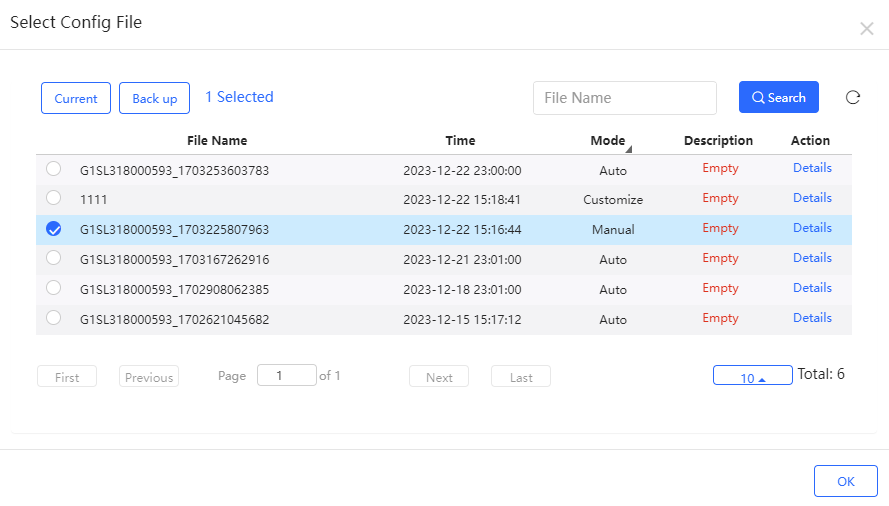
To replace the configuration with the configuration of an existing device, click Select Config File.
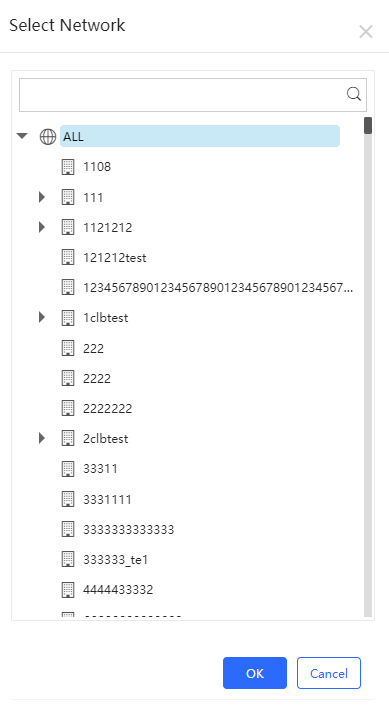
Step 1: Select one or multiple devices in the Switch List, click More > Move to.
Step 2: Select the new network and click OK.
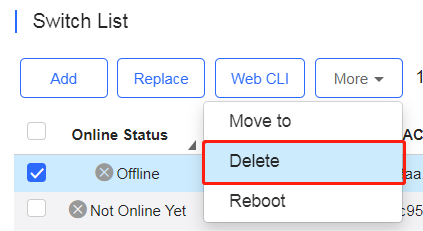
Select one or multiple devices in the Switch List, click More > Delete and click OK.
Select one or multiple devices in the Switch List, and click Reboot.

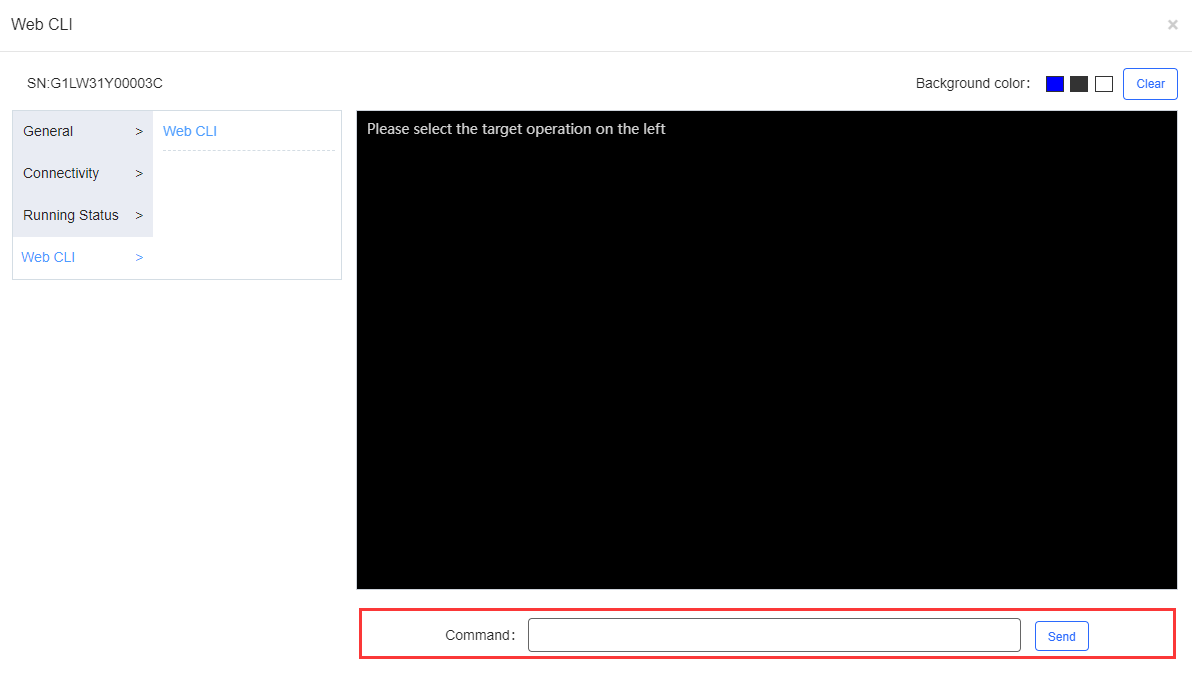
Select one or multiple devices in the Switch List, and click Web CLI. The Web CLI dialog box is displayed, and device information can be queried via the menus in this dialog box. The menus vary with the products.
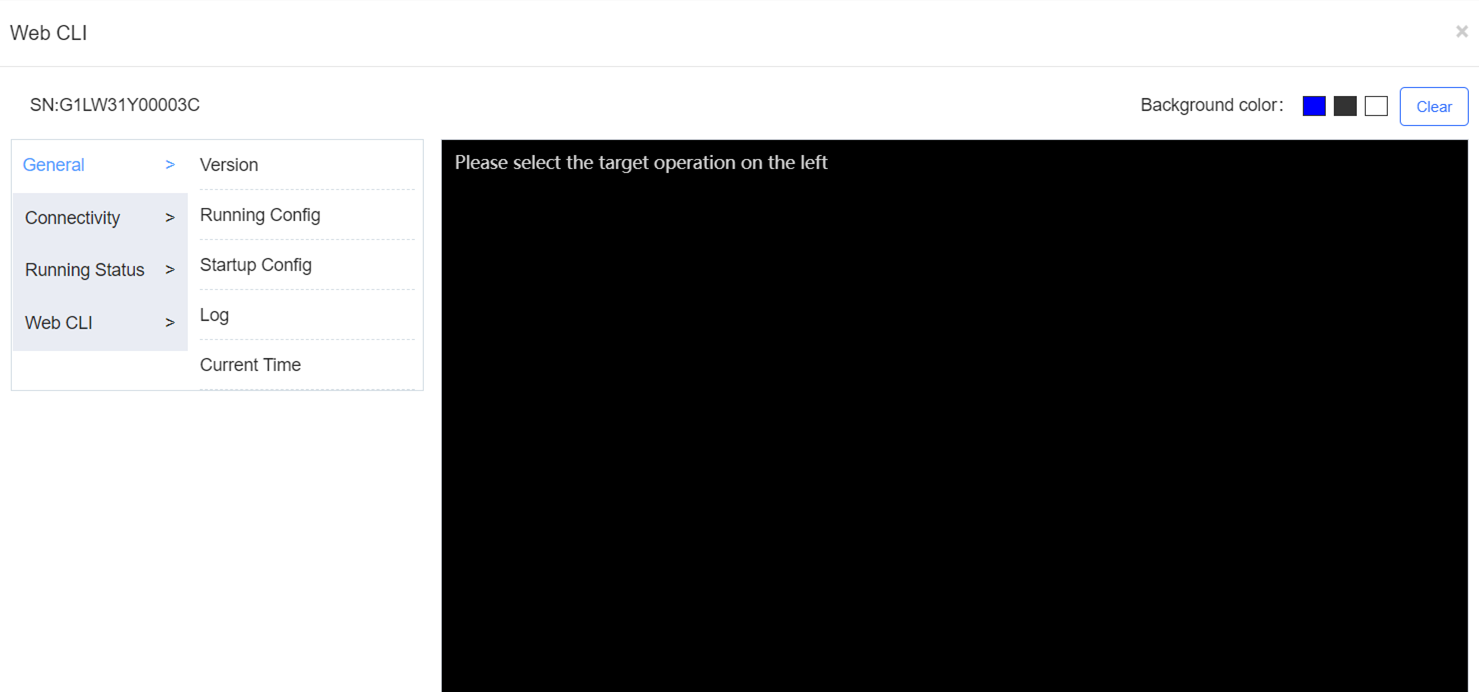
In addition, in the command entry box, the TAB key and question mark (?) both can complete a command.
全部评论