Radio planning can adjust channels and power of APs in a same area network to optimize the channel allocation and power of the APs. Proper RF configuration planning can reduce channel interference, increase channel utilization and improve overall wireless network performance and capacity.
Choose CONFIGURATION > WIRELESS > Radio Planning to open the Radio planning page. Both manual and automatic planning are currently supported.
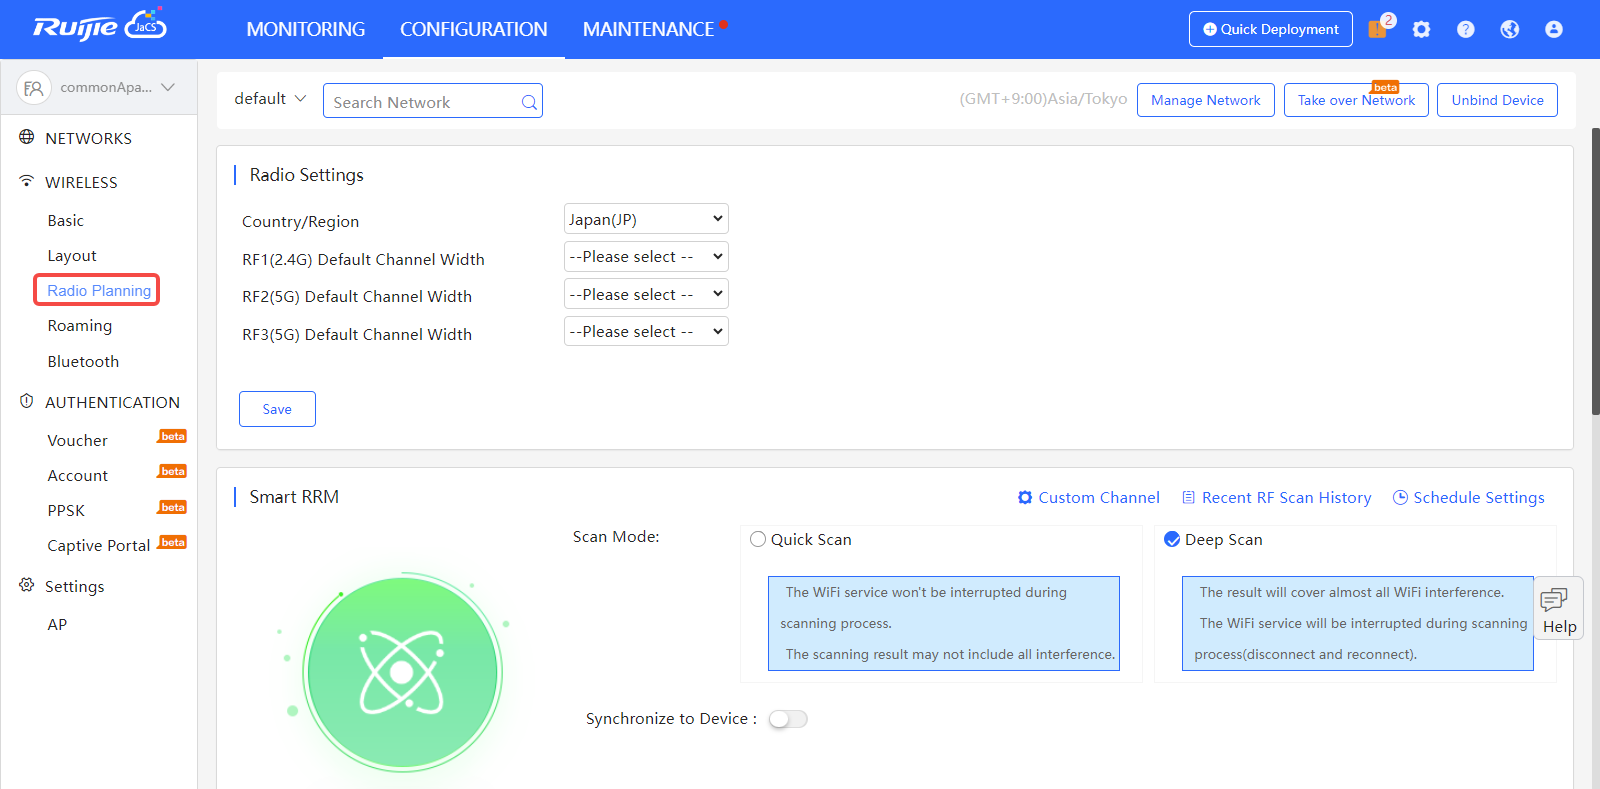
On the Radio Settings page, select the country and channel width.
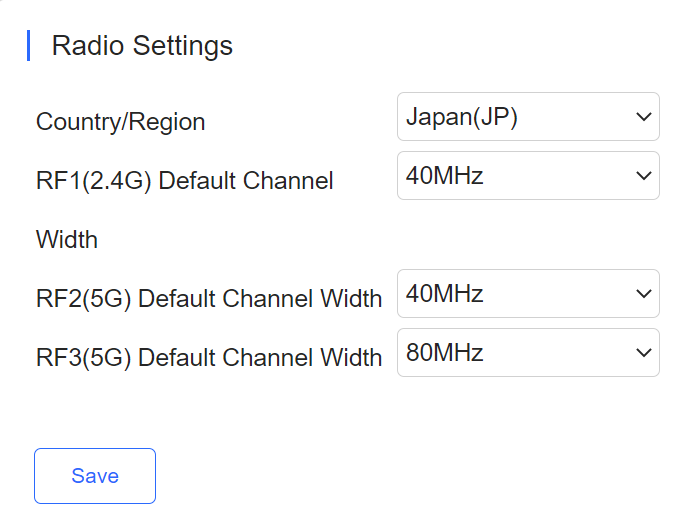
For 2.4G channels, the channel width can be 20 or 40 MHz. For 5G channels, the channel width can be 20, 40, 80, or 160 MHz.
The automatic RF planning function allows the cloud to calculate the optimal channel configurations and power values for APs by using the radio resource management (RRM) algorithm according to RF information collected by each AP. Optimal recommended configurations can be applied to the APs.
The entire process of the automatic RF planning includes three parts:
The automatic RF planning supports network-based planning only.
The AP RF channel optimization algorithm staggers RF channels of neighboring APs respectively based on the 2.4 GHz frequency band and the 5 GHz frequency band while ensuring as much as possible that original configurations are unchanged. To reach optimal power, The AP power optimization algorithm automatically increases or decreases the RF power for an AP according to the co-channel interference.
After a network is selected on the RF planning page, a page for automatic RF scanning and planning of the network is displayed. On this page, the APs of a network can be triggered to scan the RF, display recommended RF configurations calculated after scanning, and save the recommended RF configurations to APs.
The Recent RF Scan History page displays historical records of automatic RF scanning and planning. Each record shows triggering information got each time, including the automatic RF planning status, the start time, the end time, the status (Initializing/Scanning/RRM analysis/Finish/Failure), whether to apply to the APs, and the running logs.

There are two execution modes: immediate and periodic. Click Scan Now, and the cloud triggers RF scanning. Data will be uploaded after scanning.
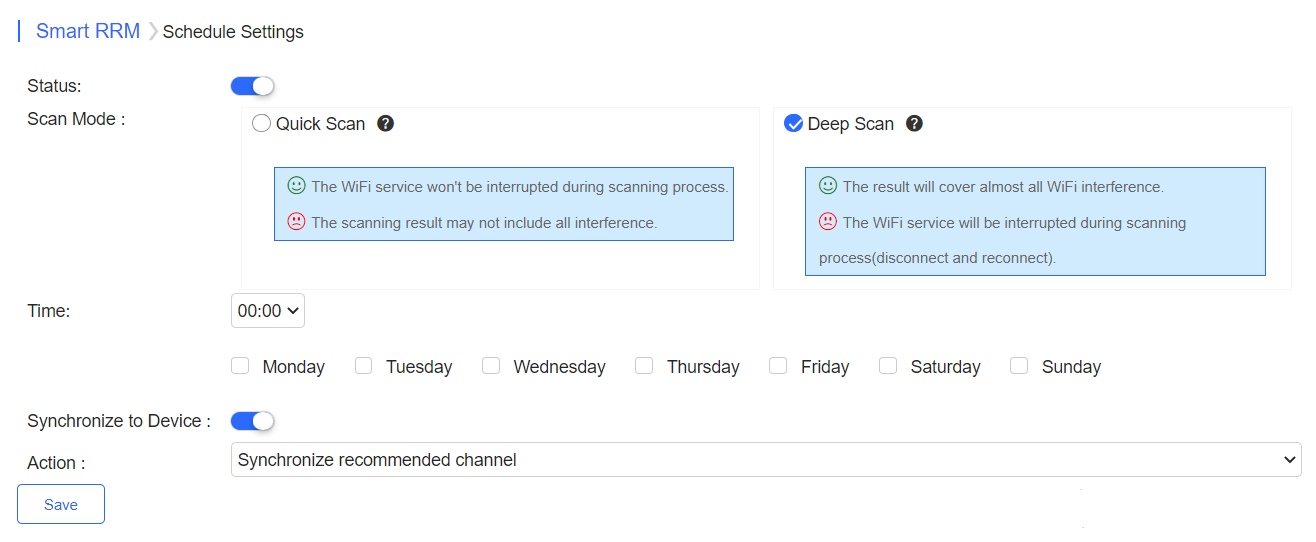
On the Schedule Settings page, Periodic Execution can be enabled.
Note: When a periodic task is triggered, this periodic task is automatically canceled if the network is already in a scanning triggered state (for example, immediate execution is being triggered).
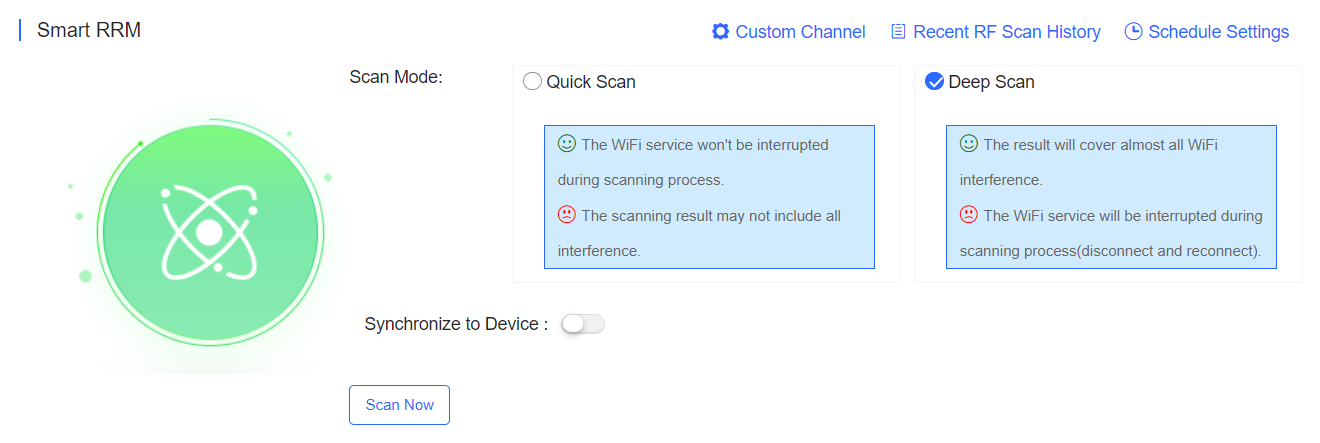
(1) Scan Mode
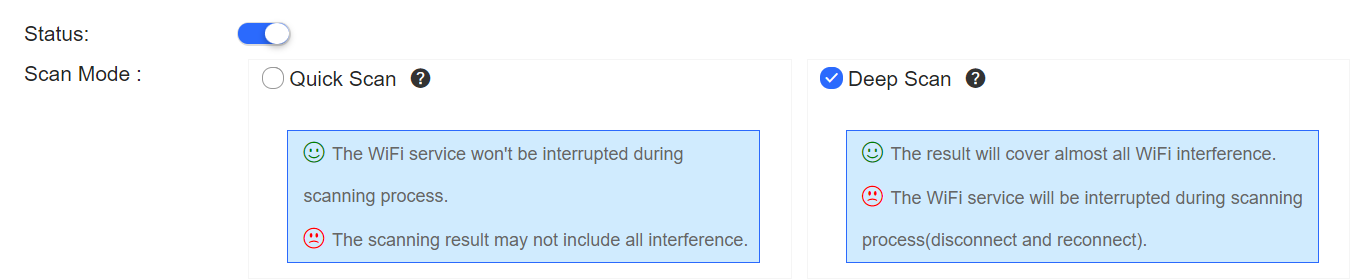
Quick Scan: This mode enables APs to provide the WiFi service properly during scanning. However, data acquired in this mode is not as accurate as that in the Deep Scan mode. The calculation result based on the data in this mode is less accurate than that in the Deep Scan mode. This mode is applied when it is expected that the current network is not affected.
Deep Scan: This mode is also referred to as the enhanced mode, and causes wireless clients to go offline at the beginning and ending of the scanning. Data acquired in this mode is more accurate than that in the Quick Scan mode, and the automatic RF planning based on the data is more accurate. This mode shall be applied at the initial stage of the overall network planning or when disadvantages of this mode are tolerable.
(2) Synchronize to Device

If this function is enabled, the RF scanning result will be automatically pushed to the AP.
Note: If an AP has been bound to a location and has been synchronized with RF configurations of the location. This operation will remove the RF synchronization between the location and the AP, and push the selected recommended optimization configurations to the AP.
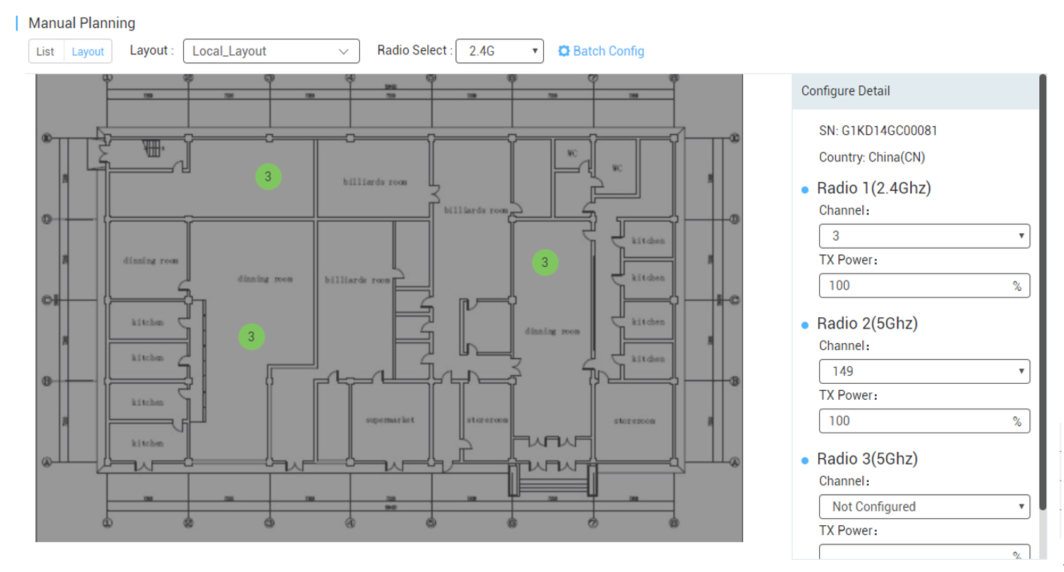
Click a network on the left to open the manual RF planning page. The Radio Select drop-down list above the diagram lets you select an RF type (2.4 GHz/5 GHz) to display. The number inside the location icon indicates the current channel, and a range displayed when the cursor stays on the location icon indicates a power percentage.
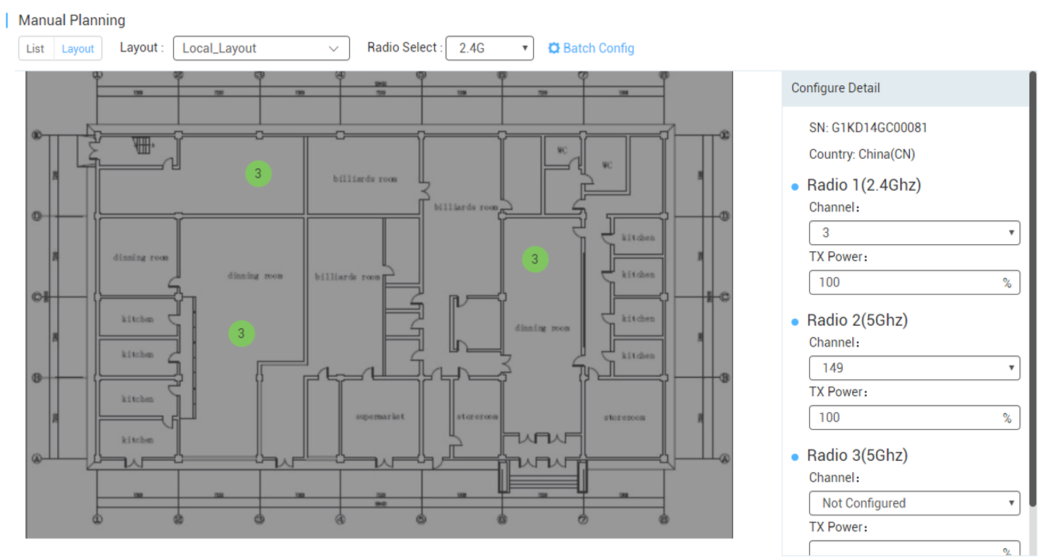
Note: The RF channel or power data is not displayed during configuration.
You can click a location icon to display the RF channel and power configurations on the right. If the location is bound to an AP, the SN of the bound AP is also displayed.
Step 1: Set the RF configurations of a location in one of the following three ways:
(1) Configure one location
Click a location icon, enter configurations on the right, and click Apply.
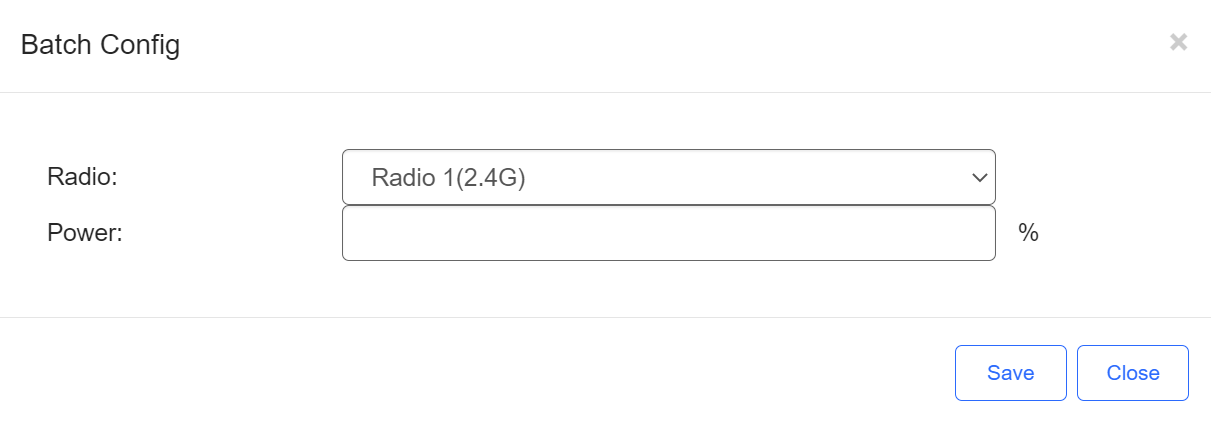
(2) Configure locations in batches
This function is used to configure the RF channel and power for a large batch of locations, and is suitable for a scenario with many locations on a network.
Click  above the location diagram to uniformly configure the power percentage for all locations on a network.
Step 2: Synchronize the RF configurations of the location to a bound AP.
Click  above the location diagram to synchronize the RF configurations of the corresponding location to the bound AP.
Batch operations for multiple locations can be select before clicking .
After the synchronization is successful,  is displayed in the lower right corner. At this point, the configurations of the location are synchronized to the bound AP.
Note: If an unbind or bind operation is performed, RF configurations are removed from or synchronized to the AP.
Step 1: In the AC network, click Radio Planning to open the Smart RRM page.
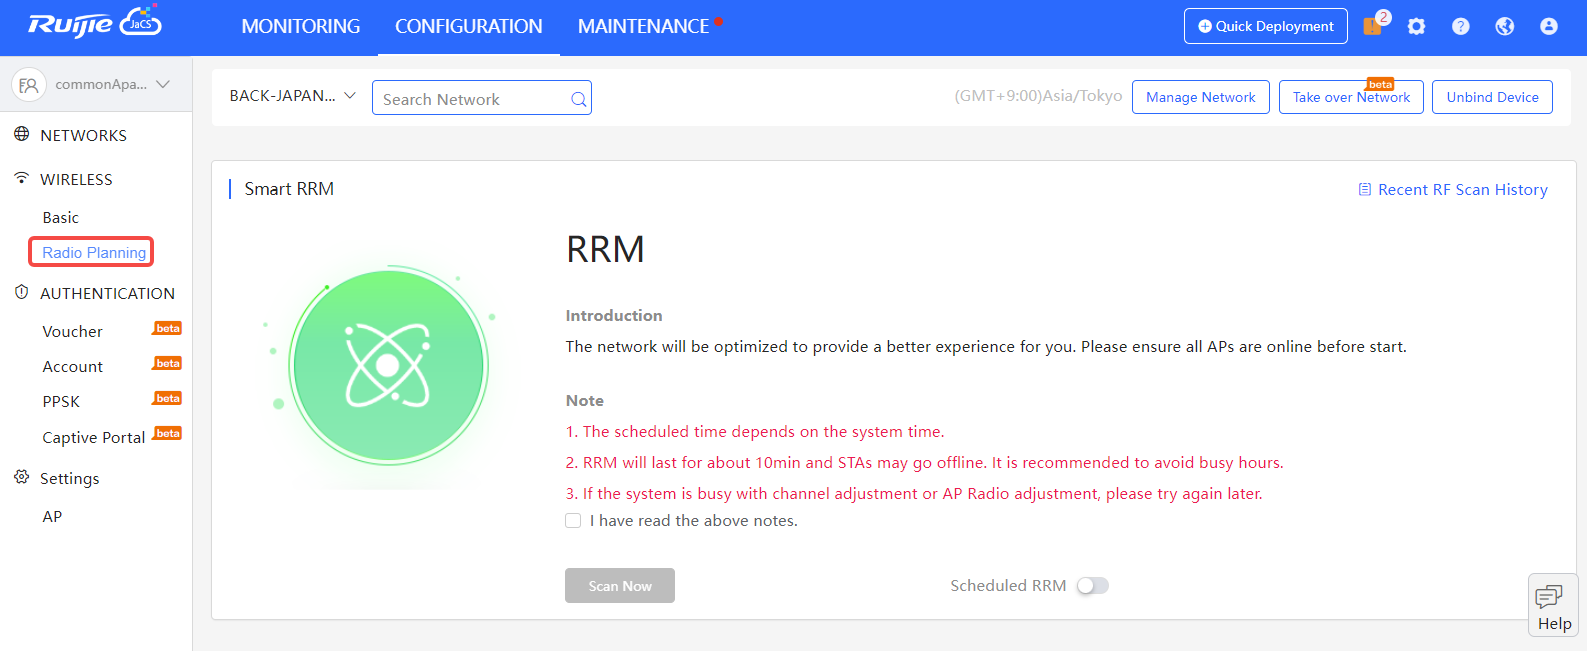
Step 2: Check the note, click  to start RRM. The whole process takes about 10 to 15 minutes.
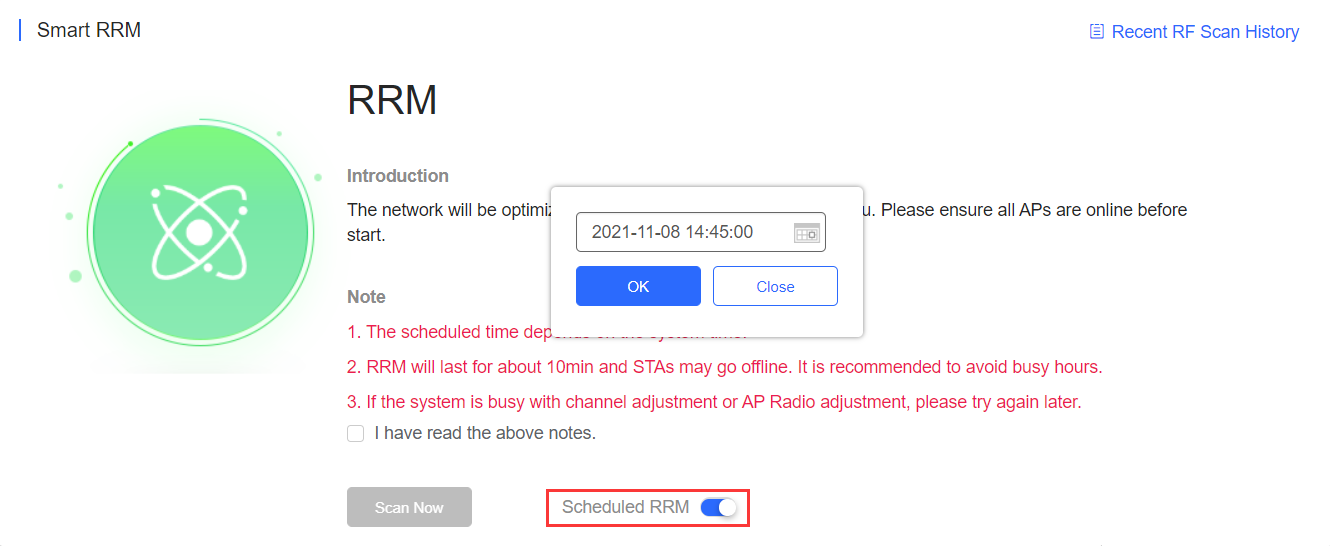
Step 3: Enable Scheduled RRM to configure the time, and RRM will start at the set time.
全部评论