Step 1: Click CONFIGURATION > NETWORKS to open the page.
Step 2: Click Add Network, and then fill in basic information for the network.
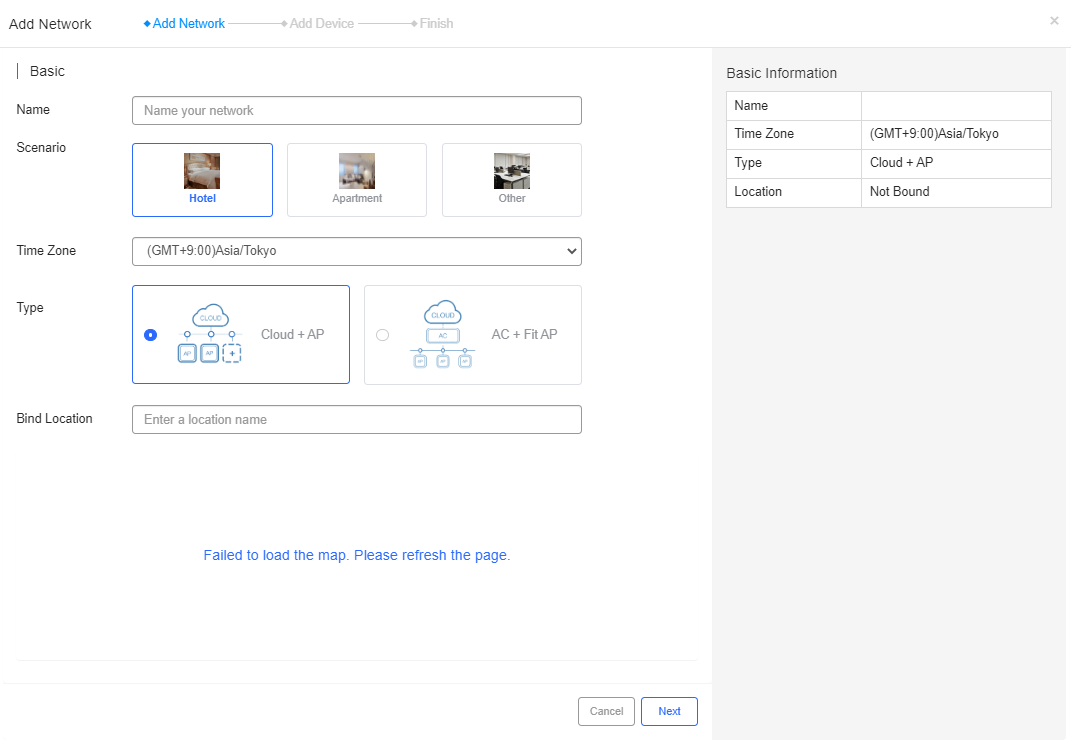
The fields shown on this page are interpreted as follows:
Name: Enter a name for the network, such as the name of a hotel branch.
Scenario: Choose Hotel.
Time Zone: Choose a time zone for the network.
Type: Choose a networking type:
Cloud + AP: APs are directly managed via the Cloud.
AC + Fit AP: APs are managed via ACs.
Bind Location: (Optional) Enter the physical location for the network, such as the address of the hotel.
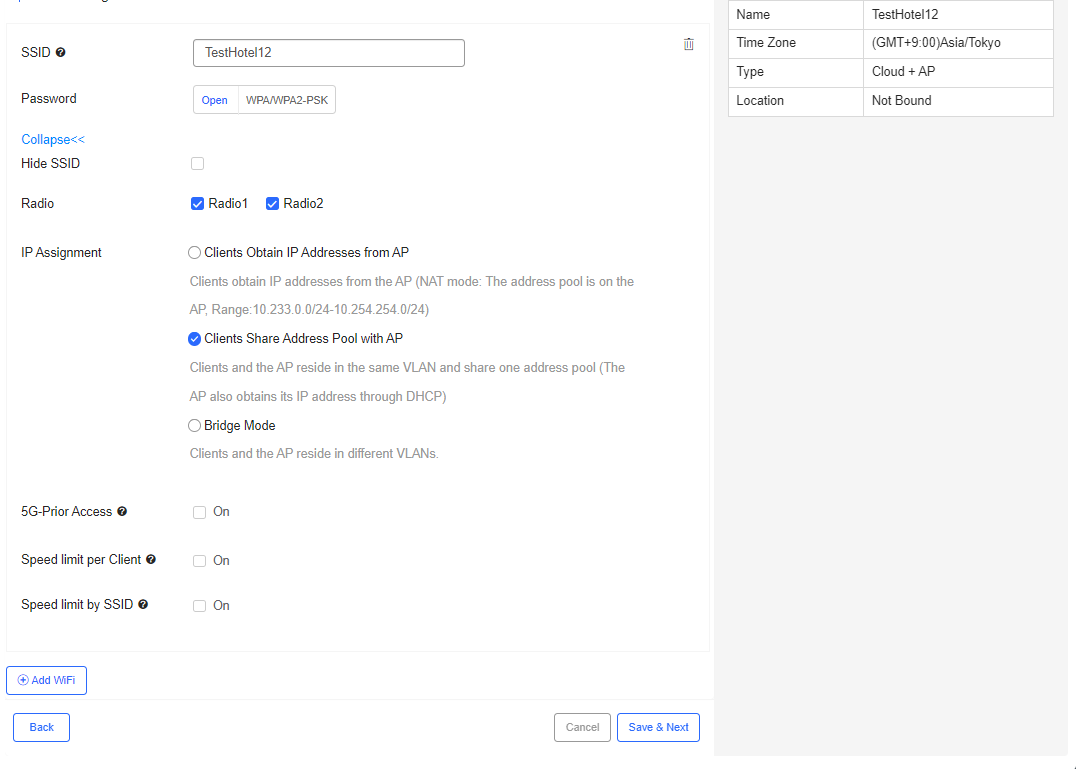
Step 3: Set basic configurations for Wi-Fi, such as its SSID and password.

The fields shown on this page are interpreted as follows:
SSID: Set the WLAN ID. By default, it is the name configured for the network in the precious page.
Password: Configure whether Wi-Fi is encrypted:
Open: No password is required when users connect to the Wi-Fi, and the Wi-Fi is available by all.
WPA/WPA2-PSK: A password is to be set and all users need to input the password to get access to the Wi-Fi.
Note: It is recommended to choose Open for a public network, and choose WPA/WPA2-PSK for a network for hotel guests.
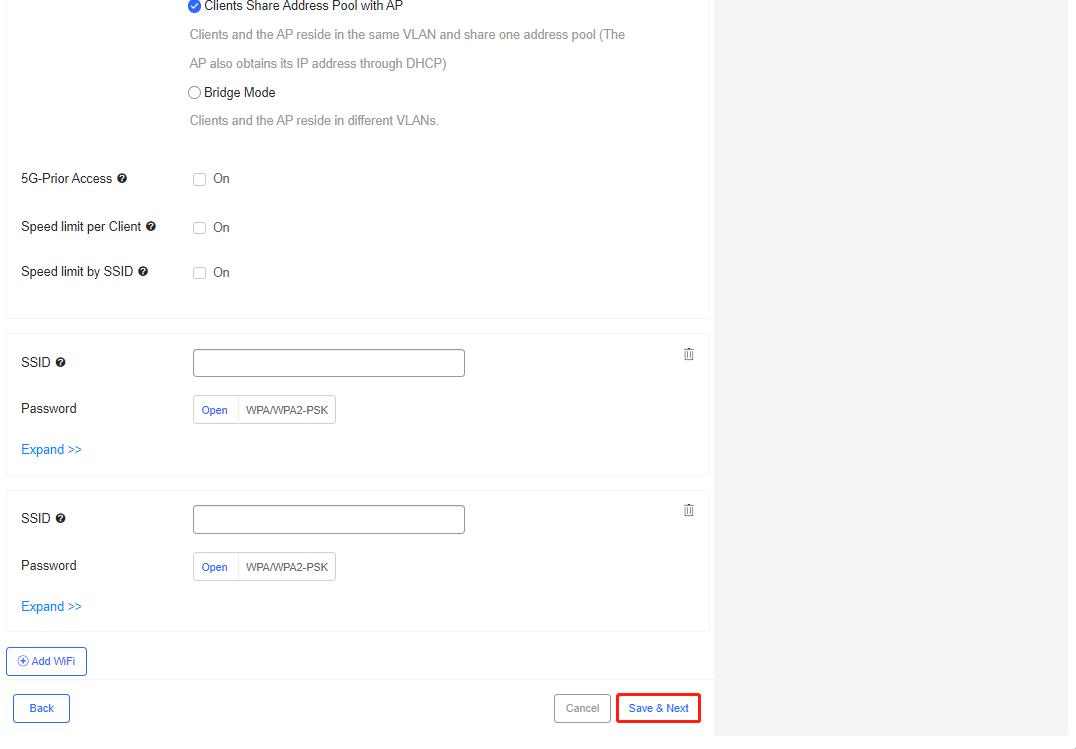
Step 4: (Optional) If you want to further configure W-iFi, please click Expand>> for more settings. If not, skip this step.
The fields shown on this page are interpreted as follows:
Hide SSID: Tick the box if you don’t want the SSID to be seen by STAs (connected users).
Radio: Choose a signal(s) for the SSID. For example, Radio 1 is bound with 2.4G signal and Radio 2 is bound with 5G signal. If you choose Radio 1, then 2.4G signal is released under the SSID; if you choose both Radio 1 and Radio 2, two signals (2.4G and 5G) are released under the SSID.
IP Assignment: Choose an IP assignment method for terminals:
Clients Obtain IP Addresses from AP: IP addresses are assigned from the address pool of the AP.
Clients Share Address Pool with AP: IP addresses are from the same address pool as the management IP address.
Bridge Mode: IP addresses of terminals and the AP are from different pools.
Note: In general, it is recommended to choose Clients Obtain IP Address from AP.
5G-Prior Access: Enable it when the SSID is associated with Radio 1 and Radio 2 for dual-band APs (2.4 GHz and 5 GHz) to ensure that clients supporting dual bands access the 5 GHz frequency band preferentially. This reduces the load in the 2.4 GHz frequency band and improves user experience.
Note: In general, it is recommended to keep this feature disabled.
Speed limit per Client: Enable it when channel width control is expected for each user who connects to this Wi-Fi.After enabling this feature, you need to set peak date rates in uplink and downlink.
Note: In general, it is recommended to keep this feature disabled.
Speed limit by SSID: Enable it when channel width control is expected for the total traffic throughput of this SSID. After enabling this feature, you need to set peak date rates in uplink and downlink.
Note: In general, it is recommended to keep this feature disabled.
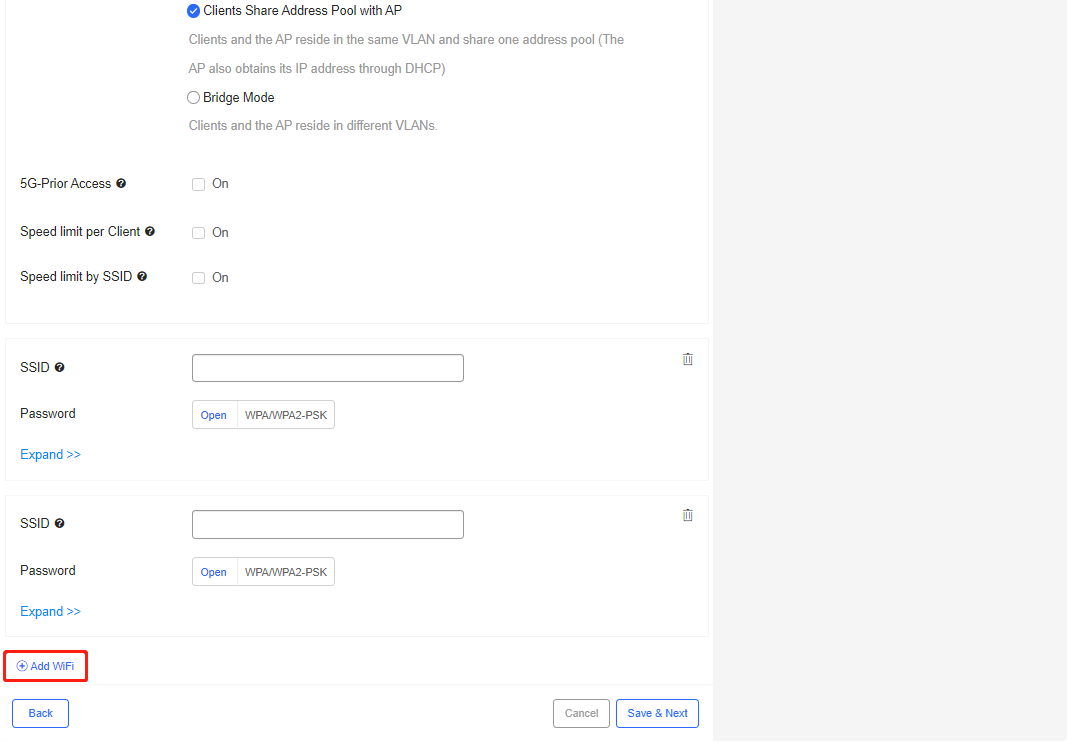
Step 5: *(Optional) If you want to add an SSID(s), please click Add Wi-Fi and repeat Step 2 and Step 3. If not, skip this step.
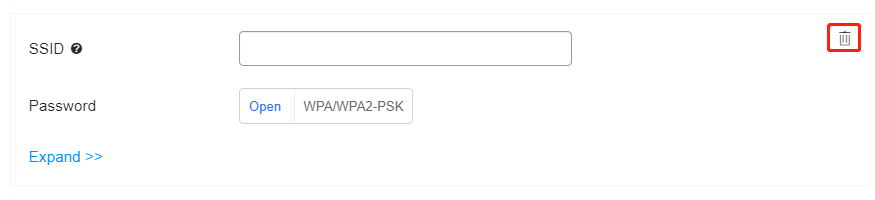
Step 6: *(Optional) If you want to delete Wi-Fi, please click  right to its SSID. If not, skip this step.
Step 7: Click Save & Next to save all the configurations.
Step 8: The following prompt indicates successful adding.

After a network is added, the user is automatically redirected to the Add Device page.
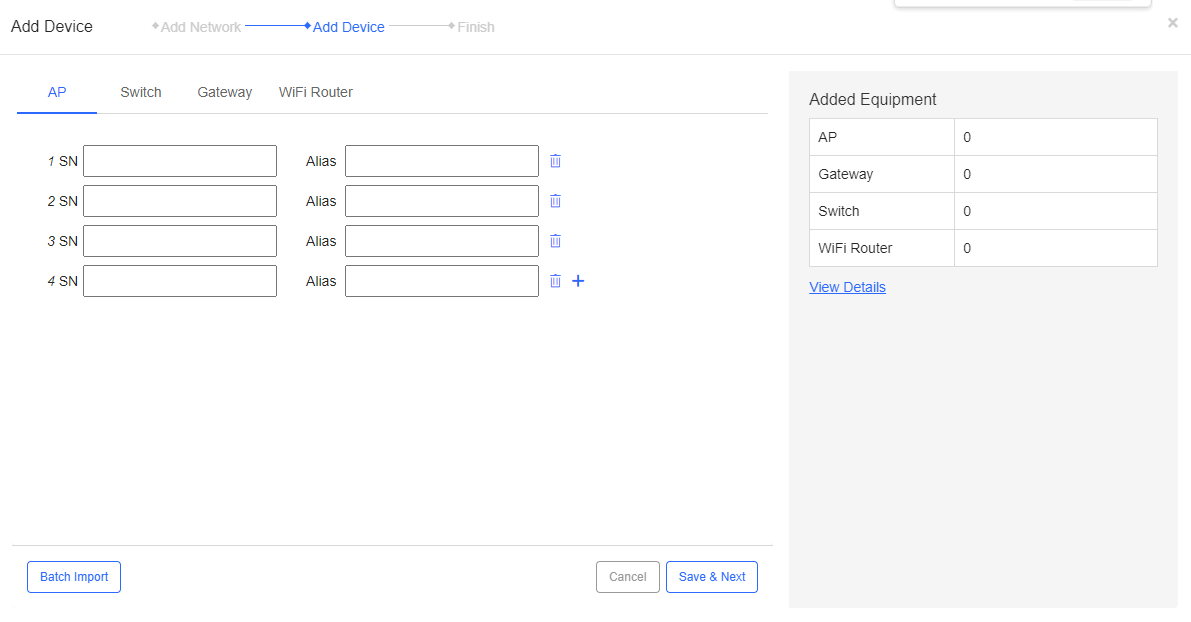
There are two ways to add APs, switches and Wi-Fi routers:
Manual importing (recommended when just few devices need to be added.)
Batch importing (recommended when users need to add plenty of devices.
Either way you choose, please click AP in the navigation bar first.
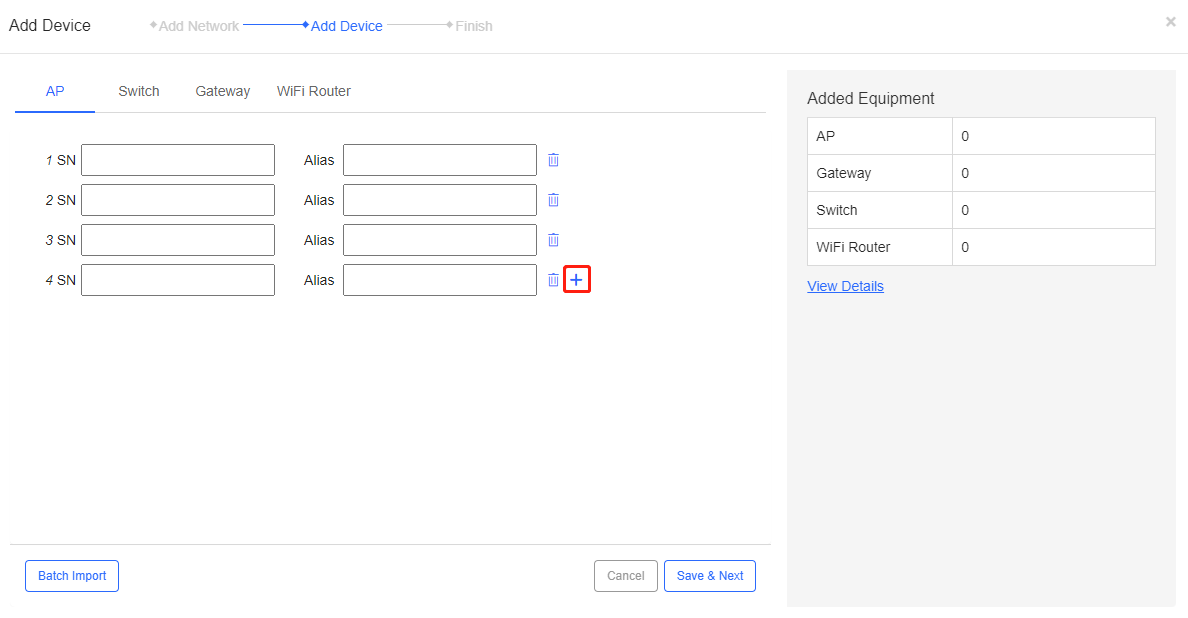
Step 1: Enter the SN and the *alias of the device.
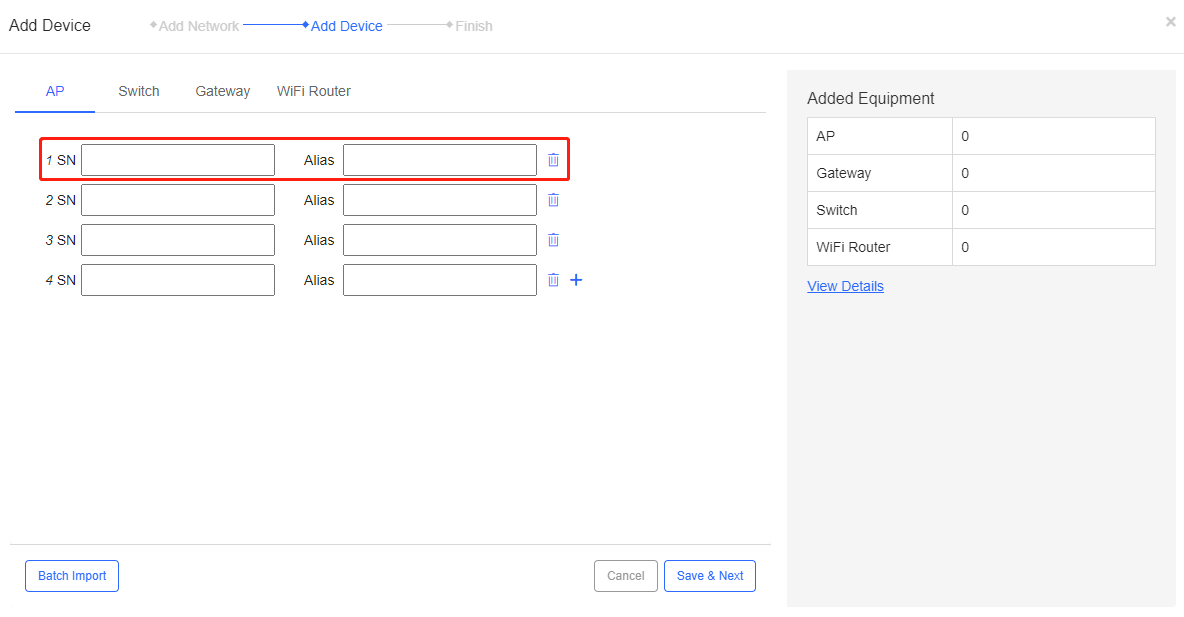
The fields shown on this page are interpreted as follows:
SN: The SN can be found in the device or its packing box.
Alias: (Optional) Name the device.
Step 2: (Optional) If you want to remove a device, click  next to it.
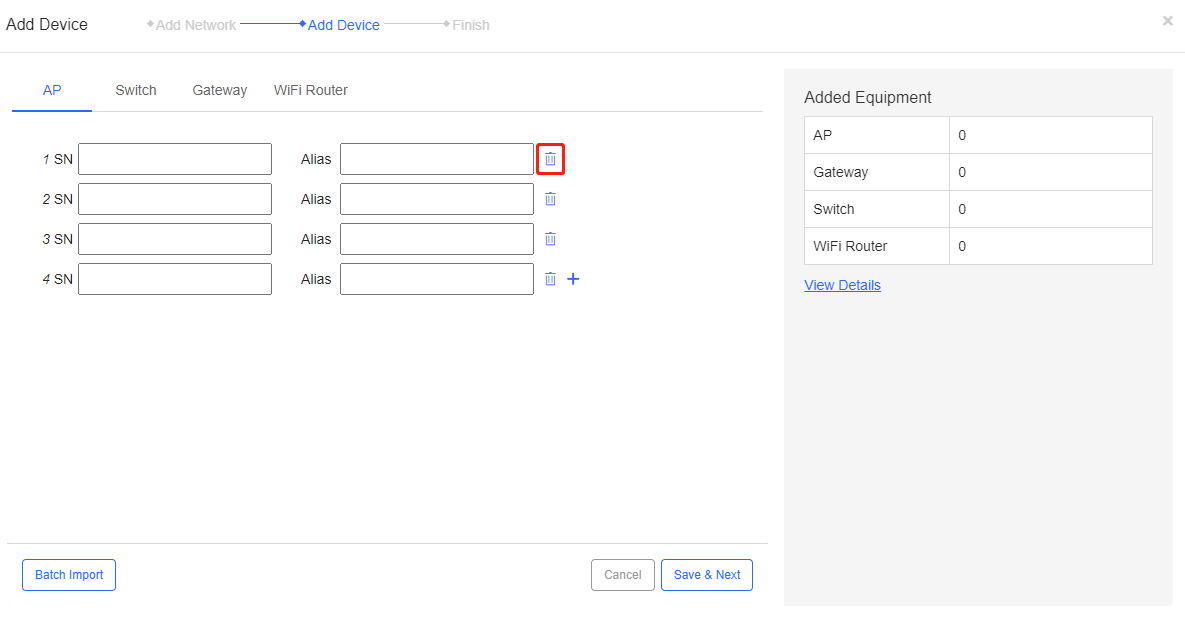
Step 3: (Optional) If you need to add a device, click  .
.
Step 4: After inputting information of all devices, click Save & Next to save all configurations.
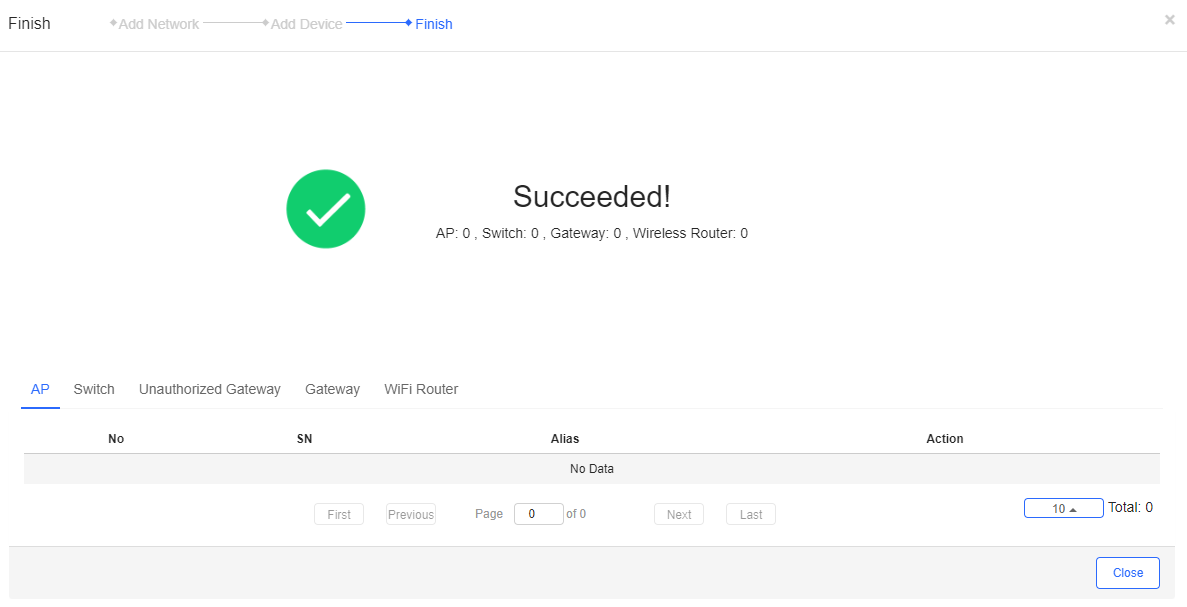
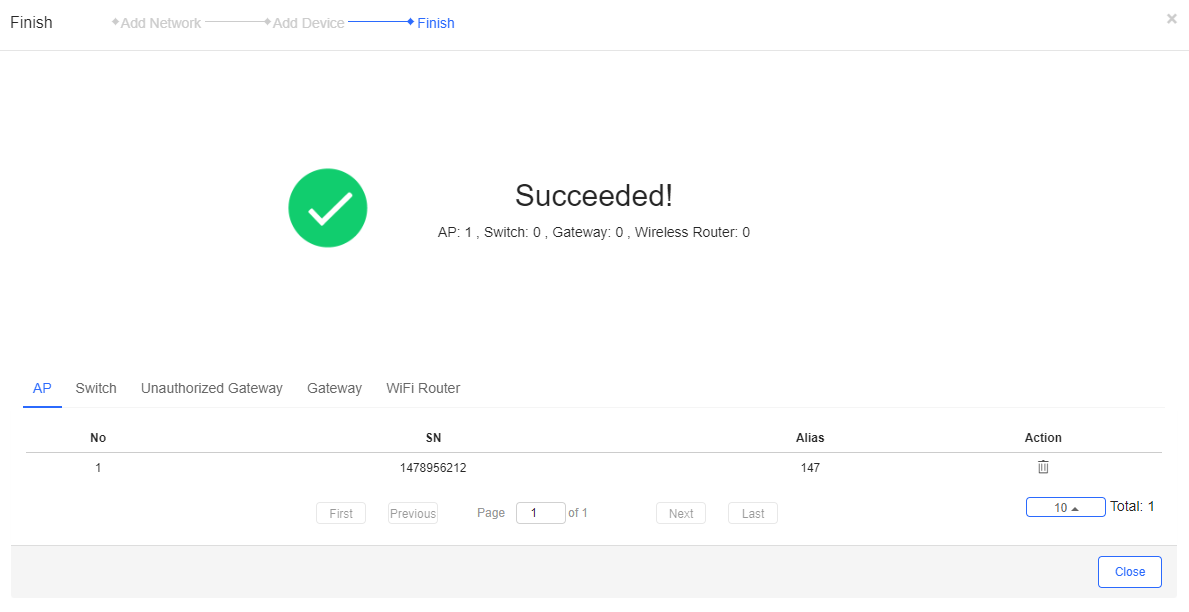
Step 5: The following image indicates a successful operation.
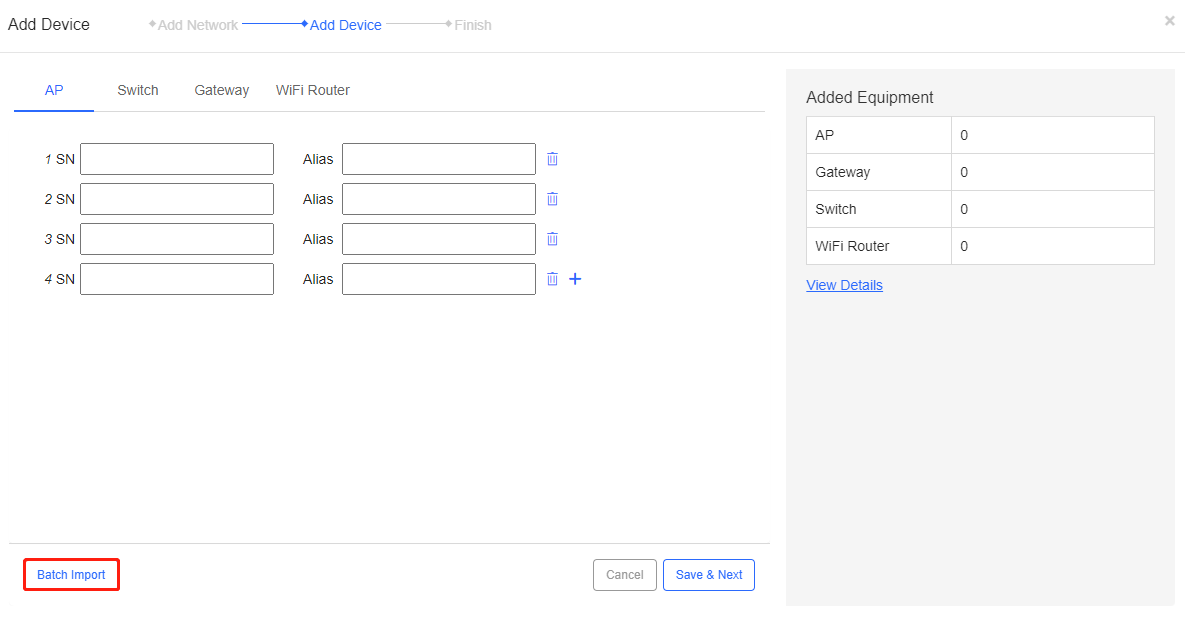
Step 1: Click Batch Import to enter the Batch Import page.
Step 2: Click Download Template to download the template to fill in.
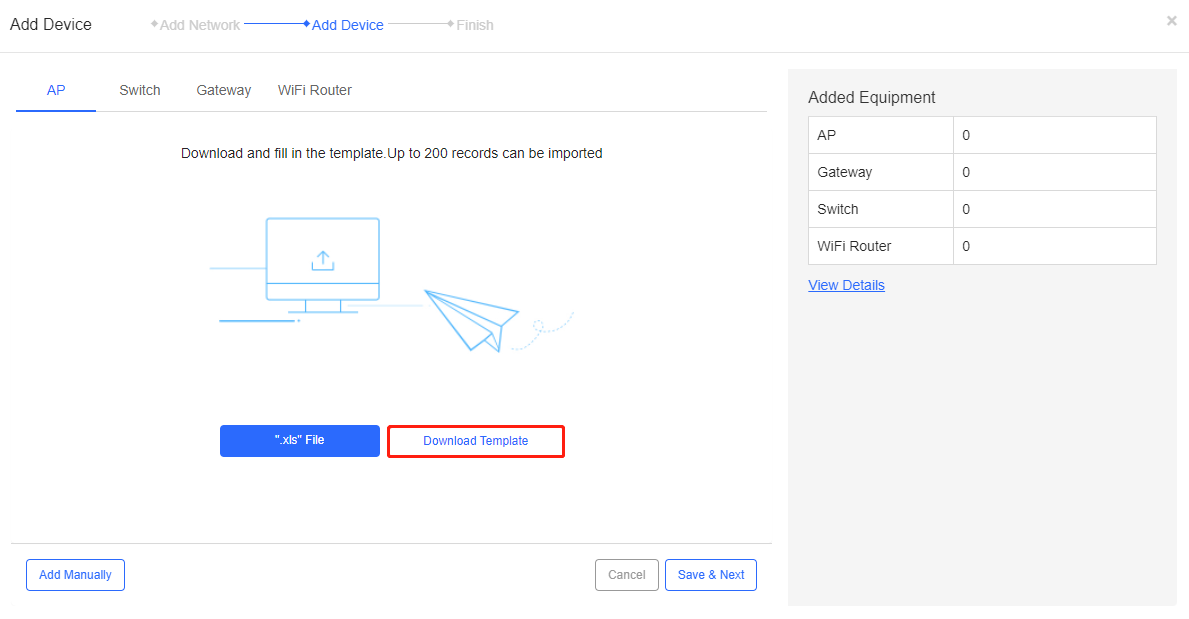
Step 3: Fill in the template. SN is mandatory while Alias, Latitude and Longitude are optional.
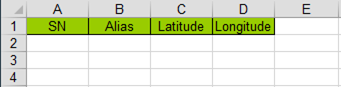
SN: The SN can be found in the device or its packing box.
Alias: Name the device.
Latitude: The latitude the device is at.
Longitude: The longitude the device is at.
Step 4: Click *.xls File to import the filled template.

Step 5: The following page is shown after successful importing.
Gateways have to be added manually.
Step 1: Click Gateway in the navigation bar.
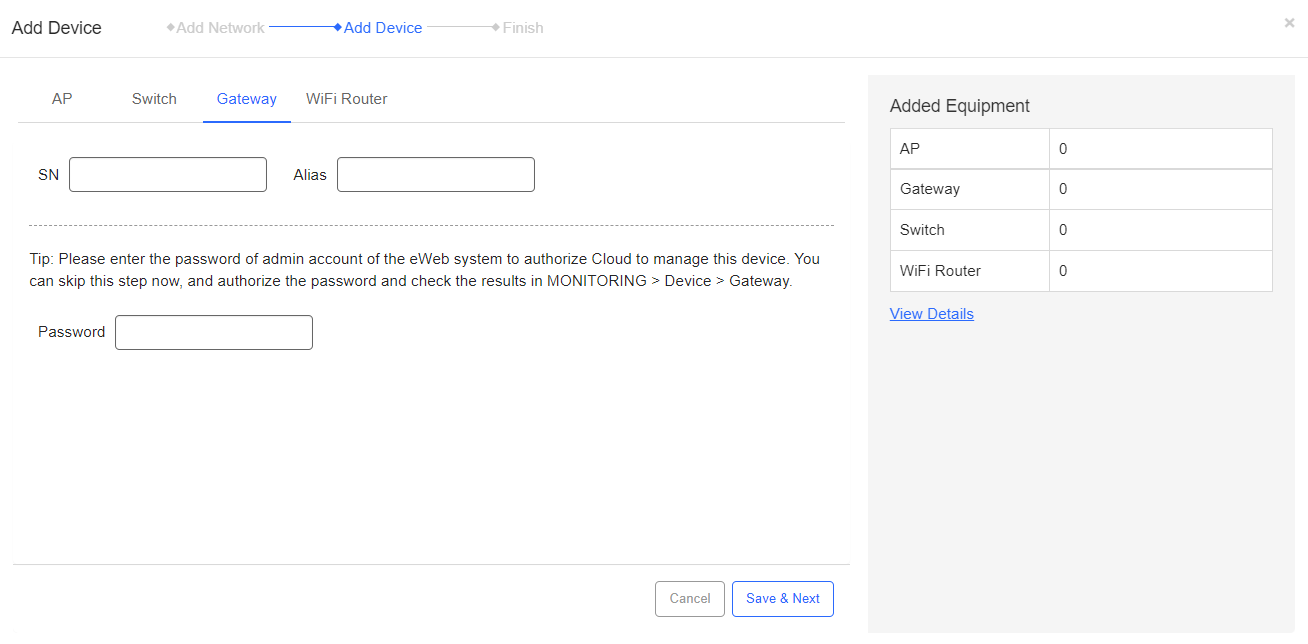
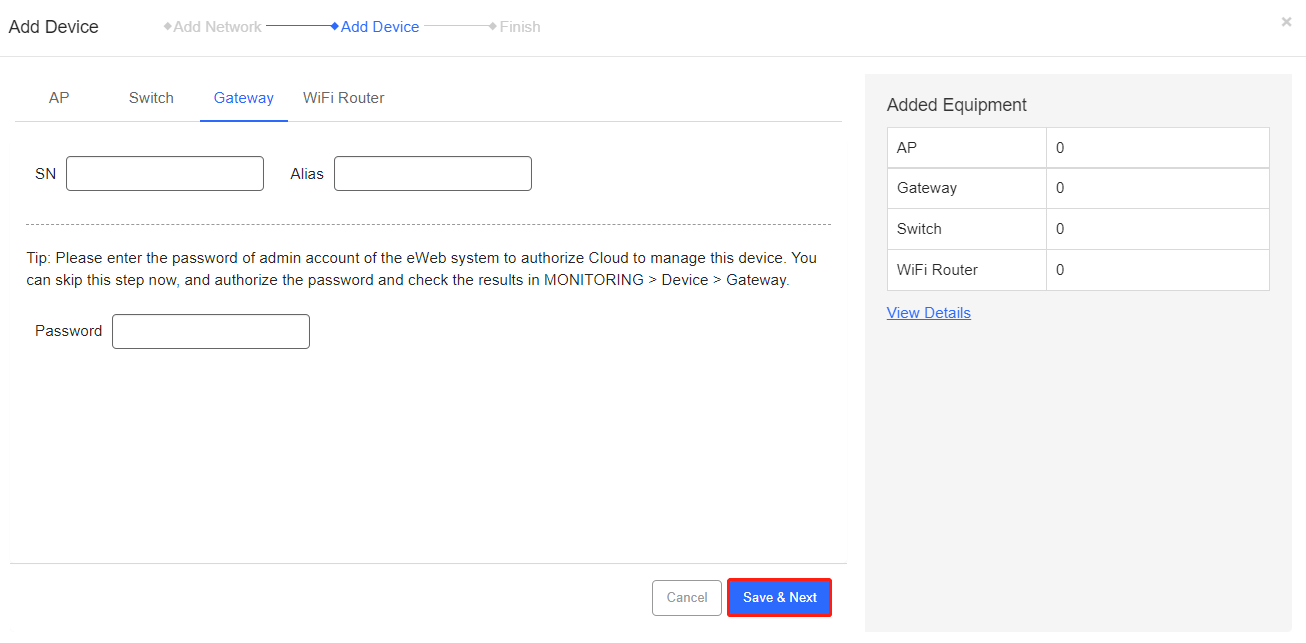
Step 2: Enter the SN, the *alias (optional), and the *password (optional) of a gateway.
Step 3: After inputting information of all devices, click Save & Next to save all configurations.
Step 4: The following page is displayed when successful importing is operated.
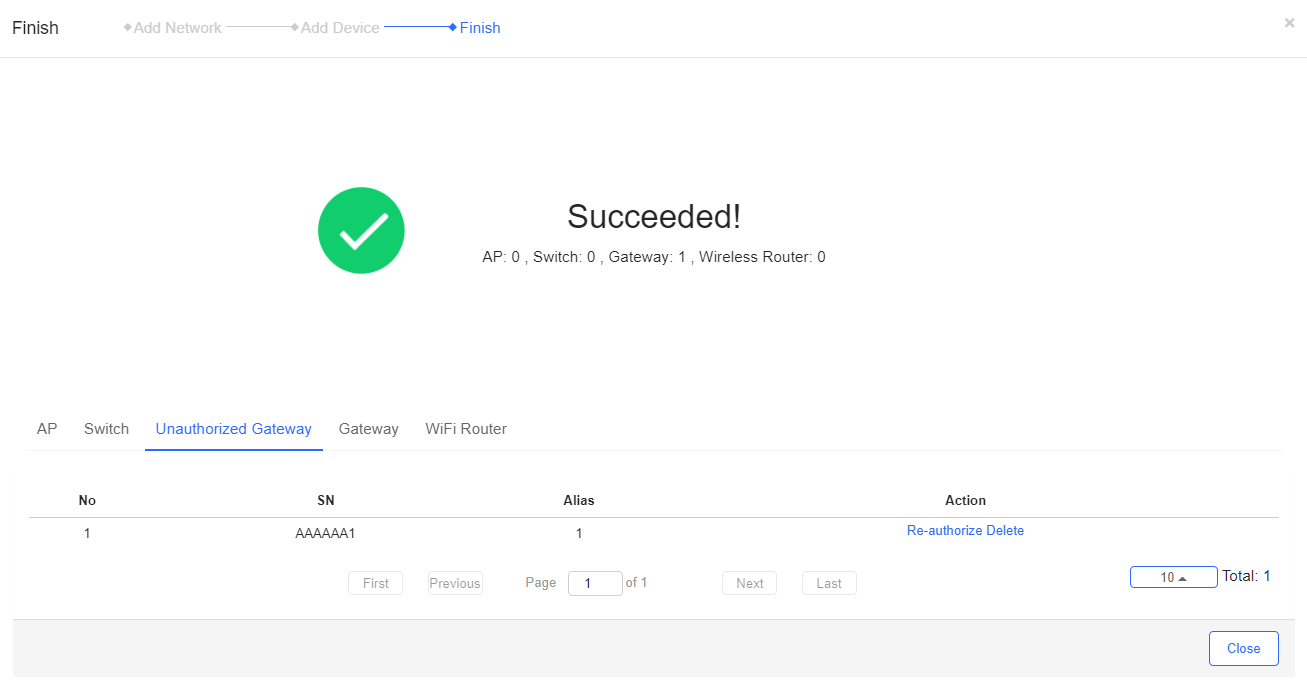
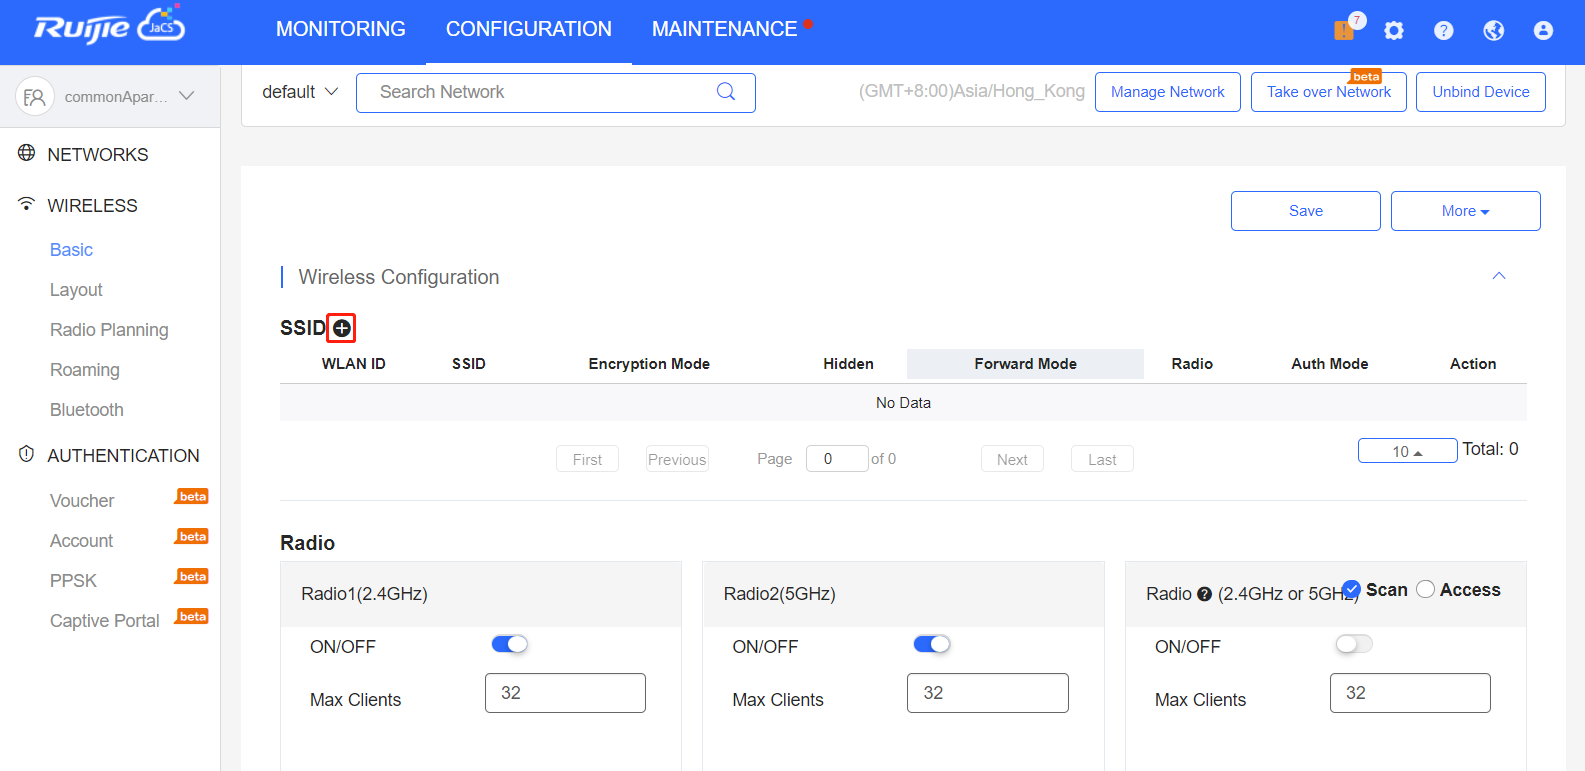
Click CONFIGURATION > Wireless > Basic to configure basic parameters for wireless networks.

Users can modify and configure SSIDs and their attributes in this section.
Step 1: Click  to add an SSID and enter its configuration page.
Step 2: Configure the SSID. And click OK to complete the configuration.
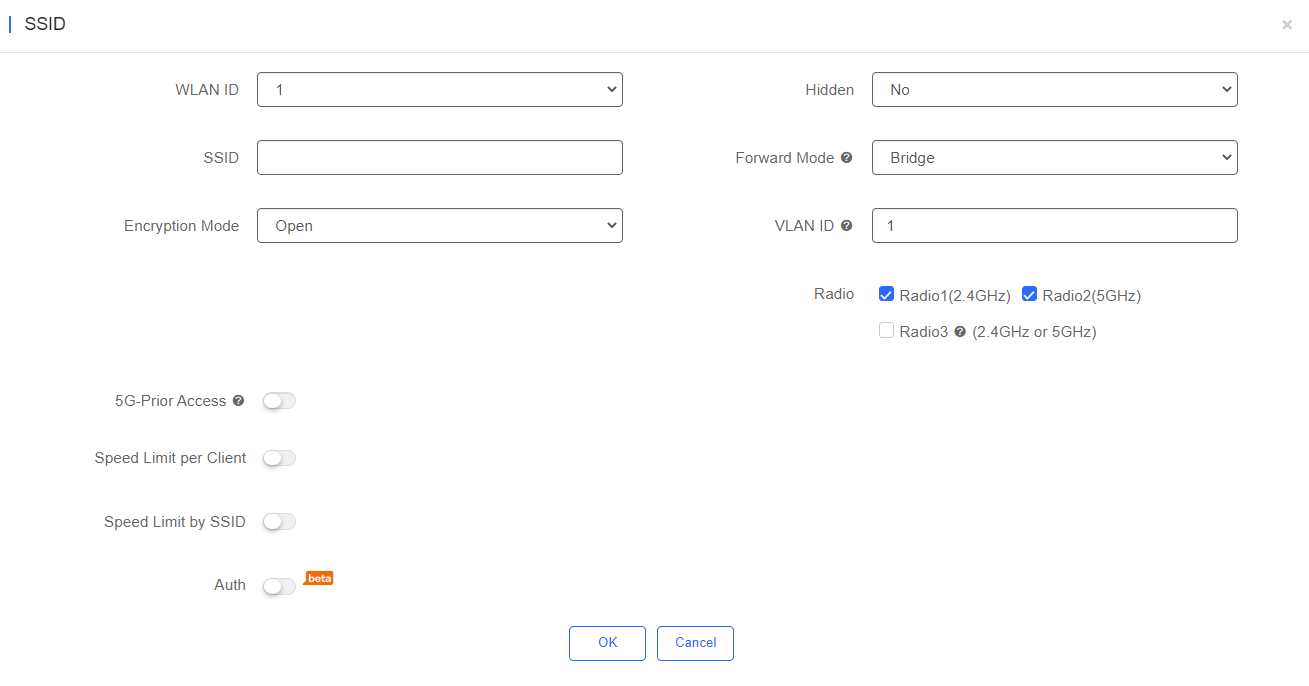

The fields shown on this page are interpreted as follows:
WLAN ID: Select a WLAN ID. An SSID matches a WLAN ID one to one. The WLAN ID can be specified only when an SSID is added and cannot be changed subsequently. The maximum value of WLAN ID is 32.
SSID: Enter an SSID name. (Up to 32 characters are supported. Letters, numbers, spaces, “_”, “-”, “.”, and “@” can be used. If spaces are contained, the SSID cannot be longer than 30 characters.)
Encryption Mode: Five modes are available: OPEN, WPA-PSK, WPA2-PSK , WPA2-ENTERPRISE (802.1X) and PPSK.
OPEN indicates that no password needs to be configured;
WPA-PSK or WPA2-PSK indicates that a password needs to be configured.
WPA2-Enterprise (802.1x) indicates that the 802.1x authentication mode is adopted for the SSID. After the 802.1x authentication mode is selected, you need to choose a primary serve and decide whether to enable Jitter Prevention and whether to configure an 802.11x server group.
PPSK indicates that each terminal device is bound with a unique Wi-Fi account and key. After the PPSK mode is selected, you need to configure your account in CONFIGURATION > AUTHENTICATION > PPSK.
Hidden:Specify whether to hide the SSID, which can be set to Yes or No.
Forwarding Mode:Select a forward mode of a wireless AP. NAT indicates that an IP address is allocated to a client by an AP; Bridge indicates that an IP address is allocated to a client by an AP’s upstream device. A VLAN ID must be configured when the Bridge mode selected. (It is recommended to choose NAT.)
NAT Address Pool Configuration: Click the NAT Address Pool Configuration link to display the window.
VLAN ID:Input the ID to choose a VLAN. It is mandatory when the forwarding mode is set to Bridge.
5G-Prior Access:Enable it when the SSID is associated with Radio 1 and Radio 2 for dual-band APs (2.4 GHz and 5 GHz) to ensure that clients supporting dual bands access the 5 GHz frequency band preferentially. This reduces the load in the 2.4 GHz frequency band and improves user experience. (In general, it is recommended to keep this feature disabled.)
Speed Limit per Client:Enable it if you want to set speed limit for connect terminals. After you enable it, you need to set both the uplink and downlink speed limits. (In general, it is recommended to keep this feature disabled.)
Speed Limit by SSID: Enable it if you want to set speed limit for the SSID. After you enable it, you need to set both the uplink and downlink speed limits.(In general, it is recommended to keep this feature disabled.)
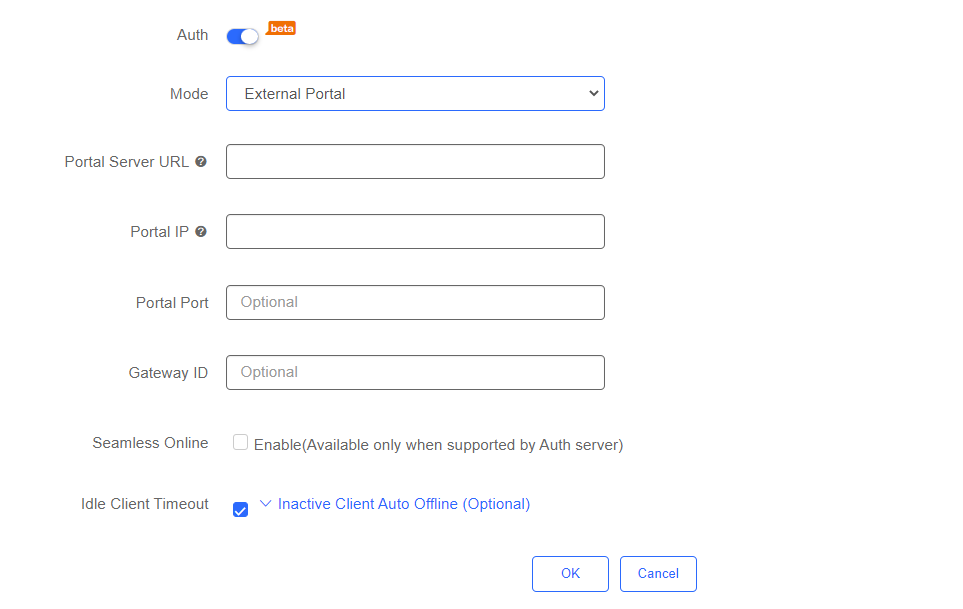
Auth: Enable it if you want terminals to get authenticated before getting Internet connection. Common APs support External Portal and Captive Portal authentication:
Choose External Portal when authentication is expected to be carried out on an external server;
Choose Captive Portal when authentication is realized on the server of the Cloud.
Configuration steps are explained in the following step.
Step 3: (Optional) If you need to configure portal authentication for the SSID, choose either External Portal authentication or Captive Portal authentication, before referring to the corresponding configuration instruction.
To edit SSID, enable Auth and select External Portal. Fill in the required information and click OK to complete the configuration.
The fields shown on this page are interpreted as follows:
(1) Logo Picture: Choose a logo to be shown on the page. You may choose the default logo or upload one.
(2) Background: Choose a background style for the page. It can be an image or a solid color (the color is adjustable in Advanced).
(3) Background Image: Choose an image if you choose Image in Background. You may choose the default image or upload one.
(4) Welcome Message: Choose whether it is text or an image. If you would like it to be text, then you need to input it in the column; if an image, upload one.
The Radio page enables you to configure the AP radio ports by providing the On/Off and Max Clients items.

The fields shown on this page are interpreted as follows:
(1) ON/OFF: Specify whether to enable the radio. When it is set to Off, the radio is invalid.
(2) Max Clients: Enter the upper limit of associated clients in a frequency band.
Note: Deletion of radio configurations indicates that the system preserves the current configurations.
In this section, users are allowed to enable features such as eWeb, Telnet, password configuration and user isolation.
(1) eWeb Settings
Enable this feature if you want to set a unified password for the web pages of all APs connected to the network. The system does not push the password to AP if the password is empty.

(2) Telnet Settings
Enable this feature if you want to set a unified password for the Telnet service of all AP s connected to the network. When the Telnet service is enabled, the password is required.

(3) Client Isolation
Clients are isolated without affecting their network access to ensure that they cannot communicate with each other, thereby ensuring client service security. AP-based client isolation or AP&SSID-based client isolation can be selected. If AP-based client isolation is enabled, all layer-2 clients associated with the same AP cannot communicate with each other. If AP&SSID-based client isolation is enabled, clients in the same WLAN on the same AP cannot communicate with each other.

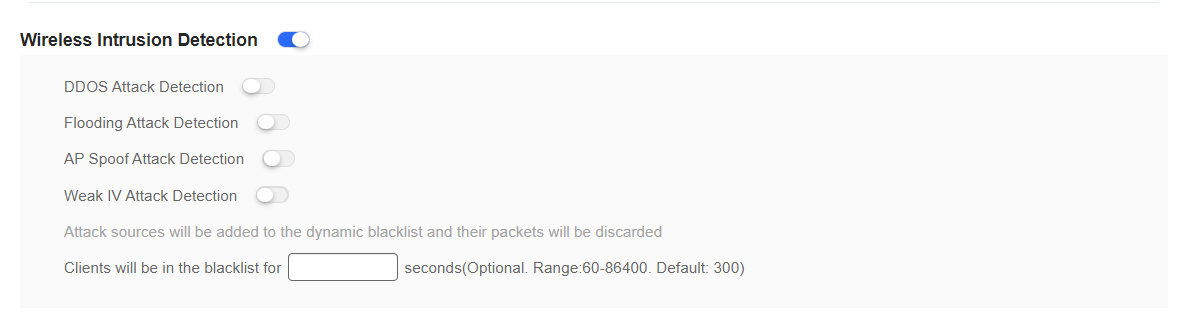
(4) Wireless Intrusion Detection
This part includes DDOS attack detection, flooding attack detection, AP spoof attack detection, and weak IV attack detection. You can choose to enable features based on your needs.
In this part, users can operate configurations about AP RF scheduling, whitelists and CLI commands.
(1) AP RF Scheduling
This feature specifies the operation period of the AP.
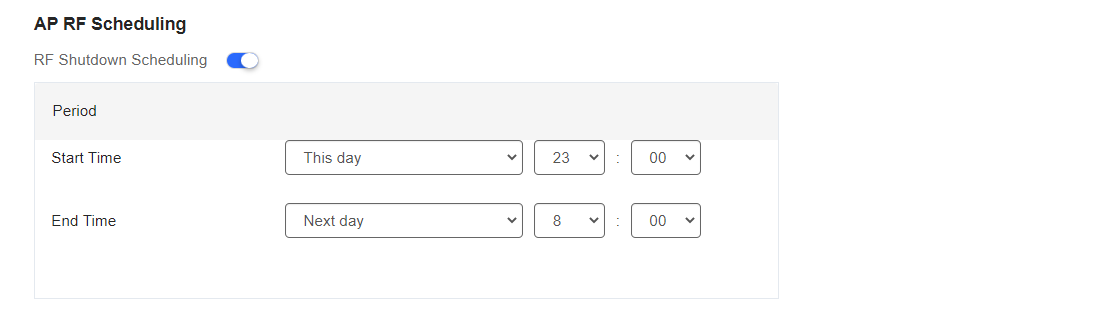
The fields shown on this page are interpreted as follows:
RF Shutdown Scheduling: Enable it if you expect the AP to broadcast the SSID.
Start Time: Specify the time to turn on Wi-Fi after RF Shutdown Scheduling is enabled.
End Time: Specify the time to turn off Wi-Fi after RF Shutdown Scheduling is enabled.
(2) Whitelist
Click  and then enter whitelisted websites, and websites that can be accessed directly without authentication. For Facebook social login, you need check on Facebook Whitelist so that clients can access Facebook API before authentication.

(3) CLI Command
Click  and then enter commands to be pushed to APs. This function allows you to perform some configurations unsupported via CLI commands.

全部评论