PPSK combines the advantages of PSK and 802.1x. It prevents the network from being stolen. Each terminal device is bound with a unique WiFi account and key so that the key will not be shared. This can also be called “One Client, One Password”.
The main tasks of the PPSK administrator are:
Staffs can connect to the SSID with a unique WiFi key allocated by the administrator to access the Internet.
The specific configuration steps are as follows:
Step 1: Select the project to be configured, and click Device Config > Basic.
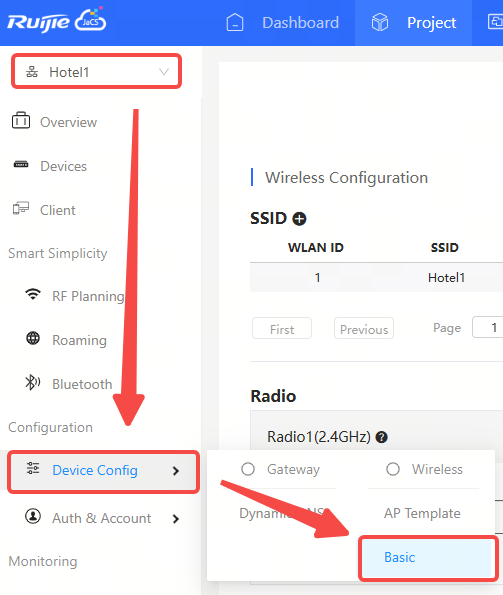
Step 2: Click  to add a new SSID or click the
  to modify an existing SSID. In the SSID configuration page, set the encryption mode of the SSID PPSK, and then click OK.

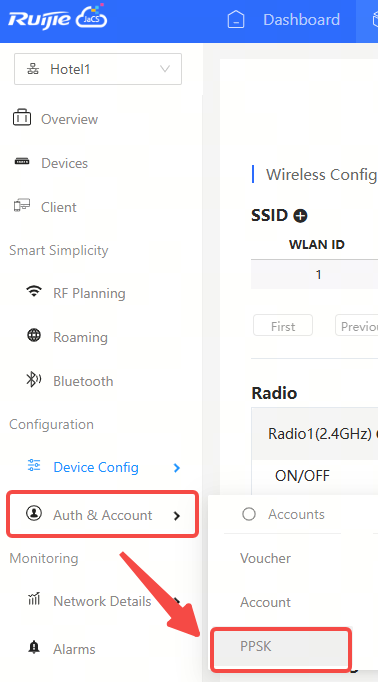
Step 3: After the configuring the SSID, click Auth&Account > PPSK to enter the PPSK configuration interface.

Step 4: Click Add Account to enter the creation interface.


Creating account in batches:
① Click Download Template to download the batch configuration template.

② After filling in the account information in the template, click “.xls” File to upload the template.


Create a single account:
① Click Add Account.

② Enter the account name (up to 32 characters can be entered), and then click OK. To add multiple accounts, click + to add them.

③ When the "Add operation succeeded" prompt appears, the operation is completed. The added account will be displayed in the PPSK list.

Step 5: Enter the MAC address, and then click Bind to bind the MAC address. If the MAC address is not bound, the configuration will not take effect on any client.

Click  in the Action column to view the synchronization log of PPSK.

全部评论